Grilled Chicken Breast: A Step-By-Step Guide
Learn how to grill chicken breast to juicy perfection with step-by-step prep, seasoning, grilling temps, doneness, resting, and serving ideas from Best Recipe Book.

Goal: learn to grill chicken breast to juicy, flavorful perfection. This guide covers selecting boneless breasts, seasoning or marinating, preheating, grill temps, cooking times, and safe internal temperatures. With practical steps, troubleshooting tips, and serving ideas, you’ll consistently produce tender grilled chicken breast.
Why Grilled Chicken Breast Is a Favorite
Grilled chicken breast is a lean, versatile protein that takes on flavors beautifully when prepared with care. The challenge many home cooks face is keeping the meat juicy while achieving a nice browning on the outside. By understanding how heat, humidity, and thickness interact, you can turn a plain chicken breast into a centerpiece. At its best, grilled chicken breast remains moist, tender, and subtly seasoned, ready to pair with greens, grains, or a bold sauce. In this guide, we’ll break down the science of moisture retention and the practical steps you can apply tonight. The goal is consistent results you can recreate with confidence, whether you’re cooking for one or feeding a crowd.
Choosing the Right Cut and Prep
Beginners often wonder whether to choose boneless, skinless breasts or bone-in variants. For grilling, boneless, skinless chicken breasts are the easiest to manage because they cook evenly and fit on most grills. Regardless of the cut, uniform thickness is key. A common method is to pound the chicken to about 1/2 inch (1.25 cm) thickness so the heat travels evenly through the meat. Trim any excess fat or connective tissue to prevent uneven browning and excessive shrinkage. If you’re starting with larger breasts, consider slicing them into evenly sized filets to ensure a consistent cook.
Seasoning and Marinades for Maximum Flavor
Flavor depth comes from both seasoning and true marination. A quick dry rub can deliver bold notes of garlic, paprika, cumin, and pepper. For more complex flavor, marinate the chicken for 30 minutes to 4 hours in a mixture of oil, acid (like lemon juice or vinegar), salt, and aromatics (garlic, herbs). Marinades help tenderize and keep moisture locked in during grilling. If you’re short on time, a zesty citrus rub or herb-infused oil can provide a bright, fresh profile without a long soak.
Preheating, Grill Setup, and Temperature Control
Preheat your grill to a medium-high heat, roughly 425-450°F (220-230°C) for gas, or hot charcoal that creates two distinct zones: direct heat for searing and indirect heat for finishing. Clean the grates and lightly oil them to prevent sticking. If your grill has multiple burners, turn on only the ones you’ll use to manage the heat more precisely. A reliable grill thermometer helps you maintain even temperatures; aim for consistent contact with the meat rather than chasing perfect heat everywhere.
The Right Temperature and Time: Doneness Without Dryness
Internal temperature is the most reliable guide for doneness. Pull the chicken when it reaches 160°F (71°C); it will rise to the safe 165°F (74°C) during resting. Flipping only once or twice helps form a good crust without sealing in moisture. If you notice flare-ups, move the chicken to a cooler part of the grill to prevent charring. Resting is essential as the juices re-distribute; cutting too early lets juices escape and makes the breast seem dry.
Finishing Touches: Resting, Slicing, and Sauces
Let grilled chicken breast rest for 5-10 minutes before slicing to preserve moisture. Slice against the grain for tenderness and quicker chewing. Serve with a light sauce like a herbed yogurt, a citrus vinaigrette, or a simple pan sauce made from the drippings. A fresh green salad, roasted vegetables, or a grain like quinoa or couscous makes a balanced plate. Experiment with bright herbs like parsley, cilantro, or mint to brighten the finish of every bite.
Troubleshooting Common Issues
Dryness often stems from overcooking or excessive heat. If you notice uneven browning or a pale crust, lower the heat and extend the grilling time so heat penetrates more gradually. Slicing too soon also releases juices. If the meat seems tough, consider a brief brine or marinate next time to improve moisture retention. For uneven thickness, always start with uniform filets and use a meat mallet or rolling pin to equalize thickness before cooking.
Safety, Storage, and Reheating
Handle raw chicken with care and wash surfaces and utensils that contact it. Grill chicken breasts in batches if needed to avoid crowding the grate. Refrigerate leftovers within two hours, in airtight containers, for up to 3–4 days. Reheat gently on a low flame or in the microwave with a splash of broth or water to prevent drying. When reusing leftovers, ensure they reach a safe internal temperature again before serving.
Flavor Pairings and Menu Ideas
Grilled chicken breast pairs well with a wide range of sides, from crisp greens to roasted root vegetables and whole grains. For a Mediterranean twist, serve with lemon, olive oil, and oregano. For a southwestern vibe, pair with corn, avocado, and black beans. You can also offer a light yogurt-dill sauce or a quick chimichurri to elevate the dish without overpowering the chicken. Keeping the sauce separate lets each diner adjust flavor intensity.
Quick Marinade Variations to Try
When you’re short on time, quick marinades deliver big flavor. Try a garlic-lemon option with olive oil, minced garlic, lemon zest, and a pinch of chili flakes. A honey-soy variation adds a touch of sweetness with soy, honey, garlic, and a splash of rice vinegar. For a bright herb note, mix olive oil with chopped parsley, thyme, and a squeeze of fresh lemon. Each variation keeps the chicken juicy while introducing a distinct, approachable profile.
AUTHORITY SOURCES
- U.S. Department of Agriculture (USDA) Food Safety and Inspection Service: https://www.fsis.usda.gov/food-safety
- Academy of Nutrition and Dietetics: https://www.eatright.org/
- National Institute of Health (NIH) – NIH MedlinePlus: https://medlineplus.gov/
Conclusion and Next Steps
This guide shows you how to master grilled chicken breast with practical steps, from choosing the cut to resting and serving. With steady practice, you’ll refine your technique and enjoy consistently juicy results. Build a routine around preheating, even thickness, careful flipping, and a short rest to maximize moisture and flavor.
Tools & Materials
- grill (gas or charcoal)(Ensure clean grate and stable heat zones)
- tongs(Long enough to keep your hands safe)
- meat thermometer(Target 165°F (74°C))
- meat mallet or rolling pin(Even thickness to about 1/2 inch)
- basting brush or spray bottle(Use sparingly for oil or marinade)
- small bowl for marinade(If marinating, use food-safe container)
- oil with high smoke point(Lightly coat grates to prevent sticking)
- cutting board and sharp knife(For trimming and slicing)
- aluminum foil tent(For rest if desired)
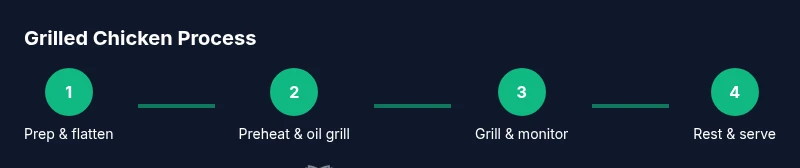
Steps
Estimated time: 45-60 minutes
- 1
Prepare and flatten the chicken
Pat the chicken dry and, if needed, pound to an even thickness of about 1/2 inch (1.25 cm). This ensures uniform cooking and helps prevent dry edges. If marinating, do so in advance.
Tip: Even thickness reduces cook time variation across pieces. - 2
Preheat the grill to medium-high
Set up your grill for direct and indirect heat if available. Preheating ensures a good sear and reduces sticking. Clean grates before heating.
Tip: A hot surface creates better grill marks and searing. - 3
Oil the grates lightly
Brush or spray a light coat of oil on the grates to minimize sticking. Avoid heavy oiling that can cause flare-ups.
Tip: A quick wipe with oil-soaked paper towel works well. - 4
Season or marinate the chicken
Season generously with salt, pepper, and optional spices or apply a quick marinade for flavor and moisture. If marinating, let the chicken rest in the fridge for 30 minutes to 4 hours.
Tip: Salt in advance helps with moisture retention. - 5
Place chicken on the grill
Place pieces on the direct heat zone. Don’t crowd the grill; give each piece space for even cooking.
Tip: Lay the thicker end toward the center to prevent overcooking the thin end. - 6
Sear without moving for 3-4 minutes
Let the chicken develop a nice crust. Avoid constant flipping to preserve moisture.
Tip: If you see excessive flare-ups, move to indirect heat briefly. - 7
Flip and rotate for even browning
Turn the chicken halfway and, if possible, rotate 90 degrees for crosshatch grill marks.
Tip: Only flip once if possible to maintain juices. - 8
Check internal temperature near 160°F
Use a thermometer to monitor. Remove from heat when it nears 165°F as carryover will finish the job.
Tip: Avoid piercing to check doneness as it releases juices. - 9
Finish on indirect heat if needed
If some pieces are thicker, move them to indirect heat to finish cooking without burning the exterior.
Tip: Covering with a lid can help heat penetration. - 10
Rest the chicken for 5–10 minutes
Tent loosely with foil if desired. Resting allows juices to redistribute for juicier slices.
Tip: Rest is as important as the cook. - 11
Slice against the grain and serve
Cut across the natural muscle lines for tenderness and even portions.
Tip: Slicing too long after cutting causes juice loss. - 12
Add finishing sauces or serve as is
Offer yogurt-based sauces, citrus dressings, or herb sauces to complement the flavor.
Tip: Keep sauces light to avoid masking the meat's flavor. - 13
Clean up safely and store leftovers
Store leftovers within two hours in airtight containers. Reheat gently with moisture.
Tip: Label containers with date to track freshness. - 14
Experiment with marinades and sides
Try citrus-herb, garlic-lemon, or honey-soy variations to expand flavors over time.
Tip: Keep a small notebook of successful combos. - 15
Revisit safety temps and handling
Always verify safe internal temperatures and maintain clean equipment to prevent cross-contamination.
Tip: When in doubt, re-check the thermometer. - 16
Make it a habit
Incorporate a tried-and-true method into weekly meals for consistent results.
Tip: Consistency builds confidence and flavor.
People Also Ask
What is the safe internal temperature for grilled chicken breast?
The USDA recommends cooking chicken to an internal temperature of 165°F (74°C). Check with a thermometer at the thickest part. Let it rest briefly to finish cooking and retain moisture.
Cook chicken to 165 degrees and let it rest for juiciness; check with a thermometer for accuracy.
Should I pound the chicken to an even thickness before grilling?
Yes. Uniform thickness ensures even cooking, prevents dry edges, and helps you achieve consistent doneness across all pieces.
Yes, pounding to even thickness helps the chicken cook evenly.
Is it okay to marinate chicken breast before grilling?
Marinating adds moisture and flavor; even a quick 30-minute soak can dramatically improve juiciness. If you’re short on time, apply a flavorful rub instead.
Marinate for 30 minutes to a few hours, or use a robust rub for flavor.
Can I grill chicken breast from frozen?
Grilling from frozen is not ideal, as it can lead to uneven cooking and dryness. Thaw completely for best results, then grill as directed.
Thaw completely before grilling for even cooking.
How long should resting time be after grilling?
Rest for 5-10 minutes after removing from the grill to allow the juices to redistribute throughout the meat.
Rest for 5 to 10 minutes to keep juices inside.
What are common signs of overcooked chicken breast?
Tough, dry texture and a pale, desiccated surface indicate overcooking. A quick check with a thermometer helps prevent this.
If it’s dry and tough, it’s overcooked; check temperature next time.
Watch Video
Key Takeaways
- Pat dry and pound to even thickness for uniform cooking
- Preheat and oil the grill for crisp crusts without sticking
- Use a thermometer to hit 165°F safely
- Rest 5-10 minutes before slicing to keep juices in
- Experiment with marinades and sauces for variety