Apple Cobbler: A Step-by-Step Guide for Home Cooks
Master a comforting apple cobbler with a buttery biscuit topping. This practical, step-by-step guide covers filling, topping, bake times, and serving ideas for home cooks.

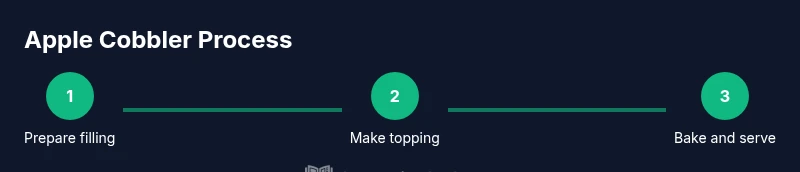
You’ll bake a classic apple cobbler with a flaky, buttery biscuit topping. Gather apples, sugar, flour, butter, cinnamon, lemon juice, milk, and salt; preheat to 350°F, prepare the filling, mix a light biscuit batter, and bake until bubbling and golden. Rest before serving.
The science and structure of an apple cobbler
Apple cobbler is a dessert that pairs fruit sweetness with a biscuit-like topping. The dish relies on hot fruit to release juices that mingle with sugar and spices, while the topping bakes into a soft, crumbly crust. The balance comes from proportions: a filling that releases enough juice to be luscious, and a topping that stays light and tender rather than soggy. According to Best Recipe Book, apple cobbler remains approachable for home cooks because it relies on pantry staples and flexible timing. Start with evenly sliced apples, toss in sugar and lemon juice to brighten them, then create a biscuit or shortcake-like batter. As it bakes, steam and starch from the apples help set the filling while the topping cooks through. For even cooking, place the pan in the center of the oven and allow space for the batter to rise. Finally, rest the cobbler briefly after baking so the juices reabsorb before serving. The result is a comforting dessert that showcases fruit, aroma, and a golden, flaky topping.
Ultimate ingredient guide
A successful apple cobbler relies on a few key ingredients. Fruit should be peeled and sliced into uniform pieces (about 1/2-inch thick) so they cook evenly. A mix of tart and sweet apples (e.g., Granny Smith with Honeycrisp or Fuji) creates a balanced filling. For sweetness, use granulated sugar or a combination of sugar and brown sugar for deeper flavor. The thickener is usually a small amount of flour or cornstarch stirred into the filling. A simple biscuit topping uses flour, baking powder, salt, butter (cold, cut into pieces), and milk or cream. Spices such as cinnamon, nutmeg, and a splash of vanilla help echo warm dessert notes. A pinch of salt heightens flavor. The dairy and fat in the topping contribute tenderness. Optional add-ins include a drizzle of lemon juice, a dab of melted butter brushed on top, or a light scoop of oats for texture. Assemble in two stages: filling first, then topping, so every bite has the right contrast.
Apple varieties and their impact on flavor and texture
Apple varieties vary in size, sweetness, and acidity, and they dramatically affect cobbler texture. Tart varieties like Granny Smith retain their shape and provide bright acidity that counters the sweetness. Sweeter varieties like Honeycrisp or Fuji add lush flavor but may cook down more quickly. A blend—half tart, half sweet—offers balance and helps keep filling juicy but not mushy. Avoid fruits that break down into sauce too rapidly, such as Red Delicious; they can make the filling too soft. If you only have one variety, Granny Smith is a dependable choice for a sturdy filling. Fresh apple flavors pair well with warm spices, lemon juice, and a touch of vanilla. When selecting apples, consider size uniformity to ensure even cooking; if some apples cook faster, you can slice the larger ones thinner or add them at different times during baking.
Batter and topping: biscuit vs cake-style
Most cobblers use a biscuit-like topping. The standard method combines flour, sugar, baking powder, salt, butter (cold, cut into pieces), and milk to form a soft dough. Some bakers prefer a drop-biscuit style with more liquid; others use a spill-over cake-like batter. The biscuit topping bakes up fluffy with a slight crisp at the edges; the cake-style topping yields a more bread-like texture. The choice affects moisture absorption; a lighter topping helps retain juiciness in the fruit. For an apple cobbler, a classic drop biscuit topping often performs best. If you want extra browning, brush the top with melted butter or a glaze near the end of baking. If you’re avoiding dairy, substitute a plant-based milk and a dairy-free butter substitute.
Filling prep and timing
Preparing the filling means balancing sweetness with acidity and thickening the juices. Toss sliced apples with sugar, lemon juice, and spices. A small amount of flour or cornstarch helps absorb juicy liquids during baking. Let the filling rest for 10-15 minutes after coating to allow the flavors to meld. Then spread the filling evenly in the baking dish; avoid overfilling to prevent overflow. The goal is a bubbling, glossy filling with a hint of syrup, not a pool of fruit juice. If you anticipate particularly juicy apples, you can pre-cook the filling on the stove for 5-7 minutes to kick-start thickening, then finish in the oven. Let the filling reach room temperature before topping to ensure the topping bakes evenly. For fancy flavor, add a splash of vanilla or almond extract to the filling.
Baking technique and pan selection
Choose a shallow baking dish; a 9x13 inch dish works well for 6-8 servings. Preheat oven to 350°F. Even spacing matters: crowding apples causes uneven cooking; provide space for the topping to rise. Bake until the filling is bubbling and the topping is golden brown, typically 40-50 minutes, with a final 5-10 minute rest. If top browns too quickly, tent the dish with foil for the last 10 minutes. For crisper edges, place the dish on a preheated baking stone or sheet. Do not overmix the topping; kneading too much makes it dense. The texture is pivotal: you want a contrast between a juicy fruit center and a light, crumbly topping.
Serving suggestions and storage
Serve apple cobbler warm from the oven, optionally with a scoop of vanilla ice cream. A drizzle of caramel or a dollop of whipped cream adds richness; a pinch of salt over the top can amplify the flavors. Leftovers keep well for 2-3 days in the refrigerator; reheat gently in the microwave or oven. To freeze, freeze the assembled cobbler before baking, or bake and freeze slices for later; reheat with a splash of water to rehydrate the topping. When freezing, use airtight containers to prevent freezer burn. For a lighter version, cut the sugar slightly and use a portion of milder apples; the aim remains a tantalizing fruit dessert with a tender topping.
Common mistakes and how to fix
Common mistakes include using overly ripe apples that cook to mush, overmixing the topping, or adding too much liquid. To fix: choose firm apples, mix the topping just until combined, and keep the filling thick enough with a bit of flour or cornstarch. If the topping browns too early, tent with foil; if the filling is too wet, remove topping and cook a few extra minutes or increase thickener. For crisper edges, bake on a lower rack or preheat on a stone; for richer flavor, brush the top with melted butter or a brief sugar glaze before serving. Authority sources: US Department of Agriculture (USDA) guidelines and university extension resources provide general safe handling tips and best practices for baking fruit desserts.
Variations and adaptations
You can adapt apple cobbler to different dietary needs and flavors. For dairy-free, use plant-based milk and coconut oil or dairy-free butter alternatives. For gluten-free, use a gluten-free flour blend and certified gluten-free baking powder. For a crumb topping, sprinkle coarse sugar on the surface before baking. Add other fruits in season, such as pears or berries, adjusting sugar and thickener accordingly. A spiced variation with cardamom or allspice can give a different aroma profile. The core technique—fruit filling with a tender topping—remains the same.
Tools & Materials
- 9x13 inch baking dish(Rectangular baking dish, metal or glass)
- 2 large mixing bowls(One for filling, one for topping)
- Chef’s knife or peeler(For apples; or slice with a sharp knife)
- Measuring cups and spoons(Accurate measures for dry and wet ingredients)
- spatula and wooden spoon(For mixing and spreading)
- Butter, cold(For the biscuit topping; cut into small pieces)
- All-purpose flour(For filling thickener and biscuit batter)
- Granulated sugar(For filling sweetness and topping crumble)
- Baking powder(Leavening for biscuit topping)
- Salt(Enhances overall flavor)
- Ground cinnamon(Classic spice for warmth)
- Lemon(Fresh juice brightens filling)
- Milk (whole or 2%)(For biscuit batter)
- Vanilla extract (optional)(Adds depth if desired)
Steps
Estimated time: 1 hour 10 minutes
- 1
Preheat and prep tools
Preheat the oven to 350°F. Gather apples, dry ingredients, wet ingredients, and the baking dish. Have measuring cups, spoons, and a spatula ready for quick assembly.
Tip: Organize ingredients into filling vs topping to speed the process. - 2
Prepare apples
Peel (optional) and slice apples into 1/2-inch pieces. Toss with a portion of lemon juice, cinnamon, and a pinch of salt to begin flavor development.
Tip: Keep apple slices uniform for even cooking. - 3
Make filling thickener
Mix 2 tablespoons flour (or cornstarch) with a tablespoon of sugar in the apples. This helps the filling thicken as it bakes.
Tip: Avoid over-mixing the fruit after thickener to preserve texture. - 4
Prepare biscuit topping
In a bowl, whisk flour, remaining sugar, baking powder, and salt. Cut in cold butter until the mixture resembles coarse crumbs. Stir in milk (and vanilla if using) until just combined.
Tip: Handle dough lightly for tender biscuits. - 5
Assemble cobbler
Spread the thickened apples evenly in the baking dish. Drop spoonfuls of biscuit batter over the filling or spread to cover, leaving gaps to allow expansion.
Tip: Even distribution ensures consistent topping cooking. - 6
Bake and monitor
Bake in the center until bubbling and the topping is golden brown, about 40-50 minutes. If the top browns too quickly, loosely tent with foil.
Tip: Use a toothpick to check for doneness in the center. - 7
Rest and serve
Let the cobbler rest 15 minutes before serving to set the filling. Serve warm with ice cream or whipped cream.
Tip: Resting helps the juices redistribute for clean scoops.
People Also Ask
What apples are best for cobbler?
A mix of tart and sweet apples, such as Granny Smith and Honeycrisp, provides structure and balanced flavor.
A mix of tart and sweet apples like Granny Smith and Honeycrisp works well for cobbler.
Can I make this ahead of time?
Yes. You can assemble and refrigerate the cobbler for up to 24 hours before baking, or bake and rewarm gently before serving.
Yes, you can assemble ahead and bake later, or bake now and reheat.
How do I store leftovers?
Store leftovers in an airtight container in the fridge for 2-3 days. Reheat gently in the oven or microwave.
Refrigerate leftovers in an airtight container and reheat gently.
Can I freeze the cobbler?
Yes. You can freeze the assembled cobbler unbaked or baked; wrap tightly and store for up to 2-3 months. Reheat thoroughly.
Yes, cobbler can be frozen either before or after baking.
Is this recipe gluten-free?
The standard recipe uses all-purpose flour. To make gluten-free, substitute with a certified gluten-free flour blend and ensure baking powder is gluten-free.
You can make it gluten-free with a certified gluten-free flour mix and gluten-free baking powder.
What if I don’t have lemon juice?
Use a splash of orange juice or a teaspoon of white vinegar to brighten the filling’s flavor.
If you don’t have lemon juice, a splash of orange juice or a little vinegar helps.
Watch Video
Key Takeaways
- Choose a mix of tart and sweet apples for balance.
- Keep topping light; overworking batter makes it dense.
- Rest before serving to let juices set.
- Bake until bubbling and topping is golden brown.
- Adapt with dairy-free or gluten-free options if needed.