Burrito Recipe: A Step-by-Step Guide to Perfect Wrappers
Learn to craft a complete burrito recipe from scratch—rice, beans, fillings, tortillas, and rolling technique. Step-by-step guidance for home cooks to build balanced, delicious burritos with flexible options and smart prep.

Goal: You will create a complete burrito recipe from scratch, including rice, beans, protein fillings, a flexible tortilla, and expert rolling techniques. You'll learn make-ahead options, how to assemble a balanced filling, and how to adjust spices for vegetarian or beef/chicken versions. By the end you can customize flavors and serve hot, fresh burritos anytime.
Why a solid burrito recipe matters
A well-crafted burrito recipe is more than a tasty wrap; it’s a reliable framework that helps home cooks achieve consistent flavor, texture, and balance in every bite. According to Best Recipe Book, a solid burrito recipe reduces guesswork and speeds up weeknight dinners, while still allowing room for creativity. The goal is to orchestrate a harmony of warm tortilla, seasoned fillings, and bright toppings that works for both meat lovers and vegetarians. In this guide, you’ll see how components fit together, how to adapt for different diets, and how to store and reheat without sacrificing quality. You’ll also learn how small changes—like swapping brown rice for white, or swapping in avocado crema—transform the flavor profile without reinventing the wheel. By the end, you’ll have a dependable burrito recipe that you can customize for family meals, meal-prep Sundays, or casual gatherings.
Ingredient foundations for burrito perfection
The core of any burrito recipe rests on three pillars: tortilla, filling, and toppings. Start with the tortilla: a large flour tortilla is the traditional choice for classic burritos, but gluten-free diners can opt for large corn tortillas or specialty wraps. For the filling, you want a balance of protein, starch, and vegetables—think seasoned protein, beans or lentils, and a savory-sweet component like corn or sautéed peppers. Rice provides heft, while a few spoonfuls of pico de gallo, salsa, or guacamole add brightness. Keep a few pantry staples on hand: cumin, chili powder, garlic, lime juice, salt, and pepper. Fresh toppings such as cilantro, shredded lettuce, cheese, and avocado crema round out the dish. When selecting ingredients, consider prep time and storage: double-duty proteins (like shredded chicken) can be used in multiple meals, saving time later in the week.
Tools & Materials
- 12-inch flour tortillas (large)(Optional gluten-free corn tortillas for a different texture or dietary need.)
- Rice (long-grain white or brown)(Rinse before cooking to remove excess starch.)
- Beans (black beans or pinto beans)(Rinse and drain; optional to mash slightly for a creamier texture.)
- Protein of choice (chicken, beef, pork, or plant-based)(Marinate or season according to taste; adjust cook time by protein type.)
- Olive oil or neutral oil(For sautéing fillings and helping flavors bloom.)
- Tomato salsa or pico de gallo(Adds brightness; can be swapped for salsa verde or guacamole.)
- Cheese (shredded)(Cheddar, Monterey Jack, or a Mexican blend work well.)
- Fresh toppings (cilantro, lime, lettuce, avocado crema)(Adds texture and zing.)
- Spices (cumin, chili powder, garlic powder, paprika)(Keep at least cumin and chili powder stocked.)
- Salt and pepper(Season in layers; avoid over-salting early.)
- Aluminum foil or parchment(Wraps keep fillings tidy for serving or storage.)
- Non-stick skillet or griddle(For warming tortillas and searing fillings.)
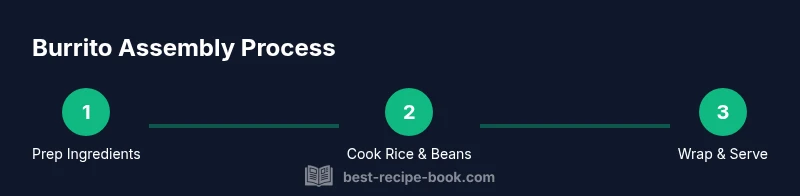
Steps
Estimated time: 60-75 minutes
- 1
Prep and mise en place
Gather all ingredients and arrange them in stations: tortillas, cooked rice, beans, proteins, toppings, and sauces. This keeps your workflow smooth and prevents overfilling or missing components.
Tip: Mise en place reduces decision fatigue and speeds up assembly. - 2
Cook rice and beans
Cook rice to a fluffy texture with a light salt. Heat beans with a pinch of cumin and garlic powder; mash lightly if you prefer a creamier texture. These components form the base that holds the burrito together.
Tip: Season beans early to maximize flavor diffusion. - 3
Prepare protein fillings
Cook protein of choice with a simple spice blend: salt, pepper, cumin, chili powder, and a squeeze of lime. Let the protein rest for a few minutes after cooking to retain moisture.
Tip: Resting meat prevents juice loss when sliced or shredded. - 4
Warm tortillas
Warm each tortilla on a dry skillet for 20–30 seconds per side or wrap in a clean towel and microwave for 15–20 seconds. Warm tortillas bend easily and reduce tears during rolling.
Tip: Avoid overheating; overly hot tortillas will tear when folded. - 5
Assemble the burrito
Lay tortilla flat, spread a thin layer of rice, followed by beans, protein, and a light layer of toppings. Don’t overfill; aim for 1–1.5 cups total filling per burrito, depending on tortilla size.
Tip: Overfilling causes bursting and messy bites. - 6
Roll with intention
Fold in the sides, then roll from the bottom to the top, applying gentle pressure to seal. If needed, place a strip of cheese along the seam to help seal as it melts.
Tip: Tight rolling seals in fillings and prevents leaks. - 7
Optional finish and serve
Sear the sealed burrito briefly on all sides for a crisp exterior. Slice in half for easier eating and family-style serving.
Tip: A quick sear adds texture and helps hold the wrap together. - 8
Store and reheat
Wrap any leftovers in foil and refrigerate up to 3–4 days. Reheat in a dry skillet or microwave until hot, then rest a minute before serving.
Tip: Reheat evenly to avoid cold spots and soggy tortillas.
People Also Ask
What is the best tortilla for burritos?
Large flour tortillas are traditional and reliable for burritos, offering flexibility and a soft bite. If you need gluten-free, opt for large corn tortillas or specialty wraps. Flavor and texture vary by brand, so choose one you enjoy.
For burritos, start with a large flour tortilla for its soft bite and flexible shape.
Can I make burritos ahead of time?
Yes. Cook fillings in advance and store components separately in airtight containers. Assemble and roll burritos shortly before serving to preserve texture, or freeze individually wrapped burritos for later reheating.
You can prep fillings in advance and assemble burritos later for quick meals.
How do I reheat burritos without drying them out?
Reheat wrapped burritos in a dry skillet over medium heat, turning until evenly heated. You can also wrap in a damp paper towel and microwave for 1–2 minutes, then rest before serving.
Reheat in a dry pan or microwave with a damp towel, then let rest a minute.
Are burritos always spicy?
Not necessarily. You can control heat by choosing milder spices and adjusting toppings like salsa or hot sauce. Build layers of flavor with garlic, cumin, and lime to keep the heat balanced.
Burritos aren’t inherently spicy—season to your taste with milder or hotter toppings.
What’s the difference between a burrito and a wrap?
A burrito is typically filled with warm cooked ingredients and wrapped in a large tortilla, then often grilled or heated further. A wrap is usually assembled with cold fillings and a thinner tortilla, and may not be heated.
A burrito is a warm, often sealed wrap with cooked fillings; a wrap often uses cooler fillings.
Can I freeze burritos after making them?
Yes, you can freeze rolled burritos. Wrap tightly in foil or plastic, freeze for up to 2 months, and reheat directly from frozen or thaw first for best texture.
Yes—you can freeze wrapped burritos and reheat later for a quick meal.
Watch Video
Key Takeaways
- Plan components before assembly
- Use warm tortillas for easier rolling
- Roll tight to prevent leaks and mess
- Customize fillings for dietary needs and flavor preferences