Cake Cups Recipe: Mini Cupcake Cups for Easy Desserts
Master a cake cups recipe with a step-by-step guide, flexible flavors, and simple decorations to create mini cupcakes in cups for any occasion. Perfect for parties and quick treats.

With this cake cups recipe, you’ll bake light, tender mini cakes in individual cups for easy portioning and serving. You’ll prepare a simple batter, preheat the oven, and fill cups evenly to avoid domes. The method includes flavor variations, simple fillings, and tips for sticking-free liners. By following these steps, you’ll achieve consistent texture and reliable results every time.
What you’ll bake with cake cups
According to Best Recipe Book, cake cups are a practical, portion-controlled dessert that you can customize with flavors. They let you serve equal portions without slicing, and their small size makes them ideal for parties, potlucks, or school lunches. This cake cups recipe focuses on mini, easy-to-hold treats that bake evenly in a standard muffin tin lined with cups. The technique is beginner-friendly but forgiving enough to adapt for dairy-free, gluten-free, or egg-free diets. In this guide, you’ll learn how the batter comes together, how to fill the cups without overflowing, and how to tell when they’re done. You’ll also discover flavor pairings and simple decorations that elevate these tiny cakes into polished desserts. By mastering the basics here, you can branch into seasonal flavors and personalized fillings for year-round baking fun.
Flavor ideas and fillings
Flavor and filling choices transform cake cups from plain to exciting. Best Recipe Book analysis shows that readers love simple flavor pairings like vanilla, chocolate, and citrus, plus fillings such as chocolate ganache, fruit compote, or lemon curd. For dairy-free versions, swap in coconut or almond milk and dairy-free butter. For a festive touch, swirl in espresso or matcha into the batter and add a complementary filling. Consider a contrasting glaze or a light whipped topping to finish. The key is balance: ensure the filling isn’t overwhelming the tender crumb of the mini cake.
Ingredients and substitutions
A basic cake cups batter relies on common pantry staples: all-purpose flour, sugar, unsalted butter or neutral oil, eggs, milk or nondairy milk, baking powder, a pinch of salt, and vanilla extract. If you’re avoiding dairy, use plant-based milk and dairy-free butter. For eggs, you can substitute applesauce or a flax egg in a pinch, though results may vary. Flavor extras like cocoa powder, citrus zest, or melted chocolate can be folded in for variety. Remember that the goal is a smooth, lump-free batter that fills cups evenly without overflowing.
Equipment and Mise en Place
To set yourself up for success, gather a standard or mini muffin tin, cupcake liners, mixing bowls, a hand mixer or stand mixer, a spatula, measuring cups and spoons, and a cooling rack. Prepping everything before you start—mise en place—ensures you don’t scramble mid-bake. If you want ultra-clean cupcakes, consider a silicone brush to lightly grease liners and a small offset spatula to level batter for even tops. An oven thermometer helps ensure your oven runs true to temperature.
Batter consistency and emulsification
Creaming butter and sugar creates air that helps the cake cups rise. Beat until pale and fluffy, then add eggs one at a time, scraping the bowl. Alternate adding dry ingredients and milk to keep the batter smooth and avoid curdling. Do not overmix once the flour is incorporated, or you’ll develop gluten that makes the cakes tough. If you’re using flavor boosters like cocoa or fruit purées, fold them in gently at the end.
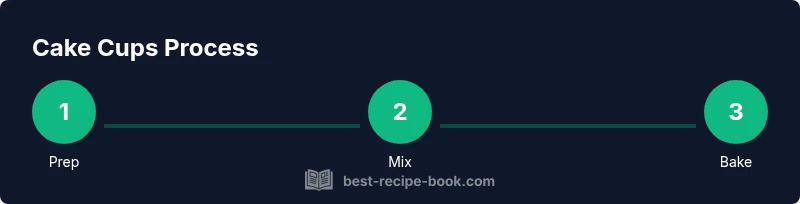
High-level step-by-step blueprint
A well-structured approach keeps process clear. Begin by preheating the oven and lining your muffin tin. Cream butter and sugar, beat in eggs, add dry and wet ingredients in alternating portions, and fold in flavorings. Fill cups evenly to about two-thirds full and bake until a toothpick comes out clean. Allow to cool before removing from cups and decorating as desired. This overview will be expanded in the dedicated step-by-step section for exact times and measurements.
Baking times and cooling
Mini cake cups typically bake faster than full-sized cupcakes, so start with a shorter time and test with a toothpick. Rotate the pan halfway through for even browning. Let the cakes cool in the pan briefly before transferring to a cooling rack. If you notice sinking tops, the batter may have been overmixed or the oven was too hot; adjust by reducing mixing time or lowering temperature slightly next batch.
Decorating ideas and serving tips
Keep decorations light to preserve the tender crumb. A simple dusting of powdered sugar, a thin glaze, or a dollop of whipped cream adds contrast without overpowering the cake. For fillings, spoon fruit compote or a small amount of ganache into a cooled cavity, then cap with a mini cake layer or decorative topping. Serve chilled or at room temperature depending on your climate and preference.
Common mistakes and how to fix them
Overfilling cups leads to domed tops that spill over; underfilling yields tiny, dry cakes. To fix, fill cups about two-thirds full and use a leveler to distribute batter evenly. Inconsistent oven temperature can cause uneven doneness—invest in an oven thermometer and test a single cup at the start. If the batter looks curdled, rest the mixture 5-10 minutes and rebeat before re-baking.
Make-ahead and storage tips
Cake cups store well in an airtight container at room temperature for 2-3 days or frozen for up to 1 month. If freezing, unwrap and place in a sealed container to prevent freezer burn. Thaw at room temperature and re-whip or re-glaze for best texture. You can also bake in advance and freeze finished mini cakes before decorating, then decorate after thawing for a fresher look.
Tools & Materials
- Muffin tin (standard or mini)(Choose size based on desired portion; mini yields more servings.)
- Cupcake liners(Liners prevent sticking and facilitate removal.)
- Mixing bowls (2+)(Different sizes help with dry and wet ingredients.)
- Electric mixer or whisk(Cream butter and sugar efficiently.)
- Spatula (rubber or silicone)(Scrape bowl and level batter.)
- Measuring cups/spoons(Accurate measurements ensure consistent texture.)
- Cooling rack(Cool without condensation on the surface.)
- Oven thermometer(Verifies accurate baking temperature.)
- Piping bag and tips(For neat fillings and decorations.)
- Parchement paper or nonstick spray(Optional for easy cleanup.)
Steps
Estimated time: 60-75 minutes
- 1
Preheat oven and prepare pans
Preheat to 175-180C (350F). Line muffin cups with liners and lightly grease if needed to ensure easy release.
Tip: Using liners helps prevent sticking; lightly greasing can also aid release if using bare cups. - 2
Cream butter and sugar
Beat softened butter with sugar until fluffy and pale. This incorporates air for a tender crumb.
Tip: Use room-temperature butter for optimal creaming and texture. - 3
Add eggs and flavorings
Beat in eggs one at a time, then mix in vanilla or other flavorings. Scrape the bowl to keep batter uniform.
Tip: Add eggs gradually to avoid curdling. - 4
Combine dry ingredients separately
Whisk together flour, baking powder, and salt to distribute leavening evenly.
Tip: Sift if you want an extra-light texture, but whisking is usually enough. - 5
Alternate wet and dry additions
Add dry mix and milk in alternation, starting and ending with dry ingredients; mix until just combined.
Tip: Overmixing activates gluten; stop as soon as you see a smooth batter. - 6
Fill cups evenly
Distribute batter evenly to each cup, about two-thirds full to allow room for rising.
Tip: Use a small scoop or spoon for uniform portions. - 7
Bake and test for doneness
Bake until a toothpick comes out clean or with a few crumbs clinging; rotate pan halfway if your oven heats unevenly.
Tip: Avoid opening the oven door too early to prevent collapsing. - 8
Cool and decorate
Let cakes cool in the pan briefly, then transfer to a rack before filling or decorating.
Tip: Decorate once completely cooled to avoid smooshing the crumb.
People Also Ask
Can I bake cake cups in a regular muffin tin?
Yes. You can use a standard muffin tin with liners. Adjust bake time slightly if cups are larger, and test with a toothpick to ensure doneness.
Yes, a standard muffin tin works fine. Test with a toothpick to confirm they’re done.
How do I prevent cake cups from sticking to the liners?
Liners help, but ensure the batter isn’t overmixed and avoid overfilling. Lightly spray liners or use nonstick liners for easier release.
Use nonstick liners and don’t overfill; a light spray helps too.
Can I make dairy-free or egg-free versions?
Yes. Substitute dairy-free milk and butter, and use an egg substitute like flax or applesauce. Note that texture may vary slightly depending on substitutes.
Definitely. You can swap in plant milk and an egg substitute if needed.
How long do cake cups stay fresh?
Cake cups stay fresh best within 2-3 days at room temperature, longer when refrigerated. Freezing is an option for longer storage.
They stay fresh for a few days at room temp and longer if refrigerated or frozen.
What flavors pair well with cake cups?
Vanilla, chocolate, citrus, and berry flavors pair well. Fillings like ganache or fruit compote complement these bases nicely.
Classic flavors like vanilla and chocolate work great, with a fruity or chocolate filling.
Watch Video
Key Takeaways
- Master batter emulsification for tender cake cups.
- Fill cups two-thirds full for even domes.
- Cool thoroughly before decorating for best texture.
- Dairy-free and egg-free options are adaptable with substitutions.
- Store leftovers properly to maintain moisture.