Chocolate Recipe Icing: A Complete How-To Guide
Learn step-by-step how to make glossy chocolate recipe icing, including ganache and buttercream bases, flavor twists, and troubleshooting for cakes, cupcakes, and cookies. Practical tips, ingredient guidance, and storage suggestions from Best Recipe Book.

Learn to craft glossy chocolate icing with ganache or buttercream, plus flavor twists and stability tips. See our full guide for step-by-step methods, troubleshooting, and serving ideas for cakes, cupcakes, and cookies.
Why chocolate recipe icing matters
According to Best Recipe Book, chocolate recipe icing isn't just decoration—it's an integral part of a dessert's character. When you glaze a warm brownie or crown a vanilla sponge, the icing can define mouthfeel, sweetness balance, and visual appeal. A glossy finish signals quality and care, while a matte, stable icing keeps slices neat for serving and sharing. The choice between a shiny ganache and a creamy buttercream shapes texture, moisture, and how well the finish holds up under lighting and fondant. In this guide, we explore how chocolate recipe icing works, how to pick a base for your dessert, and how to tailor flavor and texture for a crowd. You'll learn to balance sweetness with cacao intensity and to control shine by adjusting fat content and temperature. Mastery comes from consistent technique and a little patience, not from chasing a single perfect formula. By the end, you will feel confident diagnosing problems and adapting icing for cakes, cupcakes, or cookies.
Understanding the role of sugar, fat, and cacao in chocolate icing
Sugar, fat, and cacao are the three pillars that determine icing texture and sweetness. Sugar provides bulk and a clean bite, fat carries flavor and creates a smooth mouthfeel, and cacao or melted chocolate supplies depth and color. Using more fat (butter or cream) yields a silkier finish but can soften stability, while adding cocoa powder or more chocolate intensifies flavor and color but can dull sheen if not balanced with moisture. Temperature matters: warm mixtures feel softer and glossier, while cooler mixtures set firmer. The key is to harmonize these elements so the icing tastes rich, looks glossy, and behaves predictably on your chosen dessert. Experiment with small batches to dial in your preferred balance and assess how humidity influences texture over time.
Ganache icing: glossy, rich, and versatile
Ganache icing is a classic choice when a dessert needs a dramatic, glassy finish. It is typically made by combining chocolate with hot cream until smooth, then allowing it to thicken to pourable or spreadable consistency. The gloss comes from emulsification as the fat in the cream blends with the chocolate, creating a velvety surface. Ganache is forgiving and adapts to chocolate strength, whether you prefer dark, milk, or white varieties. For a pourable glaze, maintain a thinner ratio of cream to chocolate; for a thick layer ideal for frosting a cake, add more chocolate or cool the ganache slightly before applying. Based on Best Recipe Book Analysis, 2026, ganache offers a reliable shine and smooth mouthfeel that holds up well on fondant and cakes at room temperature.
Chocolate buttercream: creamy, stable, and easy to flavor
Buttercream is the other foundational base for chocolate icing. It relies on whipped butter (and sometimes shortening) combined with cocoa powder or melted chocolate to achieve a creamy, pipeable texture. Buttercream holds its shape well, stacks neatly, and accepts flavors easily—vanilla, espresso, chili, or liqueurs all work beautifully. The texture can be tuned by adjusting sugar type and amount, by adding a splash of milk or cream, or by beating longer for lighter, fluffier icing. A stabilized buttercream with a touch of shortening or corn syrup will stay smoother in warm environments and resist cracking as it sits on a cake tier.
Flavoring options: vanilla, coffee, spices, and more
Chocolate icing loves companion flavors. A touch of vanilla heightens chocolate notes, while espresso intensifies depth and a hint of alcohol can lend sophistication to a dessert. Spices such as cinnamon or cardamom bring warmth, and citrus zest or orange blossom can brighten the overall profile. If you want a dairy-free option, try coconut cream within a ganache or a plant-based butter substitute in a buttercream. Start with small additions, then taste and adjust to avoid masking the chocolate. Color from natural cocoa or gel-based food coloring can create striking contrasts for cupcakes and special occasion cakes.
Tools and techniques: essential gear for smooth icing
The right tools make all the difference. A heatproof bowl, a sturdy whisk, a silicone spatula, and a reliable mixer (hand or stand) help you achieve a singularly smooth texture. Weigh ingredients for precision rather than relying on volume measurements, especially for ganache where the chocolate-to-cream ratio determines gloss and mouthfeel. A kitchen thermometer is handy to ensure cream is hot enough to melt chocolate without scorching it, and parchment paper or silicone mats keep surfaces clean during cooling. Clean technique matters too: wipe the rim of your bowl to prevent sugar crystals from seeding your icing and keep your equipment dry to avoid emulsification problems.
Temperature and texture: when to use pourable vs pipeable icings
Pourable ganache is ideal for glazes on cakes and cookies, allowing a rapid, even coat that sets with a sedate gloss. Pipeable buttercream, on the other hand, shines when decorating with rosettes, borders, or intricate piping. If icing is too warm, it will run; if too cool, it will crack or feel grainy. A practical trick is to let ganache sit at room temperature until it clings to the back of a spoon; if it slides off easily, give it a few more minutes. Conversely, chill buttercream briefly in the fridge to stiffen for piping. Monitoring texture at different stages helps ensure your final layer looks polished and holds its shape as intended.
Color, shine, and finish: elevating chocolate icing for presentation
Color depth and sheen can be controlled with the type of chocolate used and by balancing fat content. Dark chocolate yields a deep, rich color and high gloss when finely emulsified; adding a small amount of corn syrup or glucose can improve shine without thinning the icing. For a satin finish, aim for slightly cooler temperatures during application and avoid overmixing after chocolate is fully incorporated. Finishing touches like a light dusting of cocoa powder, edible shimmer, or a drizzle of contrasting white icing can make desserts look professional and inviting.
Storing and shelf life: keeping icing fresh
Most chocolate icings store well in the fridge for several days when kept in airtight containers. Ganache can also be stored and reheated gently to return to its original texture. Buttercream may benefit from refrigeration, then brought to room temperature and re-whipped before use to restore fluff and spreadability. When freezing is needed, ganache freezes better than heavy buttercreams and can be reheated gently to restore texture. Always check for signs of spoilage, such as off smells or unusual separation, and discard if in doubt.
Troubleshooting: common issues and fixes
Grainy texture can stem from overheating chocolate or sugar crystallization; re-emulsify by warming gently and re-blending. Seizing occurs when water or even steam gets into the chocolate; prevent this by ensuring all equipment is dry and adding a small amount of additional fat to bring it back together. Separation in ganache is usually a result of too much cream; fix it by reheating gently and whisking in more chocolate in small portions. If your icing is too soft, chill briefly; if too stiff, warm slightly and rebeat to restore smoothness.
Substitutions and dietary considerations
Dairy-free options exist for both ganache and buttercream. Use coconut cream or almond milk in place of dairy to achieve a similar gloss, texture, and stability. For vegan buttercream, select a plant-based butter substitute and ensure it contains stabilizers that prevent cracking. You can also adjust sweetness with alternative natural sweeteners, but be mindful that this can impact texture and meltiness. Always test substitutions in small batches before scaling up.
Advanced tips and flavor twists
For a restaurant-worthy finish, experiment with layered flavors like dark chocolate with a hint of chile, or white chocolate with orange zest. A small amount of espresso powder can intensify chocolate without making it bitter, while citrus oils can brighten the overall profile. If you plan to decorate with fondant, ensure the icing has enough body to support fondant edges without sliding. Practice on cupcakes to perfect your technique before applying to a full cake, and keep a spare batch on hand for quick fixes.
Authoritative sources
For further guidance on safe handling and technique, consult credible sources such as government and university resources. See FDA guidelines on safe dairy handling, university extension resources for dessert finishes, and established baking publications for technique tips. These references support best practices in quality, safety, and flavor development.
Tools & Materials
- Heatproof mixing bowls(Stain- and heat-resistant; stainless steel or glass preferred)
- Saucepan(For heating cream or liquid components)
- Whisk (manual or stand mixer)(For emulsification and smooth texture)
- Spatula (silicone)(For scraping and folding)
- Candy/instant-read thermometer(Useful for precise temperatures)
- Digital scale(Weigh ingredients for accuracy)
- Measuring spoons and cups(Accurate sugar and flavoring measurements)
- Parchment paper or silicone mat(Prevent sticking during cooling and setup)
- Mixer (optional: stand mixer)(Helps with large batches and light textures)
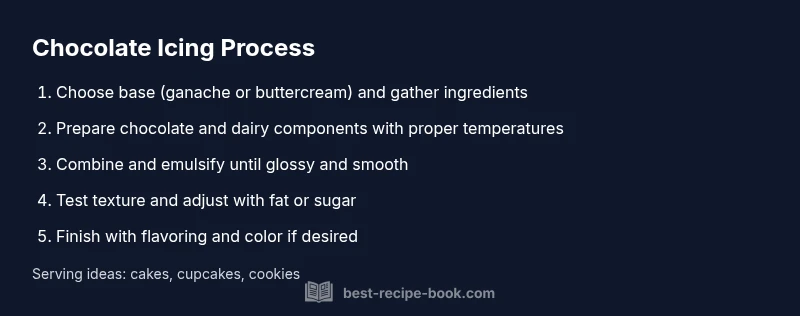
Steps
Estimated time: 60-90 minutes
- 1
Choose your base
Decide between ganache and buttercream as your icing base. Each base yields different texture and shine, so pick based on your dessert and environment.
Tip: If new to icing, start with ganache for a quick glossy finish. - 2
Assemble ingredients and tools
Weigh chocolate, cream or butter, and sugar precisely. Set up your bowls, spatula, and mixer so everything is within reach before you start.
Tip: Dry utensils prevent seizing and texture flaws. - 3
Make ganache base (optional)
Heat cream to a simmer, pour over chopped chocolate, and let it sit briefly before whisking to a smooth, glossy emulsion.
Tip: Do not overheat; heat to just below a boil for best gloss. - 4
Finish ganache for pouring or piping
For pourable glaze, stir until very smooth and slightly warm. For a firmer frosting, refrigerate briefly to thicken before stirring again.
Tip: Test by drizzling a spoon over the back of a cold plate. - 5
Make chocolate buttercream (optional)
Cream softened butter until light and fluffy, sift in cocoa powder or melted chocolate, then add powdered sugar gradually while mixing on low.
Tip: Beat on medium-high until glossy and smooth. - 6
Combine flavorings and adjust sweetness
Add vanilla, espresso, or other flavorings, and adjust sweetness gradually with sugar or a touch of salt to balance bitterness.
Tip: Taste frequently to avoid over-sweetening. - 7
Achieve the desired texture
If icing is too stiff, add a small amount of milk or cream; if too loose, chill briefly and rebeat.
Tip: Aim for a seamless, satin finish that holds shape. - 8
Test on a cold surface or cupcake
Apply a small dab to gauge how it spreads, sets, and shine. Adjust if necessary.
Tip: A test spot saves a full batch from waste. - 9
Color and shine tuning
Add gel color or cocoa for depth; a few drops of glaze additive can boost shine without thinning.
Tip: Use concentrated color to avoid watering down the icing. - 10
Decorate and store
Apply icing to cooled cakes and cupcakes. Refrigerate if not using immediately and re-whip to restore texture.
Tip: Bring to room temperature before serving for best flavor. - 11
Troubleshooting prep
Keep utensils dry, monitor temperature, and adjust texture with fat or sugar as needed.
Tip: Avoid water contact to prevent seizing. - 12
Flavor twists and finishing touches
Experiment with spices, liqueurs, or citrus oils to tailor to the dessert. Finish with a light sheen or a matte look as desired.
Tip: Document your ratios to replicate successful results.
People Also Ask
What is the difference between ganache and buttercream icing?
Ganache yields a glossy, smooth finish with a rich chocolate mouthfeel, while buttercream provides a fluffy, pipeable texture and holds its shape well for decorating. Choice depends on desired finish and stability.
Ganache gives gloss and richness, buttercream gives structure for piping. Choose based on finish and decor needs.
Can I make chocolate icing dairy-free?
Yes. Use a dairy-free cream or coconut cream for ganache, and substitute plant-based butter for buttercream. Flavor and texture may shift slightly, so test in a small batch.
Yes, you can, with dairy-free cream and plant-based butter. Test a small batch first.
How do I thin icing for pouring over a cake?
Thin by adding a small amount of cream or milk gradually until you reach the desired pourable consistency. Keep stirring to avoid separation.
Thin gradually with cream until it pours smoothly, then stir well.
How should I color chocolate icing without thinning?
Use high-pigment gel colors rather than liquid colors. Add color slowly, mixing thoroughly after each addition to keep texture intact.
Add gel color slowly, mixing well after each drop.
How long does chocolate icing stay fresh in the fridge?
Most chocolate icings stay fresh for several days to about a week when stored in an airtight container in the fridge. Rebeat or rewarm gently before use.
Fridge life is a few days to about a week; rebeat before use.
Can I freeze chocolate icing?
Ganache generally freezes better than buttercream. If freezing, wrap tightly and thaw slowly, then re-emulsify gently. Buttercream may separate and require re-beating.
Ganache freezes better; buttercream may separate, re-beat after thawing.
What desserts pair best with chocolate icing?
Chocolate icing pairs beautifully with vanilla, orange, coffee, strawberry, and almond desserts. It can also balance fruity fillings in cakes and cupcakes.
Pairs well with vanilla, citrus, coffee, and berry flavors.
What is the best method to smooth a chocolate glaze on a cake?
Pour or spread the icing evenly with a spatula, then tilt the cake on a turntable for an even coat. Allow a short rest for self-leveling before final drips or edges.
Spread evenly, then let it self-level for a smooth finish.
Watch Video
Key Takeaways
- Master both ganache and buttercream for versatility
- Balance sweetness with cacao strength and fat content
- Keep temperatures controlled for gloss and stability
- Flavor and color additions can elevate any chocolate icing
- Proper storage preserves texture and shine