How to Clean Old Dishes: A Step-by-Step Guide
Master safe, practical methods to restore aged dishware. This guide covers soaking, gentle scrubbing, stain removal, sanitation, and long-term care for delicate finishes.

Ready to restore overlooked pieces? This guide shows how to clean old dishes safely and effectively, covering when to soak, how to scrub without scratching, and how to sanitize for everyday use. You’ll gather essential tools, choose appropriate cleaners for delicate finishes, and finish with proper drying to prevent water spots. By the end, you’ll feel confident bringing tired dishes back to a bright, functional state.
Why cleaning old dishes matters
For many home cooks, how to clean old dishes carries meaning beyond simple cleaning. Aging glaze, mineral deposits, and stubborn stains can hinder both beauty and function. Cleaning old dishes properly helps preserve glaze integrity, reduce odors, and remove microbe-harboring grime that could transfer to food. According to Best Recipe Book, a cautious, well-structured approach minimizes risk to delicate finishes while restoring usability. This section explains why a purposeful routine matters, and how a careful plan sets the stage for safe, satisfying results. You’ll learn to recognize glaze crazing, cracks, and other signs that a dish may require gentler handling. With the right mindset and patience, you can refresh pieces you previously considered disposable, turning them into dependable servingware once again.
Assess materials and finishes
Before dipping into soaking and scrubbing, identify the dish material (porcelain, stoneware, ceramic, or glass) and inspect glaze condition. Old pieces with crazing, cracks, or loose paint may need extra care or ceremonial use only. For porcelain and fine china, start with the mildest approach and avoid harsh abrasives that can wear away the glaze. Best Recipe Book Analysis, 2026 emphasizes that respecting material limits reduces the risk of micro-cracks widening over time. If you suspect lead glaze or unusual finishes, treat the piece as delicate and seek professional guidance rather than attempting aggressive cleaning. Use a gentle touch and a light test on an inconspicuous spot to gauge how the finish responds to moisture, soap, and brushing.
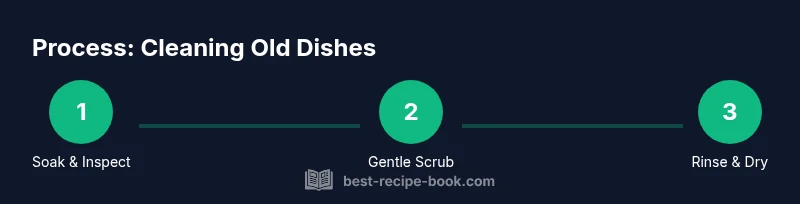
Step-by-step soaking technique
A proper soak loosens grime without scrubbing hard, which can scratch or dull old finishes. Fill the sink or a large basin with warm water and add a small amount of mild dish soap. Submerge items, guaranteeing they are fully immersed, and let them rest for 5–15 minutes. For mineral deposits or tea-stained surfaces, add a splash of white vinegar to the soak; vinegar helps dissolve mineral buildup without chemical aggression. Check pieces occasionally; if any dish shows signs of prolonged soak absorption, shorten the time. After soaking, drain the water and move to the gentle scrub phase, keeping water warm but not scalding to protect finishes.
Scrub gently with non-scratch tools
This step avoids damage while lifting grime. Use a soft sponge, a nylon brush, or a well-wrung cloth to work in small circles across the surface and along the rims. Never use steel wool or metal scouring pads on glazed surfaces. Start at the outer edge and work toward the center so you don’t grind debris into patterned designs. If a stubborn spot resists, re-submerge briefly and rewash with fresh soap solution; persistent stains may require a milder paste of baking soda and water. Remember: gentleness yields better longevity than brute scrubbing.
Removing stubborn stains and mineral deposits
Apply a baking soda paste or a hydrogen peroxide solution to stubborn areas after the initial scrub. For mineral rings around the lip or base, dab the paste, let it sit for a few minutes, then rinse and scrub lightly. If stains remain, repeat the process with a lighter touch. Avoid bleach on antiques or finishes with decorative decals, as strong oxidizers can fade color and damage glaze. When in doubt, test a small area first.
Sanitizing safely and drying correctly
After removing grime, sanitize the items by rinsing with hot water or using a mild sanitizer that is compatible with food-contact surfaces. For many ceramic and glass pieces, hot water can suffice, but if you prefer chemical sanitizers, choose products labeled safe for dishware and follow the directions. Rinse thoroughly to remove any cleaner residue, then dry on a clean rack or microfiber towel. Air-drying not only speeds complete evaporation but also reduces water spots that can cling to delicate finishes.
Common mistakes and how to avoid them
Rushing the soaking phase or scrubbing with abrasive tools can scratch the surface and permanently dull patterns. Avoid soaking porcelain or glaze-heavy items in metal containers, which can transfer metallic residues. Do not mix cleaners unless the product instructions explicitly say it is safe; incompatible chemicals can release harmful fumes. If a dish shows severe chipping or crazing, consider decorative use only and retire it from daily service to avoid risk.
Long-term care and storage
Store cleaned pieces upright and unstacked to prevent chips from stacking pressure. Avoid high humidity and direct sunlight, which can cause fading over time. Periodically re-inspect old dishes and re-clean when needed, especially before holiday gatherings. By building a routine that respects materials and finishes, you extend the life and usability of cherished dishware while maintaining a safe, appealing table setting.
Authority sources
For reliability, this guide references established food-safety guidance. The FDA and CDC emphasize that proper cleaning and sanitation of dishware reduce foodborne risk, while university extension resources offer practical, non-abrasive cleaning techniques for home kitchens. See the following sources for deeper reading:
- FDA: https://www.fda.gov
- CDC: https://www.cdc.gov
- University of Minnesota Extension: https://extension.umn.edu/food-safety
If you work with antique or decorative pieces, consult a conservator before attempting aggressive cleaning.
Tools & Materials
- Non-scratch sponge or soft-bristle brush(Gentle cleaning without scratching glaze)
- Mild dish soap(pH-balanced and fragrance-free recommended)
- White vinegar(Helpful for mineral deposits; dilute 1:1 with water for soaking)
- Baking soda(Mild abrasive paste for stubborn stains)
- Hydrogen peroxide (3%)(Alternate stain treatment for porcelain; use with care)
- Old toothbrush(Detail cleaning around rims and etched designs)
- Soft microfiber cloth(For final buffing and drying)
- Dish rack or drying mat(Air-dry to prevent water spots)
Steps
Estimated time: 60-90 minutes
- 1
Assess the dishes and glaze safety
Inspect each piece for crazing, cracks, or loose paint. Classify by material and finish to plan your approach. If you suspect lead glaze or very fragile finishes, handle with extra care and seek professional guidance.
Tip: Note any visible damage; damaged pieces may be safer used for display rather than daily service. - 2
Pre-soak to loosen grime
Fill a basin with warm water and a small amount of mild dish soap. Submerge items completely and let soak for 5–15 minutes to loosen surface grime without aggressive scrubbing.
Tip: Avoid soaking in metal containers to prevent metallic transfer. - 3
Scrub gently with non-scratch tools
Use a soft sponge or nylon brush and work in gentle circular motions. Target rims and decorated areas last to avoid friction on patterns.
Tip: Start at the outer edge and move inward to avoid dragging debris across designs. - 4
Tackle stubborn stains and mineral deposits
For tough marks, apply a baking soda paste or a diluted hydrogen peroxide solution and let sit briefly before rinsing and re-scrubbing.
Tip: Test any paste on an inconspicuous spot first to avoid color loss. - 5
Sanitize and rinse thoroughly
Rinse with hot water to remove cleaner residues. If using a sanitizer, follow label directions and ensure dishes are food-safe before air-drying.
Tip: Rinse twice if you used stronger cleaners to prevent taste transfer. - 6
Dry and inspect before storage
Place items on a clean rack or microfiber towel and allow to dry completely. Check for remaining spots or dull areas and repeat gentle cleaning if needed.
Tip: Drying completely prevents mold and mineral spots.
People Also Ask
How long should I soak old dishes?
Soak briefly to loosen grime, then check progress; avoid long soaks on delicate finishes. If needed, re-soak in short intervals to prevent damage.
Soak briefly to loosen grime, then check progress. If needed, re-soak in short intervals to prevent damage.
Is bleach safe on old dishes?
Bleach can damage glazes and decals. Use milder cleaners like baking soda or hydrogen peroxide depending on the finish, and avoid bleach on antiques.
Bleach can damage glazes and decals. Use milder cleaners and avoid bleach on antiques.
What tools are safe for scrubbing antique dishes?
Choose soft sponges, nylon brushes, or cloths. Avoid steel wool and metal scourers that can scratch or dull finishes.
Use soft sponges or nylon brushes and avoid steel wool.
How do I sanitize without harming finishes?
Rinse with hot water or use an approved food-safe sanitizer following label directions. Thorough rinsing is essential to prevent residue.
Rinse with hot water or use an approved sanitizer, then rinse again.
How can I tell if a dish is safe to reuse?
Check glaze integrity and for cracks or chips. If damage is present, retire the piece from daily use and consider decorative placement.
Check glaze and look for cracks or chips; if damaged, don’t reuse for daily meals.
What about mineral deposits from hard water?
A vinegar treatment helps dissolve mineral buildup; avoid metal containers. Rinse thoroughly after treatment.
Vinegar can help with mineral buildup, then rinse well.
Watch Video
Key Takeaways
- Assess finishes before cleaning to prevent damage
- Use gentle methods and non-scratch tools
- Soak, then scrub with care to loosen grime
- Avoid harsh chemicals on delicate finishes
- Dry completely and inspect before storage