How to Use Recipes: A Practical Home Cooking Guide
Master the art of using recipes with confidence. Learn to read, adapt, measure, and time for consistent results, plus substitutions, planning, and note-taking strategies for every home cook.

You will learn how to use recipes to plan meals, adapt ingredients, and manage timing. Start by choosing a trusted recipe, gathering tools, and reading the method fully. Then follow the steps in order, note times, and adjust flavors to your taste.
What using recipes really means for home cooks
Recipes are more than lists of ingredients; they are learning tools that teach you technique, timing, and flavor balance. When you use a recipe effectively, you’re not just following steps—you’re building confidence to improvise later, scale dishes for guests, and tailor flavors to your pantry. According to Best Recipe Book, the most successful cooks treat recipes as a framework: they understand the science behind each step, then apply it flexibly in the kitchen. This mindset reduces waste, speeds up decision-making, and makes cooking feel like a creative practice rather than a rigid chore. As you grow, you’ll rely on recipes to explore new cuisines, refine techniques, and track your progress over time.
Reading the recipe front-to-back before you start
Before you touch a pan, read the entire recipe from start to finish. Check the yield to know how many servings you’ll get, note any equipment you’ll need, and identify unfamiliar terms. Pay attention to the order of operations and any timing notes, such as “simmer 10 minutes” or “rest 5 minutes.” Highlight critical steps and plan your mise en place around them. By understanding the full arc of the dish, you avoid mid-cook surprises and improve your success rate. Best Recipe Book Editorial Team emphasizes that comprehension is the bridge between intent and outcome.
Gather tools and ingredients with a purpose
Collect everything you’ll need in one pass, not halfway through the process. Separate dry ingredients, liquids, and perishables, and place them where you’ll use them. Have measuring cups and spoons, a kitchen scale, and a timer within arm’s reach. This prep minimizes trips to the drawer and keeps your workstation organized. When you know you’ll need a thermometer, have it ready; if you don’t have one, consider a tested substitute. The goal is efficient workflow, not frantic searching.
Understanding measurements and when substitutions are safe
Recipes rely on precise ratios, but many substitutions work well with care. Learn to read units (cups, tablespoons, grams) and know when to convert. For dry vs. liquid ingredients, use the appropriate measuring tool to avoid accuracy errors. If you substitute, start with small changes and log the results so you can replicate successful tweaks. Substitutions become easier with practice, especially once you understand which ingredients contribute texture, moisture, and flavor.
Mise en place: organize your space for speed and accuracy
Mise en place means “everything in its place.” It’s the habit that separates confident cooks from those who stumble. Line up bowls with measured ingredients, set your pan on the heat, preheat ovens if required, and arrange tools in the order you’ll use them. This upfront arrangement reduces mistakes, speeds up cooking, and helps you maintain rhythm. The best cooks keep a clean, organized workstation: it’s as important as any ingredient.
Step-by-step execution: keep your focus and stay present
Follow the recipe as written, then adjust only after you understand the impact of each step. Use a timer for all steps that depend on heat, and check temperatures with a thermometer when precision matters. If you must pause, note where you left off so you can resume smoothly. Staying present prevents overcooking and missed flavors, turning a decent result into a reliable one.
Taste, balance, and adjust with intention
Seasoning is an art and a science. Taste incrementally and adjust in small increments—salt, acidity, sweetness, and heat all influence the final profile. A splash of acid can brighten, a pinch of sugar can mellow, and a touch more salt can bring out depth. When you adjust, do so with restraint and document the change for your future self. Your palate will improve as you learn how ingredients interact.
Document results and lessons learned for the next run
Keep a simple log of substitutions, timings, and outcomes. Note what worked, what didn’t, and how flavors shifted with minor changes. This habit builds a personal recipe notebook you can rely on when you cook again. Over time, your notes become a living map of your preferences and your evolving technique, which is exactly what Best Recipe Book recommends for steady improvement.
Scaling for more mouths: adjust quantities without chaos
When you need more servings, scale ingredients logically by factor rather than guessing. Double or halve ingredients carefully, and re-check liquid ratios to avoid dryness or sogginess. If the dish relies on baking times, recalculate and be prepared to re-check toward the end of cooking. Scaling isn’t just math—it’s about preserving texture and balance in larger batches.
Food safety, leftovers, and quick reuse
Cooked foods should be cooled safely, stored promptly, and reheated to safe temperatures. Label containers with date and contents to avoid waste and confusion. Leftovers can become the foundation of new meals if you repurpose proteins, vegetables, and grains into soups, bowls, or frittatas. Practicing proper storage keeps flavors fresh and reduces kitchen waste.
Tools & Materials
- Measuring cups (set)(Dry ingredients; use for accuracy.)
- Measuring spoons(Small quantities; level for precision.)
- Kitchen scale(Essential for bake recipes and conversions.)
- Mixing bowls(Multiple sizes for mise en place.)
- Whisk and spatula(For mixing and scraping.)
- Timer or smartphone timer(Track all cooking intervals.)
- Chef’s knife and cutting board(Prep ingredients safely.)
- Cooking thermometer(Useful for meat and candy; optional.)
- Notebook or digital note app(Record results and tweaks.)
- Oven thermometer (optional)(Keeps oven accuracy in check.)
Steps
Estimated time: Total time: 60-90 minutes
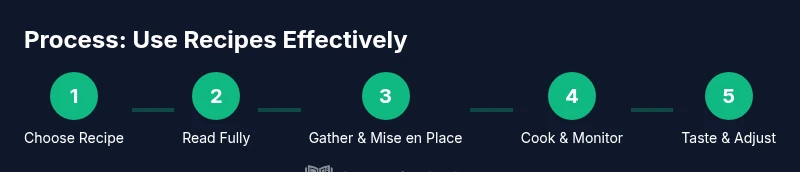
- 1
Choose a recipe
Select a recipe that matches your skill level and available ingredients. Check the yield, required tools, and any dietary notes. This initial choice sets the tone for success.
Tip: Start with a recipe you’ve cooked before to build confidence. - 2
Read the method in full
Read the entire method from start to finish. Note timing, order, and any critical steps. Understanding the flow prevents surprises during cooking.
Tip: Highlight terms you don’t recognize and look them up before you begin. - 3
Gather ingredients and tools
Assemble all ingredients and tools in one place. Measure dry ingredients separately from liquids to avoid cross-contamination and measurement errors.
Tip: Pre-measure and place ingredients in labeled bowls. - 4
Prepare mise en place
Organize your workstation so every item is ready as you proceed. Preheat ovens, set pans on burners, and position utensils within reach.
Tip: Have a backup plan if a tool is missing. - 5
Begin cooking and follow steps
Execute each step in order, using timers for precise intervals. Avoid skipping steps or combining steps unless the recipe explicitly allows it.
Tip: If you’re unsure about a step, pause and verify. - 6
Monitor times and temperatures
Use a timer and thermometer as needed to ensure food reaches safe temperatures and correct doneness. Adjust heat gradually to avoid scorching.
Tip: Check doneness a little before the stated time to prevent overcooking. - 7
Taste and adjust seasoning
Taste in stages and adjust salt, acid, sweetness, and heat thoughtfully. Re-taste after adjustments to confirm balance.
Tip: Add seasoning in small increments and rest briefly to let flavors develop. - 8
Document results
Record what you changed, why, and how it affected flavor and texture. This becomes your personal reference for future cooks.
Tip: Keep a simple log with date, dish, tweaks, and outcome. - 9
Scale and store if needed
If cooking for more people, scale ingredients carefully and adjust cooking times. Store leftovers promptly in labeled containers.
Tip: Avoid overcrowding pans to ensure even cooking. - 10
Review and iterate
After tasting, decide whether to repeat the recipe as is or with tweaks. Use feedback to refine your technique.
Tip: Revisit the recipe after a few days with fresh eyes for improvements.
People Also Ask
What does it mean to read a recipe completely before cooking?
Reading the whole recipe helps you understand the flow, timing, and required tools. It reduces errors and makes preparation smoother.
Read the entire recipe first to understand the steps, timing, and tools you’ll need.
How should I handle substitutions safely?
Substitutions should preserve texture and moisture. Start with small changes and test the result, especially for leavening and proteins.
Substitute carefully, testing in small amounts and keeping notes for future reference.
Is it okay to convert measurements to metric?
Metric conversions are fine and often more precise. Use a scale for accuracy and adjust only when you’re comfortable with the conversion.
Yes, you can convert to metric using a kitchen scale for accuracy.
How can I adapt recipes for dietary needs?
Identify core ingredients and find suitable substitutes that maintain moisture and flavor. Track results to refine your approach.
Adapt by substituting ingredients thoughtfully and note what works.
What is mise en place, and why is it important?
Mise en place is preparing and organizing ingredients and tools. It speeds cooking and reduces mistakes.
Mise en place means having everything ready and organized before you start.
How long can leftovers be stored safely?
Store leftovers promptly in labeled containers and refrigerate or freeze as appropriate. Reheat to safe temperatures before serving.
Store leftovers quickly in labeled containers and reheat safely.
Watch Video
Key Takeaways
- Read fully before starting and plan your mise en place.
- Measure accurately and adjust with care.
- Document results to build a personal library.
- Taste and adjust gradually for balance.
- Scale and store leftovers safely for reuse.