If Recipe Says Flour Which Flour: A Practical Guide
Learn how to choose the right flour when a recipe only says flour. This practical guide explains flour types, substitutions, and expert tips for reliable baked results.

You’ll learn how to identify the right flour for any baking task when a recipe only says flour. If recipe says flour which flour, you will map the option to the dish’s texture, hydrate appropriately, and adjust leavening for reliable results. With simple rules and real-world examples, you’ll feel confident choosing the right flour by aroma, texture, protein content, and intended outcome.
Understanding Flour Types: What the Names Mean
If a recipe says flour which flour, you may be unsure what the author intends. Flour isn't a single ingredient; it comes in proteins, textures, and grind sizes. Here are the most common categories: all-purpose, bread flour, cake flour, pastry flour, whole-wheat, and specialty blends. Each type behaves differently in gluten formation, hydration, and tenderness. By learning these basics, you can map the right flour to your bake rather than guessing.
How to Decide Based on the Recipe
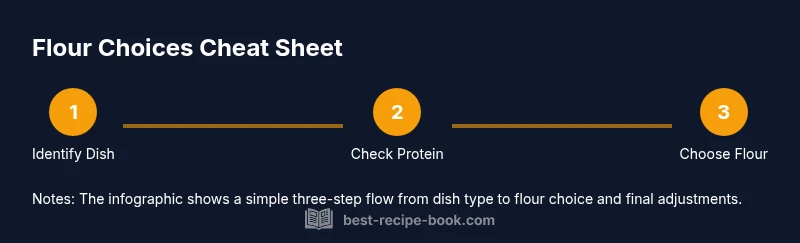
When you see a flour-only instruction, start by identifying the dish type and target texture. Is the bake aiming for light and tender crumbs, or chewy and sturdy structure? Next, check the leavening and hydration signals in the recipe. Yeast breads, cakes, and biscuits each rely on different flour behaviors. Use these cues to narrow down your options before grabbing a bag from the pantry.
Substitutions and Subtle Differences
Substituting flour is more nuanced than swapping names. All-purpose flour is a safe default for many recipes, but it may not yield the same tenderness or crust as cake or pastry flour. Bread flour provides more structure, while pastry flour softens crumb. For each substitution, start with a 1:1 ratio when possible, then adjust hydration and mixing time based on dough feel.
Substitution Scenarios: Bread, Cake, and Pastry
- Bread: Use bread flour when you need a chewy crust and good volume. - Cake: Cake flour gives a delicate crumb; replace with 3/4 cup all-purpose plus 2 tablespoons cornstarch per cup of cake flour if you must substitute. - Pastry: Pastry flour or a blend can offer flaky, tender layers; if unavailable, use all-purpose with a teaspoon of vital wheat gluten per cup to boost structure slightly.
Reading the Recipe Clues: Hydration, Leavening, and Texture
Hydration levels influence how much you should adjust liquids. A dense batter or stiff dough usually benefits from slightly less liquid when you switch to higher-protein flour. Leavening interactions matter: stronger flours can resist expansion; adjust leavening slowly and test in small batches. Always consider the end texture described in the recipe when choosing flour.
Common Myths: Bleached vs Unbleached, Sifted vs Unsifted
Bleached flour behaves a bit differently than unbleached, often yielding softer crumb and faster browning. Sifting flour adds air but can lead to different amounts; weighing flour is more reliable than scooping. Don’t assume all-purpose can replace specialty flours one-for-one in gluten-free recipes; gluten-free blends behave very differently.
Practical Substitution Cheat Sheet
Keep this quick reference handy:
- All-purpose: versatile default for many recipes
- Bread flour: for structure and chew
- Cake flour: tender crumb
- Pastry flour: flaky, tender crust
- Whole-wheat: hearty flavor and denser texture; may require extra hydration
- Gluten-free blends: follow blend-specific guidance and consider xanthan gum
Tip: When in doubt, start with a 1:1 substitution and test a small batch before committing to the full recipe.
Tools & Materials
- Digital kitchen scale(Weigh flour for accuracy (±1 g))
- Measuring cups and spoons(For volume measurements when needed)
- Mixing bowls (various sizes)(For combining ingredients)
- Fine-mesh sieve or sifter(Lightly aerate flour and remove lumps)
- Whisk and spatula(Blend and fold without overworking gluten)
- Notebook or tasting sheet(Record substitutions and outcomes)
Steps
Estimated time: Total time: 25-40 minutes active; 0-15 minutes for test batch
- 1
Identify the dish and texture goal
Start by clarifying what you’re baking and the desired crumb and mouthfeel. If the recipe says flour which flour, map it to a target texture (light and tender vs chewy and robust). This helps narrow flour options before you reach for the bag.
Tip: Write down the intended texture to guide flour choice. - 2
Check the leavening method
Determine whether the bake relies on yeast, baking powder, or whisked egg/air. This affects how flour choice will interact with gas production and crumb structure.
Tip: If using high-protein flour, you may need slightly less yeast or leavening to avoid dense results. - 3
Compare protein and gluten development
Bread flour and some whole-wheat flours develop more gluten than cake or pastry flour. Contrast with tender cake or pastry flour, which yields softer crumb.
Tip: When unsure, start with all-purpose and adjust in a second batch. - 4
Choose your flour category
Select based on the dish: bread flour for structure, cake flour for delicate crumb, pastry flour for flaky textures, or all-purpose for versatility.
Tip: If the recipe is silent, default to all-purpose and adjust hydration later. - 5
Plan substitutions and ratios
If you’re swapping, aim for a 1:1 substitution where possible. For cake flour swapping with all-purpose, use the 3/4 cup + 2 tablespoons cornstarch trick per cup of cake flour substitute.
Tip: Keep notes on the substitution you used to inform future trials. - 6
Adjust hydration gradually
Higher-protein flours often need slightly more or less liquid depending on the recipe. Add in small increments and reassess dough/batter consistency.
Tip: A slightly drier dough can bake into a denser crumb; adjust slowly. - 7
Run a small test batch
Bake a mini version to assess texture, crust, and crumb. Use the test to fine-tune the flour choice before committing to the full batch.
Tip: Use the same oven and pan as the full recipe for the best test result. - 8
Record results for next time
Document the flour type, substitution method, hydration changes, and final texture. This builds a personal reference that speeds future decisions.
Tip: Create a simple substitution log in your recipe notebook.
People Also Ask
What is the difference between all-purpose and bread flour?
All-purpose flour is versatile with moderate protein; bread flour has higher protein for more structure and chew. Your choice affects crumb and rise. In many cases, you can substitute with adjustments but expect a different texture.
All-purpose is versatile, but bread flour gives more structure; expect chewier crusts.
Can I substitute almond flour when a recipe says flour?
Almond flour behaves very differently from wheat flours; it’s denser, gluten-free, and may require binders and extra moisture. It’s not a direct 1:1 swap for gluten-containing recipes.
Almond flour doesn’t behave like wheat flour; you’ll usually need binders and moisture adjustments.
Is cake flour better for cakes?
Cake flour yields a finer, softer crumb due to lower protein. If you only have all-purpose, you can approximate with 3/4 cup all-purpose plus 2 tablespoons cornstarch per cup of cake flour substitute.
Cake flour makes a softer crumb; you can mimic it with a simple all-purpose substitution.
How do I substitute gluten-free flour?
Use a gluten-free blend designed for baking and follow the package’s guidance. Some blends need xanthan gum or guar gum; hydration may differ from wheat flours.
Gluten-free blends behave differently; follow the blend’s directions and adjust hydration.
Should I sift flour?
Sifting adds air and can affect volume. If a recipe relies on precision, weigh flour instead of scooping and sifting.
Weigh flour for precision; sifting is optional unless you need more air.
What if I only have all-purpose flour?
All-purpose is a versatile default for many recipes. You can achieve varying textures by adjusting hydration and mixing technique.
All-purpose is a flexible default; tweak hydration and technique for different textures.
Watch Video
Key Takeaways
- Identify the intended texture before choosing flour.
- Weigh flour for accuracy, then adjust hydration as needed.
- Use 1:1 substitutions when possible; tweak with tests.
- Understand protein content to predict gluten development.
- Keep a substitution log for future recipes.