Muffin Recipe Pumpkin: Perfect Pumpkin Muffins
Learn to bake moist, fluffy pumpkin muffins with pantry staples. This step-by-step guide covers ingredients, substitutions, mixing technique, bake times, storage, and flavor ideas for cozy autumn treats.

With this muffin recipe pumpkin guide, you’ll bake moist, rise-perfect pumpkin muffins from common pantry ingredients. You’ll need flour, sugar, eggs, pumpkin puree, oil or butter, leavening, spices, and a muffin tin. The quick answer lays out precise measurements, optional substitutions, and a step-by-step method to help you get reliable, bakery-worthy results at home.
Why pumpkin muffins shine
Pumpkin adds moisture, color, and a gentle sweetness that makes pumpkin muffins feel cozy and autumnal. In a standard muffin recipe pumpkin, puree replaces part or all of fat to keep crumb tender while still delivering structure from flour and leavening. If you use canned pumpkin puree, choose 100% pumpkin with no added sugar or spices for control over flavor. Fresh roasted pumpkin can work too, but you’ll need to drain excess moisture to avoid a dense batter. The pumpkin aroma pairs beautifully with warm spices—cinnamon, nutmeg, ginger—and a hint of vanilla. In your kitchen, you’ll notice that even simple, pantry-friendly ingredients can yield bakery-like muffins when you respect the batter, timing, and heat. According to Best Recipe Book, pumpkin muffins are a crowd-pleaser for breakfast, snack time, or quick dessert, thanks to their forgiving texture and universal appeal.
Key ingredients and substitutions
A classic muffin batter relies on a balance of dry and wet components. For the dry side, use all-purpose flour (or a mix with whole wheat). Add baking powder and a touch of baking soda for lift, and a pinch of salt to sharpen flavors. For the wet side, pumpkin puree provides moisture; eggs bind the batter; fat can be oil or melted butter for tenderness. Sugar sweetens and helps browning, while spices like cinnamon, nutmeg, and ginger bring warmth. If you’re avoiding dairy, substitutions include plant-based milk and yogurt. For lighter texture, substitute part of the oil with applesauce. Optional add-ins like chocolate chips or chopped walnuts bring contrast and richness. Always label whether you’re using canned puree or freshly roasted pumpkin, and drain excess moisture if needed to prevent a soggy crumb.
Equipment and bake setup
You don’t need fancy gear to start—just a standard muffin tin, paper liners or a light spray, a mixing bowl, whisk, and a wooden spoon or spatula. Preheat your oven to about 375°F (190°C). Line a 12-cup muffin pan or grease the cups well. Have a cooling rack ready; muffins finish evenly when transferred to a rack that allows air circulation. A kitchen scale can improve accuracy if you want to weigh ingredients, especially flour and sugar, for consistent results. Remember to set aside time for cooling; muffins pulled from the oven are fragile when warm and can crack if moved too soon. This practical setup keeps the process smooth and accessible for home bakers at every level.
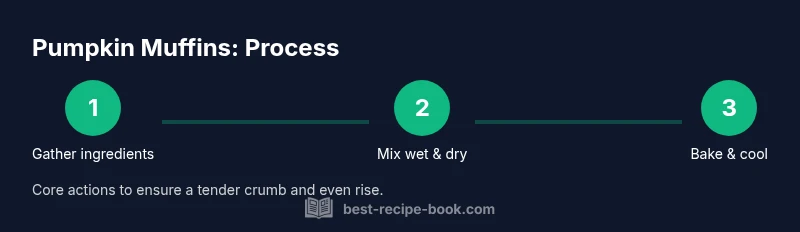
Mixing technique for tender crumb
Start by whisking all dry ingredients in one bowl, and whisk wet ingredients in another. Do not overmix once you combine; stop when the flour nearly disappears and a few streaks remain. Overmixing develops gluten, leading to a tougher muffin. Gently fold the wet mixture into the dry with a few careful turns until just incorporated. Letting the batter rest for 5–10 minutes can hydrate the flour and improve tenderness. Finally, fold in any add-ins (chips, nuts) last to avoid overworking the batter.
Baking times, doneness cues, and pan handling
Fill each cup about two-thirds full for even rise. Bake for 18–22 minutes, until the tops spring back lightly and a toothpick comes out with a few moist crumbs. Avoid opening the oven mid-bake; temperature fluctuations can cause uneven domes. If you bake at a different altitude or with a different pan (dark vs light metal), you may need to adjust time by 2–5 minutes. Cool muffins on a rack for at least 10 minutes before removing liners; this helps set the crumb and prevents crumbling. Taste a warm muffin to check if the spice balance feels right, then adjust future batches accordingly.
Variations and flavor ideas
Add-ins boost personality: chocolate chips for sweetness, chopped walnuts for crunch, or dried cranberries for tartness. For a richer crumb, replace part of the oil with yogurt or sour cream. Swapping half of the white sugar for brown sugar creates a deeper caramel note. Try a lemon glaze by mixing powdered sugar with fresh lemon juice for a bright finish. If you want healthier tweaks, try half whole-wheat flour or half applesauce in place of oil, noting crumb and lift may change slightly.
Storage, freezing, and reheating
Pumpkin muffins keep well in an airtight container at room temperature up to 3 days; refrigerate for longer shelf life, then reheat gently in a 350°F (175°C) oven for about 5 minutes. For longer storage, freeze individually wrapped muffins for up to 3 months. Thaw at room temperature or warm in a low oven to refresh texture. Label frozen muffins with date for easy rotation. Freezing batter before baking is another option; freeze portions in muffin cups and bake from frozen while adding a couple of extra minutes to the bake time.
Nutrition, dietary considerations, and substitutions
Pumpkin puree adds moisture without heavy fat, making muffins naturally lighter. If you’re watching sugar, reduce sugar by 1–2 tablespoons and rely on the natural sweetness of pumpkin and vanilla. For dairy-free versions, use a neutral oil and plant-based milk; for gluten-free, use a 1:1 gluten-free flour blend with a bit extra liquid if needed. Always check spice balance when substituting ingredients to keep the warm, cozy profile that pumpkin muffins are known for.
Serving ideas and pairing suggestions
Pair pumpkin muffins with a dollop of cream cheese frosting or a smear of honey butter for extra richness. They go well with coffee or chai as a breakfast treat or a mid-morning snack. For a festive touch, dust with cinnamon sugar or serve with a side of roasted nuts and dried fruit. Present muffins on a warm plate with autumn-themed garnish like cinnamon sticks and orange zest to boost aroma and visual appeal.
blockEndNoteTextSlugsKeyTakeaways: null
Tools & Materials
- All-purpose flour(1 1/2 to 2 cups depending on desired crumb)
- Granulated sugar(1/2 to 3/4 cup; adjust to taste)
- Pumpkin puree(100% pumpkin, 1 cup (240 ml) typical amount for 12 muffins)
- Eggs(2 large eggs, room temperature)
- Vegetable oil or melted butter(1/3 to 1/2 cup; oil yields tender crumb)
- Milk or yogurt(1/4 to 1/2 cup for moisture balance (dairy or plant-based))
- Baking powder(1 1/2 teaspoons for lift)
- Baking soda(1/4 teaspoon if using yogurt or buttermilk for acidity)
- Salt(1/4 to 1/2 teaspoon to sharpen flavors)
- Ground cinnamon(1 to 2 teaspoons depending on strength of spice blend)
- Nutmeg or ginger(Pinch to 1/4 teaspoon for warmth)
- Vanilla extract(1/2 teaspoon for depth of flavor)
- Optional add-ins(Chocolate chips, walnuts, or cranberries for variation)
Steps
Estimated time: 40-50 minutes
- 1
Preheat and prepare
Preheat oven to 375°F (190°C). Line a 12-cup muffin tin with liners or grease well. This ensures easy release and clean-up later. Measure dry ingredients first to streamline the next steps.
Tip: Preheating early helps maintain even oven temperature and reliable rise. - 2
Whisk dry ingredients
In a medium bowl, whisk flour, baking powder, salt, and spices until evenly combined. This distributes leavening and flavor uniformly so every muffin bakes consistently.
Tip: Sift if you have dense flour; it lightens the mixture and improves crumb. - 3
Mix wet ingredients
In a separate bowl, whisk pumpkin puree, eggs, oil (or melted butter), vanilla, and milk until smooth. This creates a cohesive, emulsified liquid that traps air for light muffins.
Tip: Warm liquids can help emulsify fats for a tender crumb. - 4
Combine wet and dry softly
Pour the wet mixture into the dry ingredients and fold gently until just combined. A few flour streaks are okay; overmixing creates a tougher texture.
Tip: Use a spatula with a few quick folds rather than a whisk to avoid gluten development. - 5
Fill cups evenly
Divide batter evenly among the 12 cups, filling each about two-thirds full. This ensures a uniform dome and thorough cooking in the center.
Tip: For even portions, use an ice cream scoop or a measured spoon. - 6
Bake and cool
Bake 18–22 minutes until tops spring back and a toothpick comes out with a few crumbs. Let muffins rest in the pan for 5 minutes, then transfer to a rack to cool.
Tip: Cooling on a rack prevents soggy bottoms and helps set the crumb.
People Also Ask
What makes pumpkin muffins moist and flavorful?
Pumpkin puree adds moisture and body, while spices and vanilla build aroma. Proper leavening and gentle mixing keep the crumb tender and the muffins light rather than compact.
Pumpkin puree adds moisture and flavor; gentle mixing keeps them light.
Can I freeze pumpkin muffins?
Yes. Freeze cooled muffins in airtight bags or wrap individually. Thaw at room temperature or warm briefly in a low oven for a fresh texture.
You can freeze them; thaw or warm to refresh texture.
Can I make this gluten-free?
Yes. Use a 1:1 gluten-free flour blend and keep an eye on moisture, as some blends absorb more liquid. You may need a touch more milk.
Gluten-free is possible with a 1:1 blend; adjust moisture if needed.
Can I substitute oil with applesauce?
Substituting half or all of the oil with applesauce lowers fat and can yield a slightly denser crumb. Start with 1:1 replacement and test
Yes, you can swap some oil for applesauce; expect a denser crumb if you use more applesauce.
Fresh pumpkin vs canned puree—which is better?
Canned puree is convenient and consistent; fresh pumpkin can work if drained well and moisture is managed. Both can deliver the same pumpkin flavor with slightly different textures.
Canned is reliable; fresh can work with moisture control.
Watch Video
Key Takeaways
- Bake pumpkin muffins with balanced moisture and spices.
- Avoid overmixing to keep a tender crumb.
- Use canned puree for consistency, drain if needed.
- Cool on a rack to preserve texture.