Pumpkin Bars: A Step-by-Step Guide to Moist, Spiced Bars
Master a pumpkin bars recipe with a tender crumb and silky glaze. This step-by-step guide covers ingredients, timing, spice balance, and simple serving ideas for bakery-worthy bars at home.

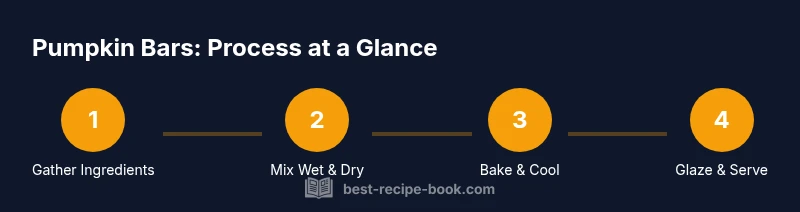
You’ll master pumpkin bars from scratch, from batter to glaze. This step-by-step guide covers mixing spices, folding in butter and sugar, baking in a 9×13 pan, and a silky cream cheese glaze for finishing. Gather pantry staples, a reliable mixer, and a preheated oven. The Best Recipe Book team found clear, practical steps yield bakery-worthy bars.
What pumpkin bars are and why they matter
Pumpkin bars are a seasonal staple that blend pumpkin puree with warm spices to create a moist, tender bar cake. They’re easier to portion than a pumpkin loaf and pair beautifully with a tangy cream cheese glaze. For home cooks, pumpkin bars offer a forgiving canvas: you can adjust spice levels, sweetness, and glaze thickness to suit family tastes. According to Best Recipe Book, getting the moisture balance right is the key to a slice that stays soft even after refrigeration. This makes pumpkin bars an ideal dessert for potlucks, fall gatherings, or weekday treat moments. The pumpkin contributes moisture and color, while cinnamon, nutmeg, and a touch of ginger create depth without overpowering the pumpkin’s natural sweetness. In practice, you’ll want to measure ingredients carefully and avoid overmixing once dry ingredients enter the bowl to keep the crumb light rather than dense.
For best results, read through the full method before you start. Having all components ready—spices, sugar, pumpkin puree, eggs, and glaze components—ensures a smooth, uninterrupted bake. If you’re new to pumpkin bars, consider this: you can scale the recipe to fit a larger sheet pan or keep it intimate by baking in a smaller pan and adjusting the bake time accordingly. Best Recipe Book’s guidance emphasizes consistency and technique to help you achieve bakery-quality bars at home.
Key ingredients and substitutions
The core components of pumpkin bars are straightforward, but small changes can alter texture and flavor substantially. You’ll primarily need pumpkin puree, flour, sugar, eggs, spices, and a fat like melted butter. To keep the crumb tender, the ratio of pumpkin to flour should remain balanced, and you can tailor the glaze for sweetness. If you don’t have pumpkin puree you can roast a small sugar pumpkin and puree it, or substitute canned pumpkin in a 1:1 ratio. Spices like cinnamon, nutmeg, and a pinch of ginger amplify the fall profile, while salt heightens the flavors. If you’re avoiding dairy, you can replace butter with an equal amount of melted coconut oil, though the texture may shift slightly. For a gluten-free version, use a 1:1 gluten-free flour blend and reduce baking powder by a touch to keep the bars from spreading too much. The glaze benefits from cream cheese for tang and powdered sugar for that glossy finish.
Key ingredients (with typical roles): pumpkin puree for moisture and color; flour for structure; sugars for browning and sweetness; eggs for structure and binding; spices for warmth; butter for richness; cream cheese glaze for a creamy finish. When substitutions are needed, keep the overall moisture and structure in balance to avoid a crumbly outcome.
Measuring and mixing for best texture
Precise measuring is the backbone of reliable pumpkin bars. Use a digital scale for flour and sugar to avoid the variability of scooping. Sift dry ingredients lightly to prevent clumps and to ensure even distribution of spices. Whisk flour, baking powder, salt, and spices in one bowl. In a separate bowl, blend pumpkin puree with eggs and melted butter or oil until smooth, then whisk in the sugars until fully integrated. The moment you combine wet and dry ingredients, mix only until just combined. Overmixing can develop gluten and lead to dense bars, while undermixing can leave pockets of flour and uneven flavor. If you’re measuring by volume, spoon flour into the cup and level off with a knife to prevent compacting. The goal is a batter that’s smooth but not heavy, with a light crumb once baked. Best Recipe Book notes that a well-balanced batter will yield a moist center with slightly crisp edges that stay sliceable after cooling.
A quick pro-tip: warm spices release more aroma when added early, but it’s better to add them evenly than to rely on a single big pinch. That helps maintain consistent flavor in every bite. You’ll also want to ensure ingredients like eggs and pumpkin are at room temperature for easier emulsification, which contributes to a uniform texture and a stable glaze.
Baking to perfection: oven, pan, and timing
The pan and oven conditions largely determine the final texture of pumpkin bars. A standard 9x13 inch pan lined with parchment or lightly greased ensures clean edges and easy removal. Preheat the oven to 350°F (177°C) so the batter bakes evenly from edge to center. Pour the batter into the pan and spread it evenly with a spatula. Bake until a toothpick tests cleanly and the center springs back lightly when touched—usually 25 to 30 minutes depending on your oven and pan depth. If the edges look a touch brown before the center is set, cover loosely with foil to prevent over-browning and to help the center finish cooking. Cool the bars completely before glazing to prevent the glaze from melting or sliding off. Best Recipe Book suggests resisting the urge to cut into the bars while they’re still warm; waiting ensures a cleaner slice and better texture.
If you’re doubling the recipe for a larger sheet pan, adjust the bake time by about 5–8 minutes and monitor closely after the 25-minute mark. A middle rack position promotes even heat distribution, which helps avoid undercooked centers or overly dry edges. For a deeper, intensified flavor, you can substitute half of the pumpkin puree with a roasted squash puree, keeping the moisture in balance with the flour and sugar.
Finishing touches: glaze and storage
A silky cream cheese glaze is the classic finish that elevates pumpkin bars from home-baked to bakery-inspired. Beat cream cheese, butter, and powdered sugar until smooth, then add vanilla and a pinch of salt. If the glaze is too thick, thin with a teaspoon of milk or water and whisk until spreadable. Spread the glaze in a thick, even layer once the bars are completely cooled. For a professional look, chill the glazed bars briefly so the glaze sets with a glossy finish. Slice only after the glaze firms up to avoid smearing.
Storage matters too. Keep pumpkin bars covered in the refrigerator for up to 4–5 days; for longer storage, freeze individual slices wrapped tightly for up to 2–3 months. Thaw in the refrigerator overnight before serving. The glaze may harden slightly when cold; allow 15–20 minutes at room temperature to soften before serving. If you’re serving them at room temperature, a light chill in the fridge can help maintain cut edges when transporting to gatherings.
Note: Pumpkin bars can also be made a day ahead—the flavors meld more deeply after a night in the fridge. Bring them to room temperature before slicing for the neatest presentation. Best Recipe Book’s testing shows that a proper glaze thickness and a fully cooled base are the two biggest factors in achieving clean, attractive slices.
Troubleshooting common issues
If your pumpkin bars crack on top or appear dry around the edges, you likely baked too long or used too much flour. Re-check your flour measurement and reduce bake time by 3–5 minutes, then test again. A dense, heavy texture usually points to overmixing or insufficient moisture; ensure you fold the batter gently and measure pumpkin puree accurately. If the glaze slides off or appears streaky, it’s often due to a warm surface or a glaze that’s too thin—cool the bars completely, then reheat the glaze or apply a thicker coat.
Rotating the pan halfway through baking can help avoid hot spots and ensure even browning. If you’re using a convection oven, reduce the temperature by 25°F and keep an eye on bake time since convection can speed up browning. For a richer flavor, you can add a touch more cinnamon or a pinch of cloves, but add gradually and taste as you go. A successful bake relies on precise timing, temperature control, and careful handling from batter to glaze.
Variations and flavor twists
Pumpkin bars are a versatile canvas. Try these easy twists to customize flavor without deviating from the core technique:
- Swirl in a cream cheese ribbon before baking for a marbled effect.
- Add chopped pecans or walnuts for crunch and nutty aroma.
- Use half white sugar, half brown sugar for deeper caramel notes and moisture.
- Mix in a teaspoon of vanilla bean paste or almond extract for contrasting aroma.
- For a dairy-free glaze, whisk coconut cream with powdered sugar and a pinch of lemon juice for brightness.
Each variation should be tested in small batches first to maintain the balance of moisture and structure. The pumpkin base combines well with bold spices, so feel free to tailor the warmth to your audience’s preferences and seasonal moods.
Serving ideas and pairings
Pumpkin bars shine with balance: pairs like caramel drizzle, whipped cream, and a pinch of flaky salt create a delightful contrast. For coffee or tea gatherings, serve in squares with a light dusting of cinnamon. They also pair nicely with autumn fruit compotes or a simple vanilla yogurt for a tangy accompaniment. If you’d like a brighter finish, top a portion with a thin layer of citrus zest or orange glaze to lift the pumpkin flavor. When presenting to guests, cut with a sharp warm knife for clean edges, then wipe the blade between slices for presentation. This recipe makes a forgiving crowd-pleaser that holds up well in lunchboxes and dessert plates alike.
Tools & Materials
- All-purpose flour(1 1/2 cups (180 g))
- Granulated sugar(1 cup)
- Brown sugar(1/2 cup, packed)
- Ground cinnamon(1-2 tsp (adjust to taste))
- Ground nutmeg(1/4 tsp)
- Ground ginger(1/4 tsp)
- Baking powder(1/2 tsp)
- Salt(1/2 tsp)
- Pumpkin puree(1 1/2 cups (340-360 g))
- Eggs(2 large)
- Unsalted butter(6 tbsp, melted)
- Cream cheese(8 oz (226 g))
- Powdered sugar(2 cups)
- Vanilla extract(1 tsp)
- Parchment paper(For lining 9x13 pan)
Steps
Estimated time: 60-75 minutes total
- 1
Preheat and prep the pan
Preheat the oven to 350°F (177°C). Grease a 9x13 inch pan or line with parchment. This ensures easy release and even baking.
Tip: Line with parchment for clean lifting; avoid sticking and clean edges. - 2
Whisk dry ingredients
In a bowl, whisk flour, baking powder, salt, and spices until evenly distributed. This builds an even crumb and prevents clumps in the batter.
Tip: Whisk thoroughly to prevent pockets of spice or flour after mixing wet ingredients. - 3
Whisk wet ingredients
In a separate bowl, blend pumpkin puree with eggs and melted butter until smooth, then whisk in sugars until fully integrated.
Tip: Make sure the pumpkin is smooth to avoid chunks in the final bars. - 4
Combine wet and dry
Fold the wet mixture into the dry ingredients just until combined. Do not overmix to keep the bars tender and light.
Tip: A few streaks of dry flour are okay; overmixing will toughen the crumb. - 5
Bake until set
Pour batter into the prepared pan and bake 25–30 minutes, until the center springs back and edges are set.
Tip: Use middle rack and test with a toothpick; remove when a few crumbs cling to the toothpick for moist bars. - 6
Cool and glaze
Cool completely, then whip cream cheese glaze and spread evenly. Chill briefly for a glossy finish before slicing.
Tip: Let glaze firm up in the fridge for a cleaner cut and better sheen.
People Also Ask
Can I freeze pumpkin bars?
Yes. Freeze individual slices wrapped tightly; thaw in the fridge. They hold their shape well when reheated briefly in a low oven.
Yes. Freeze slices individually; thaw in the fridge and rewarm briefly if you want a warm finish.
Can I make pumpkin bars gluten-free?
Yes. Use a 1:1 gluten-free flour blend and reduce baking powder slightly to keep the bars from spreading. Texture may be slightly different but still tender.
Yes, with a 1:1 gluten-free flour blend; expect a slightly different texture but still tasty.
What can I substitute for pumpkin puree?
Roasted squash puree works well as a substitute. Use the same quantity as pumpkin puree and adjust spices to taste.
Roasted squash puree works as a substitute; keep the same amount and adjust spices.
Why are my pumpkin bars crumbly?
Often due to too much flour or overmixing. Weigh flour and mix just until combined to keep a tender crumb.
Crumbly bars usually mean too much flour or overmixing; weigh flour and mix gently.
How long do pumpkin bars last in the fridge?
Stored in an airtight container, pumpkin bars last about 4–5 days in the fridge. For longer storage, freeze slices.
They last about 4–5 days in the fridge; freeze for longer storage.
Can I bake these in a different pan size?
Yes, but adjust bake time. For a shallower cake, use a larger pan and monitor for doneness.
You can bake in a different pan; expect faster baking in a shallower layer.
Watch Video
Key Takeaways
- Measure ingredients precisely for consistent texture.
- Balance pumpkin, flour, and spices for a tender crumb.
- Cool completely before glazing for clean slices.
- Store properly to maintain moisture and flavor.