The Ultimate Coffee Cake Recipe: Cinnamon Swirl Guide
Learn a dependable recipe for coffee cakes featuring a tender crumb, cinnamon swirl, and a bright vanilla glaze. This step-by-step guide covers batter, swirl, bake times, and practical variations for dairy-free and gluten-free options.

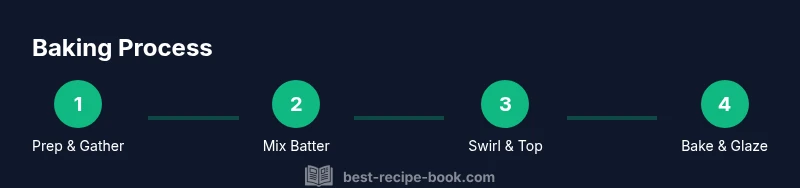
By the end, you'll bake a tender coffee cake from scratch with a cinnamon swirl and a light vanilla glaze. This guide covers batter prep, swirl integration, pan setup, and glaze finishing. You’ll need common pantry ingredients, a 9x13 pan, an oven preheated to 350°F (175°C), and standard mixing tools. Ready to bake a crowd-pleasing coffee cake for weekends or gatherings?
What is coffee cake and why home bakers love it
Coffee cake is a softly sweet loaf or sheet cake designed to pair with coffee or tea, not because of coffee flavor itself, but for its crumb and texture. It often features a cinnamon swirl and a butter-rich crumb, with a glaze or streusel that adds a delicate crunch. The note-worthy quality of a good coffee cake is its tender, moist interior and a light, slightly aromatic crumb that remains moist for a day or two. According to Best Recipe Book, a well-tested recipe for coffee cakes emphasizes balance between a airy crumb and a rich, slightly sweet topping. This makes it a reliable choice for weekend breakfast, brunches, or casual dessert. The focus is on approachable technique plus forgiving results for home bakers with standard pantry staples.
Core ingredients and substitutions
A classic recipe for coffee cakes relies on common baking ingredients, but you can tailor it for dietary needs or pantry limitations. The base typically includes flour, sugar, butter, eggs, milk, and a leavening combination (baking powder and a pinch of baking soda). The cinnamon swirl is created by mixing cinnamon with sugar and a touch of melted butter, creating a merry ribbon through the batter. For dairy-free options, substitute plant-based butter and dairy-free milk; for gluten-free versions, use a proven GF flour blend with xanthan gum. Optional add-ins like chopped nuts or dried fruit can elevate texture and flavor, while lemon zest or vanilla extract brighten the crumb. In all cases, measure ingredients precisely for consistent results and a tender crumb that remains moist and flavorful.
Equipment and pantry prep
Before you start, assemble essential tools and pre-check your pantry. You’ll want a 9x13 inch baking pan lined with parchment for easy removal, a couple of mixing bowls, a whisk, a wooden spoon or spatula, a rubber spatula, and a cooling rack. Having an oven thermometer helps ensure accuracy beyond the dial on your oven. Gather dry ingredients in one bowl and wet ingredients in another, plus a prepared cinnamon-sugar swirl and streusel topping. Setting out these items in advance reduces last-minute scrambling and improves your workflow, helping you achieve a consistent, bakery-like result in your own kitchen.
Batter basics: achieving a tender crumb
The batter forms the foundation of a great coffee cake. Start by whisking dry ingredients (flour, sugar, baking powder, salt) to evenly distribute leavening and add-ins. Cream softened butter with sugar until light and fluffy, then beat in eggs one at a time before alternating additions of milk and flour. Do not overmix once the flour is added; mix just until the batter comes together. The goal is a batter that holds air while remaining supple and not greasy. A gentle fold-in of a little yogurt or sour cream can enhance moisture and tenderness without making the crumb heavy, which is a hallmark of well-made coffee cakes.
Cinnamon swirl and streusel topping technique
Create a cinnamon swirl by whisking cinnamon with sugar and a small amount of melted butter. The swirl should be thick enough to ribbon through the batter but soft enough to swirl easily. For the streusel topping, combine flour, sugar, butter, and optional nuts or oats until the mixture resembles coarse crumbs. The crumb should be sizable enough to provide texture but not so large that it weighs down the cake. When layering, drizzle a portion of batter into the pan, spoon swirls across, then dollop more batter and swirl again. Finish with streusel on top so the cake bakes with a crunchy, caramelized crust.
Baking times, temperatures, and doneness cues
Preheat to 350°F (175°C) and bake until the cake is golden and a toothpick inserted near the center comes out with a few moist crumbs. Expect 30-40 minutes for a standard 9x13 pan, though exact times depend on your oven and pan material. Begin checking at the 28-minute mark and rotate the pan halfway if your oven heats unevenly. Don’t overbake, or the crumb can dry out. Let the cake rest briefly after removal from the oven before glazing, as a short rest enables the crumb to set and enhances cutting ease.
Variations: dairy-free, gluten-free, and vegan options
If you need dairy-free, substitute butter with a neutral-tasting margarine or plant-based butter and use dairy-free milk. For gluten-free bakers, use a trusted gluten-free flour blend designed for cakes, and consider adding a tablespoon of almond or tapioca starch to improve texture. For vegan adaptations, replace eggs with a flaxseed or chia egg substitute and use plant-based milk and butter substitutes. Each variation may change crumb density slightly, so test and adjust by adding a touch more liquid or flour as needed to maintain a moist, tender crumb.
Lemon glaze and finishing touches
A simple lemon glaze brightens the coffee cake and adds a glossy finish. Whisk powdered sugar with a splash of lemon juice and a pinch of salt until smooth. Drizzle the glaze over the cooled cake in a thin, even layer; let it set for a few minutes before slicing. If lemon isn’t desired, a vanilla glaze or a light coffee-flavored glaze are also delicious options for finishing. Serve slices warm or at room temperature, with coffee, tea, or milk for a comforting treat.
Storing, freezing, and reheating for best texture
Store coffee cake in a parchment-lined container at room temperature for up to 3 days or refrigerate for up to 5 days. To freeze, wrap slices tightly in plastic and aluminum foil, or freeze the whole cake in a sealed bag for up to 2 months. Reheat slices gently in the microwave or warm whole cake briefly in a low oven to restore the aroma and softness. To preserve the crumb’s moisture, avoid storing the cake in sealed plastic alone, which can trap moisture and lead to a soggy crust. Proper cooling, storage, and gentle reheating keep the cake tasting fresh for days.
Troubleshooting common issues and tips
If the center remains wet, your oven may be running cool or the pan was too deep. Check the oven with a thermometer and consider baking with a metal pan for even heat distribution. If the top browns too quickly, tent the cake with foil and continue baking. For a dry crumb, add a little sour cream or yogurt to the batter next time or reduce mixing time to prevent overworking the gluten. Always measure flour properly and avoid pressing it into the cup, which can lead to dense results. These adjustments help you consistently achieve a tender, flavorful coffee cake.
Tools & Materials
- 9x13 inch baking pan(Lightly grease or line with parchment)
- Parchment paper(Liner for easy removal)
- Two mixing bowls(One for dry, one for wet ingredients)
- Whisk and rubber spatula(For mixing and folding)
- Measuring cups and spoons(Accurate flour, sugar, liquids)
- Electric mixer or stand mixer(Cream butter and sugar until light)
- Oven thermometer(Helps verify 350°F (175°C))
- Cooling rack(Cool cake completely before glazing)
- Small saucepan(Melt butter for swirl or streusel)
- Mixer attachment: paddle(Creams butter well)
- Ingredients: flour, sugar, butter, eggs, milk, vanilla(Base needs accurate measurement)
- Ground cinnamon and optional nuts(Swirl and streusel flavor and texture)
- Lemon juice or vanilla for glaze(Flavor options for glaze)
Steps
Estimated time: 60-75 minutes
- 1
Preheat and prepare pan
Preheat the oven to 350°F (175°C). Line a 9x13 pan with parchment, or grease and flour it lightly. This step ensures clean removal and even baking.
Tip: Check the oven temperature with a thermometer to avoid underbaking or overbaking. - 2
Mix dry ingredients
Whisk flour, sugar, baking powder, and salt in a large bowl until evenly distributed. This step ensures consistent crumb and prevents dense pockets.
Tip: Sift flour if possible to lighten the batter and improve texture. - 3
Cream butter and sugar
Beat softened butter with sugar until pale and fluffy. Add eggs one at a time, then mix in vanilla and optional sour cream or yogurt for extra moisture.
Tip: Avoid overmixing after adding eggs to prevent a tough crumb. - 4
Combine wet and dry
Alternate adding dry ingredients and milk to the butter mixture, beginning and ending with dry ingredients. Stir until just combined.
Tip: Fold in a spoonful of batter to loosen the mixture before fully combining if it looks stiff. - 5
Prepare cinnamon swirl
Mix cinnamon with sugar and a small amount of melted butter to form a thick paste for swirling through batter.
Tip: Keep swirl relatively thick for distinct ribbons; too thin will vanish during baking. - 6
Assemble layers
Spread a third of the batter into the pan, drizzle with swirl, then add more batter and swirl again. Finish with streusel on top.
Tip: Aim for an even layer of batter across the pan to prevent thick pockets. - 7
Bake and check for doneness
Bake 30-40 minutes, until the top is golden and a toothpick comes out with a few moist crumbs. Rotate pan halfway if your oven heats unevenly.
Tip: If the top browns too quickly, tent with foil to prevent over-browning. - 8
Cool and glaze
Let the cake cool on a rack for 15-20 minutes, then drizzle with lemon or vanilla glaze. Wait until the cake is fully cooled to set the glaze properly.
Tip: Glaze while cake is warm but not hot to help it adhere and set nicely.
People Also Ask
What is coffee cake, and how does it differ from a regular cake?
Coffee cake is a tender, moist cake designed to be enjoyed with coffee. It typically features a cinnamon swirl and a crumbly streusel topping, rather than a heavy frosting. It’s not primarily about coffee flavor, but about texture and comforting, sliceable portions.
Coffee cake is a tender, moist cake meant to be enjoyed with coffee, usually with a cinnamon swirl and crumble topping instead of heavy frosting.
Can I make this recipe dairy-free or gluten-free?
Yes. Use plant-based butter and milk for dairy-free options, and a trusted gluten-free flour blend with xanthan gum for gluten-free results. You may need to adjust liquids slightly to maintain moisture.
You can adapt the recipe with dairy-free milks and butters, and use a gluten-free flour blend to keep the texture light.
How should I store coffee cake for freshness?
Store at room temperature in an airtight container for up to 3 days. For longer storage, refrigerate up to 5 days or freeze slices or the whole cake for up to 2 months. Bring to room temperature before serving for best texture.
Keep it in an airtight container at room temp for a few days, or refrigerate or freeze for longer. Bring to room temperature before serving.
Can I bake this in a different pan size?
Yes, you can adapt to a different pan size, but baking times will change. If using a smaller pan, expect a taller cake and check doneness earlier. If using a larger pan, the cake will bake faster and may be thinner.
You can use another pan size, just keep an eye on doneness and adjust time accordingly.
What are common mistakes and how can I avoid them?
Avoid overmixing the batter after adding flour to prevent a dense crumb. Ensure butter and sugar are creamed properly for lightness. Use room-temperature ingredients to help emulsify the batter. Don’t skip cooling before glazing to prevent runny glaze.
Don’t overmix, use room-temperature ingredients, and let it cool before glazing for the best texture.
Is there a vegan glaze option?
A vegan glaze can be made with powdered sugar and a splash of non-dairy milk or lemon juice. Adjust sweetness to taste and test the glaze consistency before finishing the cake.
Yes, you can make a vegan glaze with powdered sugar and non-dairy milk or lemon juice.
Watch Video
Key Takeaways
- Follow precise measurements for consistent texture
- Swirl adds aroma and visual appeal without overpowering batter
- Creaming butter and sugar properly yields a tender crumb
- Glaze finish enhances sweetness and moisture
- Adaptations keep results consistent across dairy-free and GF needs