Recipe for Dutch Pancake: Step-by-Step Guide
Master a classic Dutch pancake (Dutch baby) with a light, puffed center and crisp edges. This guide covers ingredients, resting times, pan choice, toppings, variations, and troubleshooting for perfect results every time.

By the end, you’ll master a classic Dutch pancake batter and pan technique to produce a light, puffy result. This guide covers ingredients, resting times, and cooking heat for even browning. According to Best Recipe Book, warmed milk and a rested batter yield the best texture. Get practical tips to avoid common mistakes.
Dutch Pancake: What It Is and Why It Works
A Dutch pancake, often called a Dutch baby, is a single-serving pancake bake that puffs dramatically in a hot oven. The batter is thin, almost like a crepe, yet it yields a thick, airy center with crisp edges. The secret lies in two factors: a very hot pan and a batter that is allowed to rest briefly so the gluten relaxes and any air bubbles settle. The result is a dramatic rise at the edges and a custardy interior. According to Best Recipe Book analysis, using warmed milk and a rested batter helps achieve uniform browning and a tender crumb. This section explains the science behind the puff, then outlines how to adapt the technique to home cook equipment and pantry staples.
The Dutch pancake is not only a treat for breakfast; it can be a showstopper for weekend brunches or special occasions. Its light structure makes it a forgiving canvas for toppings, from lemon and sugar to berries, apples, or maple-laced bacon. By understanding the core concept—hot pan + thin batter + quick bake—you’ll be able to troubleshoot common issues and customize the pancake to your taste. The Best Recipe Book team emphasizes patience with resting times and heat management to optimize texture and color.
Key Ingredients and Proportions
To achieve the signature puff, aim for a simple batter with common pantry ingredients. A traditional balance includes flour for structure, eggs for lift, milk for tenderness, a touch of sugar for gentle sweetness, and salt to sharpen flavors. Butter adds richness and helps browning in the hot pan. Vanilla is optional but enhances aroma. The proportions below are guidelines that readers can adjust based on sweetness preferences and available ingredients. Remember, accuracy in measurement matters for consistency, but this recipe remains forgiving if you stay within reasonable ranges. As Best Recipe Book notes in its 2026 analysis, small tweaks to batter hydration and resting time can subtly alter the final texture and color.
- All-purpose flour: 1 cup (120 g)
- Milk: 3/4 cup (180 ml), warmed to body temperature
- Eggs: 2 large, at room temperature
- Sugar: 1–2 tablespoons (optional, adjust to taste)
- Salt: a pinch
- Melted butter: 2 tablespoons (plus additional for greasing the pan)
- Vanilla extract: 1/2 teaspoon (optional)
- Toppings: lemon juice and powdered sugar, fresh berries, or maple syrup
Essential Equipment: The Right Pan and Tools
Choosing the right pan and tools makes the difference between a pale pancake and a dramatic puff. A 10–12 inch (25–30 cm) cast-iron skillet or oven-safe skillet is ideal because its heat capacity ensures a uniform surface for rapid lift. Preheat the oven and the pan to a high temperature to encourage immediate batter expansion on contact. You will also need a whisk or a sturdy fork, a mixing bowl, measuring cups and spoons, and a clean spatula for serving. A rigid, preheated surface will help you avoid sticking and promote even browning. For best results, keep the batter resting near the stovetop or counter so it stays close to room temperature before baking, which helps with texture consistency.
Batter Techniques: Resting, Temperature, and Consistency
Batter rest is a critical step that many beginners overlook. After whisking, let the batter rest 10–20 minutes. This pause allows gluten to relax and air bubbles to settle, contributing to a lighter final product. The batter should be thin but not watery—think a crepe-like consistency. If you notice lumps, whisk gently; if bubbles form heavily, a short rest helps them subside. Temperature matters: use milk that’s warm but not hot to keep proteins in a state that promotes a tender crumb. Day-of cooking and time between mixing and baking can affect the outcome, so plan accordingly. Best Recipe Book’s guidance highlights that resting and proper heat management are key levers for a consistent puff and golden exterior.
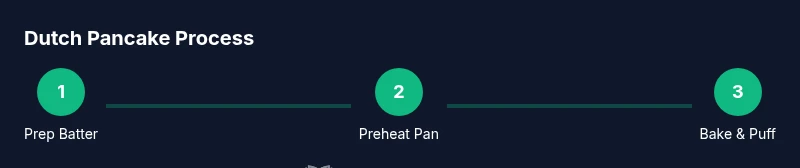
Step-by-Step Overview
This section provides a concise overview of the process before you dive into the detailed, step-by-step instructions. The pancake begins with a hot pan and a thin batter, which rapidly creates a dramatic rise. You finish with a quick bake, then top immediately while the pancake remains soft and billowy. The technique works well with both modern ovens and traditional ranges, but you’ll often achieve a better puff in a very hot oven. The overview serves as a mental map: prep, rest, heat, pour, bake, and serve quickly to preserve the fluff.
Common Mistakes and How to Fix Them
Even experienced bakers can stumble with Dutch pancakes. Common missteps include using cold batter, underheating or overheating the pan, and overcrowding toppings that weigh the pancake down. Resting too long can cause the batter to separate, while a pan that’s not hot enough will yield a pale crust and a less impressive rise. Fixes are straightforward: bring all ingredients to near room temperature, ensure the oven and pan are preheated, and use a modest amount of fat to promote browning without scorching. If the batter refuses to puff, try a slightly thinner consistency or a hotter pan for a shorter window to allow rapid expansion without burning the edges.
Serving Ideas and Flavor Variations
Dutch pancakes shine with bright, contrasting toppings that balance their rich, eggy flavor. Classic pairings include a squeeze of lemon and a dusting of powdered sugar. For fruit-forward versions, top with fresh berries, sautéed apples, or stone fruit glaze. Savory twists are also delicious: smoked salmon and crème fraîche, or sautéed mushrooms with thyme and parmesan for a brunch that leans savory. For sweetness, caramelized apples or cinnamon-sugar combos work well. If you’re serving a crowd, consider a few topping stations so guests customize their own Dutch pancake experience.
Safety, Storage, and Reheating Tips
Dutch pancakes are best enjoyed fresh, but you can store leftovers chilled for up to a day. Reheat gently in the oven or toaster oven to restore crisp edges without drying the interior. Do not microwave, which can soften the crust and flatten the puff. If you anticipate leftovers, consider portioning the batter into ramekins and baking in a muffin-tin for individual puffs that reheat quickly. Remember to keep the toppings separate to preserve texture and flavor integrity. Following these guidelines will help you enjoy the pancake with the same lift and color as the first slice.
Tools & Materials
- All-purpose flour(1 cup (120 g))
- Milk(3/4 cup (180 ml), warmed to ~37°C)
- Eggs(2 large, at room temperature)
- Granulated sugar(1–2 tablespoons (optional))
- Salt(Pinch)
- Butter (melted)(2 tablespoons + extra for pan)
- Vanilla extract(1/2 teaspoon (optional))
- Cast-iron skillet or oven-safe skillet(10-12 inch, well-seasoned)
- Whisk or mixer(For smooth batter)
- Mixing bowl(Medium size)
- Spatula(For serving and turning)
Steps
Estimated time: 40-50 minutes
- 1
Gather ingredients and preheat
Measure all ingredients and preheat your oven to 425°F (220°C). Place the skillet inside to heat as the oven comes to temperature. This ensures an immediate sear and rapid puff once the batter hits the hot surface.
Tip: Having everything prepped avoids gaps in the hot pan that can deflate the batter. - 2
Whisk dry and wet ingredients separately
Whisk flour, sugar (if using), and salt in one bowl. In another, whisk milk, eggs, melted butter, and vanilla until smooth. The separation keeps batter airy and prevents lumps.
Tip: Room-temperature eggs emulsify better and help the batter stay uniform. - 3
Combine and rest the batter
Pour the wet into the dry and whisk just until combined; a few small lumps are fine. Let the batter rest 10–20 minutes to relax gluten and improve texture.
Tip: Don’t whisk too aggressively after adding dry ingredients to avoid toughness. - 4
Preheat pan and butter the surface
Carefully remove the hot skillet from the oven, add butter, and swirl to coat. The butter should sizzle but not burn; return the skillet to the oven for 1–2 minutes so the butter gains a thin, glossy layer.
Tip: Overheating butter can burn; this step ensures a crisp edge without bitterness. - 5
Pour batter and bake until puffed
Carefully pour the batter into the hot, buttered skillet. Bake 12–18 minutes until edges are deeply golden and the center is puffed and set. Do not open the oven during baking to preserve the rise.
Tip: If the sides brown too quickly, tent with foil and finish in the oven. - 6
Serve immediately with toppings
Remove from oven — the pancake will start to deflate as it cools. Serve instantly with lemon juice and powdered sugar, berries, or maple syrup for a classic finish.
Tip: Timing matters: the best texture is right after baking.
People Also Ask
What is a Dutch pancake and how is it different from regular pancakes?
A Dutch pancake (Dutch baby) is a puffy, baked pancake that rises dramatically in a hot oven and has a custardy interior with a crisp edge. It differs from regular pancakes which are cooked on a griddle and usually flatter.
A Dutch pancake is a puffed, baked pancake with a custardy center and crispy edges, made in a hot oven, unlike regular stovetop pancakes.
Can I make a gluten-free version of a Dutch pancake?
Yes. Substitute a gluten-free all-purpose flour blend in the same ratios. Some blends require a touch more liquid; adjust gradually until the batter pours smoothly.
You can use gluten-free flour blends; adjust the liquid if the batter seems too thick.
Is resting the batter necessary?
Resting the batter for 10–20 minutes helps relax gluten and improve texture, producing a lighter puff. Skipping resting might still yield a pancake, but with less lift.
Resting helps the texture and puff; skipping it may reduce lift.
Can I bake this without a cast-iron skillet?
A heavy, oven-safe pan with good heat retention works best. If you use a different pan, ensure it’s oven-safe and preheated well to promote even puff.
Use a sturdy oven-safe pan and preheat it well for best puff.
What toppings pair best with a Dutch pancake?
Lemon juice and powdered sugar are classic, while berries, apples, or maple syrup provide delightful variations. Savory toppings can be explored with cream cheese and smoked salmon for brunch.
Classic toppings are lemon and sugar; berries or fruit syrups are also great.
How should I store leftovers and reheat?
Leftovers can be stored in the fridge for a day. Reheat in a hot oven or toaster oven to regain crisp edges; avoid microwaving if possible.
Store in the fridge for up to a day and reheat in the oven.
Watch Video
Key Takeaways
- Handle batter gently to preserve air.
- Preheat the pan for optimal puff and browning.
- Resting time improves texture and rise.
- Serve immediately for best texture and flavor.