Recipe for Homemade Pancakes: Step-by-Step Guide
Learn a reliable recipe for homemade pancakes with clear steps, substitutions, and tips from Best Recipe Book. Perfect batter for fluffy, golden stacks every time.

With this guide you’ll master a recipe for homemade pancakes using simple pantry ingredients. You’ll learn batter ratios, techniques to avoid a dense texture, and practical heat control to cook evenly. We’ll cover substitutions, timing, and topping ideas to yield fluffy, golden stacks every time, plus tips from Best Recipe Book to ensure reliable results.
Mastering the Craft: A Reliable Recipe for Homemade Pancakes
According to Best Recipe Book, the path to fluffy, restaurant-quality pancakes starts with a balanced batter and precise technique. This guide walks you through the essential ratios, practical tips, and substitutions that keep results consistent across mornings, weekend brunches, and holiday celebrations. You’ll learn how to measure ingredients quickly, mix with confidence, and cook on the right heat so each pancake cooks evenly and browns beautifully. By following these steps, you’ll transform ordinary pantry staples into comforting stacks that please both kids and grown-ups. Whether you’re new to baking or revisiting a classic, this method emphasizes clarity, repeatability, and delicious results. The recommendations here reflect the Best Recipe Book approach: practical, fail-safe instructions that home cooks can trust from the first pancake to the last.
The pancake batter is fundamentally a balance between dry and wet ingredients, leavening, and moisture. Too much flour makes a dense, heavy cake; too little liquid yields a thin, fragile result. The secret lies in measuring with confidence, letting the batter hydrate briefly, and cooking on a controlled heat. In this guide, you’ll see how to adapt the formula for different flavors or dietary needs while preserving the texture that makes pancakes universally loved. As you read, keep in mind that practical technique and consistent timing are more important than any single ingredient. The goal is simple: light, airy pancakes that brown evenly and stay tender on the inside.
Essential ingredients and substitutions
A reliable pancake recipe starts with straightforward ingredients. Here’s a practical base you can trust, plus substitutions for dietary needs or pantry gaps:
- All-purpose flour: 1 cup (120 g) crowns the batter with structure. For a lighter crumb, use 3/4 cup all-purpose flour plus 1/4 cup whole wheat or almond flour, though texture will shift slightly.
- Milk: 1 cup (240 ml). Any milk works—dairy, soy, almond, or oat. Unsweetened varieties give the cleanest flavor.
- Eggs: 1 large. Eggs add structure and tenderness; for vegan options, use a flax or chia egg substitute.
- Sugar: 1–2 tablespoons. Adjust to taste; for savory pancakes omit sugar.
- Baking powder: 2 teaspoons. This leavening aid creates lift and a fluffy interior. If you’re using a different leavener, adjust accordingly.
- Salt: 1/2 teaspoon. Enhances flavor and balances sweetness.
- Butter or oil: 2 tablespoons melted into the batter for richness, plus a light greasing of the pan.
- Vanilla extract: 1/2 teaspoon (optional) for aroma and depth.
- Optional mix-ins: blueberries, chocolate chips, or mashed banana to customize your batter. Add at the end with a gentle fold.
Substitutions and tips:
- For dairy-free batter, use plant-based milk and a neutral oil in place of butter.
- To boost protein or fiber, add a tablespoon of ground flaxseed or a tablespoon of rye flour at the dry stage. Expect a slightly denser pancake.
- Resting the batter helps hydrate the flour and relax gluten, improving texture and keeping pancakes tender. If you’re short on time, a 5-minute rest still helps.
Equipment and prep basics
Having the right tools makes pancake making smoother and faster. Gather these essentials before you begin:
- Mixing bowls: one for dry ingredients, one for wet ingredients.
- Whisk or fork: for quick, thorough mixing without overworking the batter.
- Measuring cups and spoons: to ensure accurate ratios.
- Spatula: a wide, flexible spatula helps flip pancakes cleanly.
- Nonstick skillet or griddle: 10–12 inches is ideal for uniform cooking.
- Teflon-safe brush or paper towels: to lightly grease the pan.
- Optional: cooling rack or plate warmed in a low oven to keep pancakes warm between batches.
Prep steps:
- Room temperature ingredients mix more evenly; if you’ve left ingredients in the fridge, allow them to come to room temperature for a few minutes.
- Preheat your pan on medium heat; you want a surface that is hot enough to sizzle slightly when batter touches it but not so hot it burns the exterior before the inside cooks.
Mixing technique and avoiding lumps
The goal when combining wet and dry ingredients is to create a cohesive batter without overworking gluten. Start by whisking dry ingredients in a bowl until evenly distributed. In a separate bowl, whisk milk, eggs, melted butter (or oil), and vanilla until the mixture is smooth. Pour the wet into the dry and stir just until the flour disappears, leaving a few small lumps
- Do not overmix: overworked batter becomes tough and dense.
- Gentle mixing produces tender pancakes with a light crumb.
- If you see dry pockets, add a tablespoon or two of milk to loosen the batter slightly.
This approach yields pancakes with a uniform texture and an even rise during cooking. Resting the batter for a few minutes also helps hydration, improving the final result. The goal is a batter that pours easily but doesn’t run, with enough body to hold shape on the pan.
Tips:
- Use a whisk or a wide, flat spatula to bring the batter together without breaking down the air you’ve just built in with your wet ingredients.
Resting the batter and why it helps
Resting the batter is a simple step with big returns. A 5–10 minute rest allows flour particles to hydrate fully and gluten strands to relax, producing pancakes that are tender rather than chewy. During this short window you can set up toppings, preheat your pan, and measure out any add-ins you plan to fold in. If you’re short on time, even a brief 3-minute rest can improve texture noticeably.
During rest, starch granules swell, which helps batter stability and rise. The rest also gives air bubbles time to settle, reducing the likelihood of large holes in the final pancake. If you want extra flavor, you can whisk in a small amount of melted butter at this stage or fold in berries or chocolate chips after resting for a minute or two.
If you’re meal-prepping, you can refrigerate the rested batter for up to 24 hours; bring it back to room temperature and re-stir gently before cooking.
Cooking method: heat, pan, and flipping
Heating control is the heartbeat of pancake success. Preheat a nonstick skillet over medium heat and test the surface with a few drops of water; they should dance and evaporate quickly. Lightly grease with a small amount of butter or oil—too much fat can fry the pancakes and create greasy edges.
- Pour batter in 1/4 cup scoops for uniform size. If you want larger or smaller pancakes, adjust the scoop size accordingly.
- Watch for bubbles forming on the surface and edges starting to set before flipping. The underside should be golden brown and the pancake should release easily from the pan with a gentle flip.
- Flip once; cook until the second side is golden and the center is cooked through. Avoid pressing the pancakes down, which can squeeze out air and make them dense.
Tip: If pancakes brown too quickly, reduce the heat a notch and let them cook a little longer for even doneness. A gentle, steady heat yields the most reliable texture across the stack.
Flavor ideas and toppings
Pancakes shine with toppings and mix-ins. Classic combos are maple syrup with a pat of butter and fresh fruit; you can also dress them with yogurt, whipped cream, or a sprinkle of cinnamon for warmth. For a celebratory twist, try lemon zest and blueberries folded into the batter, or white chocolate chips for a dessert-like treat.
Savory options include a thin spread of ricotta and a drizzle of olive oil, or a fried egg and avocado on top for a hearty breakfast sandwich. If you’re avoiding added sugar, pair with unsweetened yogurt and a berry compote.
Experiment with fruit compotes, fruit syrups, or a dusting of powdered sugar. The key is to balance sweetness with tang and to ensure the pancake flavor remains the star of the plate.
Common mistakes and fixes
Even experienced cooks encounter common pancake hiccups. Here are frequent issues and straightforward fixes:
- Dense or flat pancakes: ensure you use fresh baking powder, avoid overmixing, and maintain gentle heat.
- Burnt edges: reduce heat to medium and monitor the pan’s temperature; cooking too hot is a frequent culprit.
- Uneven cooking: spread batter evenly and avoid overcrowding the pan; cook in batches if needed.
- Sticking to the pan: use a proper nonstick surface and a light coat of fat.
By adjusting heat, mixing, and resting, you’ll minimize these pitfalls and consistently produce light, fluffy pancakes with evenly browned surfaces.
Make-ahead, storage, and reheating
Pancakes are best fresh, but you can prep ahead to speed up weekend mornings. Cooked pancakes freeze well; store in an airtight container or freezer bag for up to 1 month. Reheat in a warm skillet, toaster, or microwave in short 15–20 second bursts, checking frequently to avoid drying them out. If you’re batch cooking, keep a warm oven at 200°F (95°C) and stack pancakes on a rack to prevent sogginess. For a quick revival of texture, add a tiny amount of milk while reheating and refresh with a light pat of butter.
If you plan to reheat smaller portions, you can separate the toppings and add them after reheating so the pancakes stay crisp on the outside and tender inside. This approach keeps flavors bright and textures pleasant, even after storage.
Tools & Materials
- All-purpose flour(1 cup (120 g))
- Milk (dairy or non-dairy)(1 cup (240 ml))
- Eggs(1 large)
- Granulated sugar(1–2 tablespoons)
- Baking powder(2 teaspoons)
- Salt(1/2 teaspoon)
- Butter or oil(2 tablespoons melted into batter)
- Vanilla extract(1/2 teaspoon (optional))
- Mixing bowls(Medium size (one for dry, one for wet))
- Whisk or spoon(For mixing)
- Measuring cups/spoons(For accuracy)
- Nonstick skillet or griddle(10–12 inches)
- Spatula(Flat, flexible)
Steps
Estimated time: 25-40 minutes
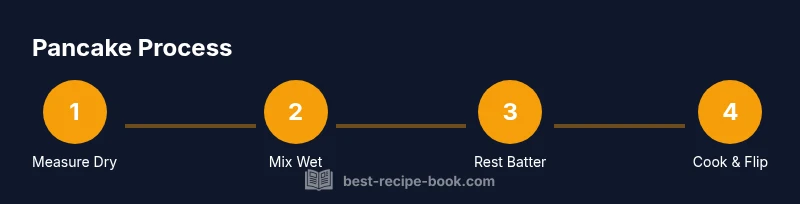
- 1
Measure dry ingredients
In a medium bowl, whisk together flour, sugar, baking powder, and salt until evenly distributed. This ensures consistent leavening and sweetness in every pancake.
Tip: Sift dry ingredients to break up lumps. - 2
Whisk wet ingredients separately
In another bowl, whisk milk, eggs, melted butter or oil, and vanilla until smooth. This helps the liquids emulsify with the dry ingredients later.
Tip: Warm milk slightly for smoother mixing. - 3
Combine wet and dry until just incorporated
Pour the wet into the dry and stir gently until most flour is hydrated. Leave a few small lumps for a tender crumb.
Tip: Do not overmix; excess gluten makes pancakes dense. - 4
Rest the batter
Let the batter rest for 5–10 minutes to hydrate flour and relax gluten, improving texture.
Tip: Resting also hydrates add-ins if used. - 5
Preheat the pan and grease lightly
Preheat a nonstick skillet over medium heat until a drop of water dances on the surface. Lightly grease with butter or oil, wiping away excess.
Tip: If the pan is too hot, pancakes will burn before cooking through. - 6
Cook and flip pancakes
Scoop 1/4 cup batter per pancake; wait for bubbles to form and edges to look set, then flip and cook until golden on the second side.
Tip: If batter is thick, tilt the pan slightly to spread evenly.
People Also Ask
What’s the best ratio for pancake batter?
A simple starting ratio is 1 cup flour to 1 cup milk with 1 egg. Adjust for thickness and sweetness as needed, aiming for a pourable but not runny consistency.
Use a 1-to-1 flour-to-liquid ratio and tweak for thickness.
Can I make pancakes with dairy-free milk?
Yes. Dairy-free milk works well; unsweetened varieties yield the cleanest flavor. You may need a touch more flour if the batter seems too thin.
Yes, dairy-free milk works; adjust thickness as needed.
Should I let the batter rest?
Resting hydrates the flour and relaxes gluten, leading to lighter pancakes. A 5–10 minute rest is ideal.
Let the batter rest a few minutes for better texture.
Why are my pancakes sticking or burning?
Ensure the pan is properly heated and greased lightly. Cook over medium heat to prevent scorching and sticking.
Use moderate heat and a well-preheated pan.
Can I freeze pancake batter or cooked pancakes?
Batter freezes less reliably; prefer freezing cooked pancakes and reheating later for best texture.
Freeze cooked pancakes, reheat gently when ready.
What toppings work best with pancakes?
Maple syrup with butter and fresh berries is classic. For variety, try yogurt, honey, or a fruit compote.
Maple syrup and berries are a great combo.
Watch Video
Key Takeaways
- Measure accurately to ensure consistent texture.
- Rest batter to improve tenderness and rise.
- Cook on moderate heat for even browning.
- Flip when bubbles form for light, airy pancakes.
- Customize with toppings for variety.