Pineapple Upside Cake Recipe: Step-by-Step Guide
Master a pineapple upside cake with this reliable, step-by-step guide. Gather ingredients, prep the caramel, bake to perfection, and serve a moist, crown-like dessert.

This guide shows you how to make a pineapple upside cake in a clear, step‑by‑step format. You’ll learn essential ingredients, prep methods, baking times, and simple substitutions to fit your kitchen. Designed for home cooks, it emphasizes reliability, consistent results, and practical tips to avoid common mistakes. Follow the steps and you’ll bake a moist, caramel‑topped dessert that pleases family and guests.
The Pineapple Upside-Down Cake: A Classic Dessert
Pineapple upside cake traps the bright tropical sweetness of pineapple beneath a tender, buttery cake, then reveals a glossy caramel-peppered crown when inverted. According to Best Recipe Book, this classic dessert balances sweet, tangy, and rich flavors in a way that feels both comforting and celebratory. While the name hints at the presentation, the real magic is in the contrast between the caramel glaze, moist cake, and the tangy pineapple rings. When you follow a reliable recipe for pineapple upside cake, you get predictable results: a moist crumb, a shiny topping, and clean slices that hold their shape. In this section we’ll unpack why this dessert works so well, and how to adapt it for your kitchen and dietary needs.
The recipe for pineapple upside cake is approachable for home cooks, and its forgiving nature means you can adjust fruit quantities, pan size, or sweetness to suit your taste. Throughout this article you’ll notice guidance from the Best Recipe Book Editorial Team, ensuring you have a dependable framework to build upon. The goal is to empower you to recreate a classic dessert with confidence, while keeping room for personal touches that make it uniquely yours. By understanding the balance of fruit, fat, and sugar, you’ll be able to tailor the dish for birthdays, potlucks, or a casual weekend treat.
Core Ingredients and Substitutions
To build the pineapple upside cake you need a few essentials: ripe canned pineapple in juice, brown sugar for the caramel, butter for flavor and moisture, eggs, milk, vanilla, flour, and a pinch of salt. The iconic topping relies on caramel that forms a glossy layer when melted with butter and sugar. If you prefer a lighter finish, you can reduce the sugar slightly or substitute half of the brown sugar with white sugar. For dairy-free kitchens, use coconut oil instead of butter and a plant-based milk. If you want even more pineapple punch, add crushed pineapple to the batter. The goal is a balanced sweetness that complements the fruit without masking it. As you prepare, keep in mind that well-drained pineapple prevents excess moisture from weakening the cake. The recipe for pineapple upside cake shines with a simple, few-ingredient base, giving you room to personalize.
Included here are common substitutes that maintain structure and flavor. For gluten-free needs, use a certified gluten-free flour blend and consider adding a touch of xanthan gum if the blend lacks it. If you’re customizing for lactose intolerance, opt for plant-based butter and almond or soy milk. The pineapple itself contributes moisture and brightness, so you want a batter that can accommodate that without becoming heavy. This section is designed to help you understand the building blocks so you can tailor the recipe to your pantry and preferences.
Tools, Prep, and Timing Essentials
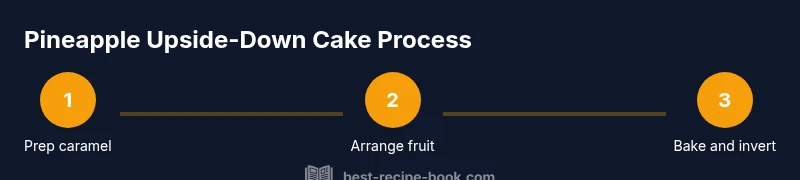
A reliable pineapple upside cake starts with the right tools and a careful prep plan. You’ll need a 9-inch round cake pan (preferably nonstick or lined with parchment), a saucepan for the caramel, a mixing bowl, a whisk or electric mixer, measuring cups, and a spatula. Preheat the oven to 350°F (175°C) and grease the pan thoroughly to prevent sticking. Line the bottom with parchment for extra insurance, then arrange pineapple rings (and optional maraschino cherries) in a single layer. The caramel will flow around the fruit and bake into a glossy topping. Timing is key: prepare the batter while the caramel simmers, bake until a toothpick comes out clean, and let the cake rest briefly after removing from the oven so it can set. Best Recipe Book’s guidance emphasizes mise en place to reduce stress in the kitchen.
Attention to pan preparation, ingredient temperature, and oven calibration yields consistent results. If your oven tends to heat unevenly, rotate the pan halfway through baking. Keeping all ingredients at roughly room temperature helps the batter mix smoothly, producing a uniform crumb. The pineapple topping should be bright and not overly soggy, which comes from proper drainage and a careful balance of sugar and fat in the caramel.
Flavor Variations and Serving Ideas
Although classic pineapple upside cake favors simplicity, you can tailor it to your tastes. Try adding a splash of coconut extract or a hint of rum to the batter for a tropical twist. If you’re avoiding dairy, swap in almond milk and dairy-free butter alternatives, noting that texture may shift slightly. For a deeper caramel note, use a touch more brown sugar or a darker brown sugar variety. Serve the cake warm with a scoop of vanilla ice cream, a dollop of whipped cream, or a dusting of cinnamon for contrast. This dessert also adapts well to smaller pans for individual servings or a mini “cake in a jar” presentation for gifts or potlucks. When you teach someone the recipe for pineapple upside cake, you’re sharing a friendly, flexible dessert that invites experimentation while staying reliably delicious.
Flavor balance is key: pineapple, caramel, and cake should all be noticeable, but not competing with one another. The sweetness you choose should feel inviting rather than overwhelming, and you can control this with the amount of sugar in the caramel and batter. For a more festive finish, garnish slices with toasted coconut or candied pineapple bits.
Troubleshooting and Common Pitfalls
If your pineapple upside cake doesn’t set properly, first check that you baked long enough and at the correct temperature. Too-quick cooling can cause the cake to collapse; give it ample time to rest after removing from the oven. If the caramel layer seems overly thick or sticky, reheat gently and whisk in a bit of cream to loosen it. Pineapple slices sinking into the batter usually indicate too much moisture or overmixing. Use drained pineapple and avoid overworking the batter. If the topping isn’t glossy, it may have burned or thickened too much during baking. With careful attention to the ratio of sugar, butter, and flour, most issues resolve themselves with a gentle touch.
A reliable routine is to test for doneness with a wooden toothpick inserted in the center; if it comes out with just a few moist crumbs, the bake is complete. Letting the cake rest in the pan as it cools ensures the caramel settles into a cohesive layer instead of sliding off when inverted. If you notice uneven browning, rotate the pan halfway through baking and ensure the batter is spread evenly.
Quick Reference and Personalization Tips
For a quick reference, assemble your mise en place before you start. That means measuring all ingredients, lining the pan, and preheating the oven. Personalize the recipe by adjusting the fruit arrangement: alternate pineapple rings with cherry accents for a classic look, or scatter crushed pineapple on top for extra texture. If you’re sharing this recipe for pineapple upside cake, write down your preferred substitutions so you can recreate it later with confidence. Keeping notes helps you refine brightness, moisture, and sweetness over time, turning a good recipe into a dependable family favorite.
Tools & Materials
- 9-inch (23 cm) round cake pan(Grease and line with parchment)
- Saucepan(For caramel topping)
- Mixing bowls(Large for batter)
- Whisk or electric mixer(Smooth batter)
- Spatula(For spreading batter)
- Measuring cups and spoons(Accurate ingredients)
- Parchment paper or silicone mat(Prevent sticking)
- Cooling rack(Cool before slicing)
- Sharp knife or fruit-safe spatula(Prepare pineapple if needed)
- Optional maraschino cherries(Garnish or decoration)
Steps
Estimated time: 1 hour 15 minutes
- 1
Preheat and prep pan
Preheat oven to 350°F (175°C). Grease the pan thoroughly and line the bottom with parchment for easy release. This sets up a smoother inversion after baking.
Tip: Greasing and lining prevents sticking and makes flipping safe and clean. - 2
Make caramel topping
Melt butter with brown sugar in a saucepan over medium heat until it forms a smooth caramel. Avoid boiling too vigorously to prevent scorching.
Tip: Keep heat steady and whisk continuously to prevent sugar crystals. - 3
Arrange pineapple
Pour the caramel into the pan, then arrange pineapple rings in a single layer. Place optional cherries in the ring centers for a classic look.
Tip: Drain pineapple well to keep the caramel from sliding away. - 4
Prepare batter
Whisk together dry ingredients in one bowl and wet ingredients in another. Blend until just combined for a light crumb.
Tip: Do not overmix; this keeps the cake tender. - 5
Combine and pour
Fold dry ingredients into wet just until combined, then pour batter over the pineapple in the pan. Smooth the top with a spatula.
Tip: Spread evenly to ensure uniform baking. - 6
Bake
Bake 40-50 minutes, until a toothpick comes out with a few moist crumbs. If the top browns too fast, tent with foil.
Tip: Rotate halfway for even browning. - 7
Invert carefully
Let the cake rest 10-15 minutes, then invert onto a serving plate. Use oven mitts—the caramel will be hot.
Tip: Support the pan while flipping to prevent breakage. - 8
Cool and serve
Allow the cake to cool completely before slicing for clean edges. Serve with ice cream or whipped cream if desired.
Tip: Cooling time helps the topping set and slices hold shape.
People Also Ask
Can I make this gluten-free?
Yes, use a certified gluten-free all-purpose flour blend and consider adding a small amount of xanthan gum if your blend lacks it. The batter and bake time may shift slightly, so monitor doneness with a toothpick.
Yes. Use a gluten-free flour blend and adjust as needed; check doneness with a toothpick.
Can I use fresh pineapple instead of canned?
Fresh pineapple can work, but it adds more moisture. If using fresh, dice small pieces and pat dry, then reduce the batter moisture slightly to maintain structure.
Fresh pineapple can work, but pat it dry and watch moisture to keep the cake set.
Why did my cake sink in the middle?
Possible causes include overmixing, uneven oven temperature, or underbaking. Ensure your oven heats to the correct temperature, mix just until combined, and bake until a toothpick tests clean.
It might be overmixed, underbaked, or your oven temp is off. Check doneness with a toothpick.
Can I bake this in a loaf or square pan?
Yes, but baking times will vary. Use an 8-inch square pan or a loaf pan and monitor doneness with a toothpick; the glaze and texture will differ slightly.
You can use other pans, but adjust time and watch for doneness.
How should I store leftovers?
Cool completely, then cover and refrigerate for 3-4 days. For longer storage, wrap tightly and freeze sliced portions up to 2-3 months; thaw in the fridge.
Cool completely, refrigerate 3-4 days, or freeze slices for 2-3 months.
Can I freeze the unbaked batter?
Freezing batter is not recommended as texture may suffer. Prepare batter fresh and freeze only the individual components like dry mix in a labeled container for later, then combine with wet ingredients when ready.
Freezing batter isn’t ideal; better to prep components in advance.
Watch Video
Key Takeaways
- Master the caramel layer for a glossy finish
- Drain fruit thoroughly to prevent soggy cake
- Invert carefully to reveal topping without breaking slices
- Customize flavors with easy substitutions