Glazed Ham Recipe: Step-by-Step Guide to a Shiny, Flavorful Finish
Discover a reliable glazed ham recipe that delivers a glossy finish and deep flavor. This how-to guide covers glaze choices, timing, safety, and practical tips for home cooks, with step-by-step instructions and variations to suit every palate.

By the end of this guide, you’ll glaze a fully cooked ham to a glossy, flavorful finish. You’ll learn how to choose the glaze, prepare the ham, apply it at the right moment, and baste for caramelization. This glazed for ham recipe emphasizes timing, temperature, and a balanced sweet-tart flavor.
Understanding glaze science and ham compatibility
Glazes rely on a balance of sweetness, acidity, and heat to cling to meat and develop caramelized color. The ham's fat renders as it heats, helping the glaze stick and form a glossy sheath. Sugars caramelize at the surface, creating that inviting shine while adding flavor. A glaze that is too thick or too acidic can slide off or burn before the ham is hot in the center. By pairing the glaze chemistry with the ham’s heat, you get even browning and a flavorful crust. According to Best Recipe Book, the best glazes combine a fond base (sugar or syrup), a tangy acid, and a touch of fat to promote adhesion. Using this knowledge, you can tailor glazes to your ham size and oven setup while keeping sugar from burning.
Choosing the right glaze for a ham
The glaze you choose sets the overall flavor profile. Classic sweet glazes use brown sugar, honey, maple, or molasses; tangy glazes emphasize citrus, vinegar, or tropical fruit juice; savory glazes lean on soy sauce, Worcestershire, or mustard for depth. For a pre-cooked ham, you want a glaze that caramelizes quickly without creating a pool of sugar that causes burning. Consider your guests' preferences and balance sweetness with acidity. Best Recipe Book's approach is to start with a simple base and build complexity in layers, so you can adjust flavors without overhauling the recipe.
Classic glaze formulas you can start with
Here are three versatile glaze formulas you can adapt. Each uses a simple base, adds a bright acidic note, and finishes with a glossy sheen. - Honey-Orange Glaze: 1/2 cup honey, 2 tablespoons orange juice, 1 tablespoon soy sauce, a pinch of grated ginger. Simmer until smooth and brush on. - Brown Sugar Mustard Glaze: 1/2 cup brown sugar, 2 tablespoons Dijon mustard, 2 tablespoons apple cider vinegar. Heat gently until thickened. - Pineapple-Ginger Glaze: 1/2 cup pineapple juice, 1/4 cup brown sugar, 1 tablespoon soy sauce, a teaspoon grated ginger. Reduce to a syrupy consistency.
Applying the glaze: timing, temperature, and technique
Preheat the oven to a moderate temperature and position the ham on a rack. Score the fat in a generous diamond pattern to expose more surface for caramelization. Brush a thin first coat to initiate adhesion, then bake and baste every 15 minutes. Reserve a final glaze layer for the last 5–10 minutes to maximize shine without burning the sugars. Use a digital thermometer to ensure the ham reaches a safe serving temperature while the glaze browns evenly.
Scoring the ham and building caramelization
Scoring the fat helps render more fat and gives the glaze more surface area to cling to. Diamonds or a crosshatch pattern work best. As the glaze cooks, watch for deep amber color developing at the edges; if the glaze darkens too quickly, cover loosely with foil to prevent burning while the interior finishes heating. The interplay of heat, sugar, and fat creates the signature caramelized crust that defines a glazed ham.
Troubleshooting common glaze issues
If your glaze looks too thin, simmer a little longer or add a small amount of cornstarch slurry to thicken. If it’s browning too fast, lower the oven heat or cover with foil for a portion of the bake. If the flavor is too sweet, add a splash of acid (vinegar or citrus) or a dash of soy sauce for balance. Always keep the glaze away from the very bottom of the pan to avoid scorching.
Storing and reusing glaze for leftovers
Leftover glaze can be cooled and stored in the refrigerator for up to several days. Reheat gently before brushing on leftovers. You can also whisk a portion into roasted vegetables or use it as a quick dipping sauce for crusty bread. If you made multiple glazes, label and refrigerate separately to preserve distinct flavors.
Glazed ham recipe variations for different palates
Adapt the glaze to suit different tastes: spicy variations with chili flakes, citrus-forward profiles with extra lemon or orange zest, or smoky tones with chipotle or smoked paprika. For a lighter option, halve the sugar and increase the acid for brightness. These variations enable you to tailor the glaze to holiday menus, weeknight dinners, or special occasions.
Safety and food-safety considerations when glazing meat
Since most hams sold for home cooking are pre-cooked, you mainly need to reheat safely and avoid drying out the meat. Keep the internal temperature at or above 140°F (60°C) when serving. Use a clean brush for glaze application to prevent cross-contamination, and wash all utensils and surfaces after contact with raw ham.
Tools & Materials
- Meat thermometer(Probe should read up to at least 160°F (71°C) to ensure safety.)
- Pastry brush or silicone basting brush(For even glaze application.)
- Small saucepan(To simmer glaze and reduce thickness.)
- Whisk(To blend glaze smoothly.)
- Baking pan with rack(Elevates ham for even heat and glaze access.)
- Aluminum foil(Tent if glaze browns too quickly.)
- Measuring cups and spoons(Accurate glaze ratios.)
- Sharp carving knife(For scoring ham fat and slicing later.)
Steps
Estimated time: 60-90 minutes
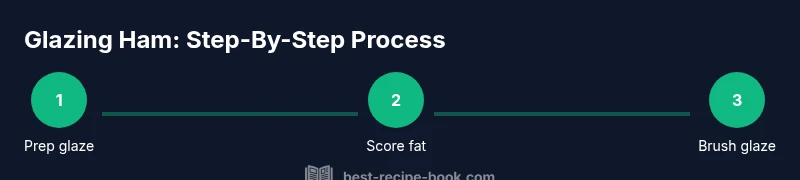
- 1
Gather ingredients and tools
Assemble all glaze ingredients and tools before starting. Having everything within reach reduces last-minute scrambles. This saves time and keeps the glaze consistent as you work.
Tip: Lay out your glaze options on a tray so you can compare flavors quickly. - 2
Score the ham fat for better caramelization
Use a sharp knife to cut shallow diagonal lines across the fat cap in a diamond pattern. Scoring helps render fat and increases surface area for the glaze to cling to. This also creates attractive, even browning.
Tip: Keep their depth shallow to avoid piercing the meat. - 3
Make the glaze and simmer until glossy
Combine glaze ingredients in a small saucepan and simmer until the mixture thickens to a syrupy consistency. Stir constantly to prevent scorching. A glossy glaze clings better and browns evenly.
Tip: Taste and adjust acidity before applying to your ham. - 4
Preheat oven and prepare the pan
Preheat to a moderate temperature and position the rack in the center. Place the ham on a rack in the pan to ensure heat circulates and the glaze can coat all surfaces.
Tip: If your oven runs hot, set it slightly lower than the target. - 5
First glaze layer and start baking
Brush a thin first coat over the scored fat and surface. This initial layer helps the glaze adhere as the ham begins to heat through. Place the pan in the oven and bake for a short period before basting.
Tip: Avoid pooling glaze at the bottom; aim for a light, even coat. - 6
Baste and build the glaze during baking
Every 15 minutes, remove the pan and baste the ham with warm glaze. This builds flavor and color while maintaining moisture. By the final pass, you should see a rich, glossy crust forming.
Tip: Keep the glaze warm between basting to prevent it from thickening too much. - 7
Finish with a final glaze and rest
Brush on a final thick layer during the last 5–10 minutes and finish under higher heat if your oven allows. Rest the ham for 10–15 minutes before slicing to let juices redistribute.
Tip: Resting makes slicing cleaner and the glaze set nicely.
People Also Ask
Should I glaze a fully cooked ham or raw ham?
Glazing is most effective on fully cooked ham to heat through while forming a glaze crust. Raw hams require longer cooking and a glaze that won’t burn before the meat is done.
Glaze a fully cooked ham to reheat and caramelize the crust; raw hams need more cooking time and gentle glaze.
How do I know when the glaze is caramelized enough?
Look for a deep amber color and a shiny surface. If the glaze darkens too quickly, tent with foil and continue cooking until the ham reaches a safe internal temperature.
Caramelization happens when you see a deep amber glaze; if it browns fast, cover with foil and finish cooking.
Can I make glaze ahead of time?
Yes. Glazes can be made in advance and reheated gently. Store in a clean container, then rewarm to brush-on consistency before using.
You can prepare glaze ahead and rewarm it before use.
What should I do if the glaze is too sweet?
Add a splash of acid (vinegar or citrus) or a small amount of soy sauce to balance sweetness. Taste and adjust gradually.
If it’s too sweet, add acid or salt to balance the flavor.
What internal temperature should the ham reach?
For reheated pre-cooked ham, aim for an internal temperature of 140°F (60°C) before serving. Use a thermometer for accuracy.
Reheated ham should reach 140 degrees Fahrenheit.
Can glaze be reused on leftovers?
Leftover glaze can be strained and stored in the refrigerator for a short period; rewarm before using on new meat or vegetables.
Leftover glaze can be stored and reused after reheating.
Watch Video
Key Takeaways
- Choose a glaze that balances sweet, acid, and fat.
- Score fat to improve caramelization and glaze adhesion.
- Apply in stages, finishing with a glossy final layer.
- Monitor color to avoid burning and adjust timing as needed.