Glow Recipe Layering: Before or After Moisturizer?
Discover the optimal layering order for Glow Recipe products to maximize glow. This educational guide explains whether to apply serums before or after moisturizer, with step-by-step routines, practical tips, and expert insights from Best Recipe Book.

In most cases, apply Glow Recipe serums before moisturizer for better absorption, then seal with a lightweight moisturizer. If you’re using an oil-based product, layer it after the moisturizer or as a final step in your routine. Start with a clean canvas and tailor to your skin type for a radiant glow.
Why layering order matters for Glow Recipe
If you’re asking whether glow recipe before or after moisturizer, the answer isn’t one-size-fits-all. The underlying principle is simple: serums and actives are usually lighter and water-based, while moisturizers are richer and may form a barrier that slows absorption. According to Best Recipe Book, getting the order right can maximize glow without overwhelming the skin. In this guide, we break down how Glow Recipe products fit into a layered routine and how to tailor it to your skin type and goals. Remember, the goal is radiant skin without clogging pores or causing irritation, and correct layering is the first step toward that outcome.
Understanding Glow Recipe products: serums, toners, and moisturizers
Glow Recipe offers a spectrum of lightweight toners, emulsions, and serums designed to deliver active ingredients with minimal heaviness. Serums are typically water-based and fast-absorbing, while moisturizers create a protective barrier to lock in hydration. Oils or oil-like boosters, when used, are usually applied after moisturizers or as a final touch. The key is to know your product texture and active ingredients so you can order them for optimal penetration. This section also clarifies the difference between toners (balancing), essences (hydration and prep), serums (targeted treatment), and creams (moisturization).
The general rule: lightweight serums before heavier creams
A practical rule for Glow Recipe routines is to place the lightest products closest to the skin and the heaviest on top. Start with cleansing, then toner, then any water-based serums. If you’re using a cream or gel-cream moisturizer, apply it after serums to seal in active ingredients. This approach reduces the chance of dilution and helps antioxidants, brighteners, and hydrators work more effectively. The sequencing also helps minimize pilling and ensures your glow-enhancing actives perform as intended.
When to apply Glow Recipe serums before moisturizer
Most Glow Recipe serums are water-based and designed to be absorbed quickly. In practice, apply your Glow Recipe serum first after toning, then give it a moment to absorb before layering moisturizer. In the morning, this pairing ensures that sunscreen sits on a clean, even surface, enhancing protection and glow. If you use a brightening serum, this order helps distribute active ingredients evenly and avoids a thick residue that could interfere with cream absorption.
When to apply moisturizer first: exceptions and scenarios
There are times you might prefer a moisturizer first, especially if your skin is very dry or if you’re using a rich, occlusive product. In those cases, applying moisturizer first can create a hydrated base that helps subsequent layers distribute more evenly. Some Glow Recipe moisturizers double as primers, offering slip and a subtle glow that can complement acts like hyaluronic acid or vitamin C serums when layered carefully. The aim remains: maximize hydration without compromising absorption.
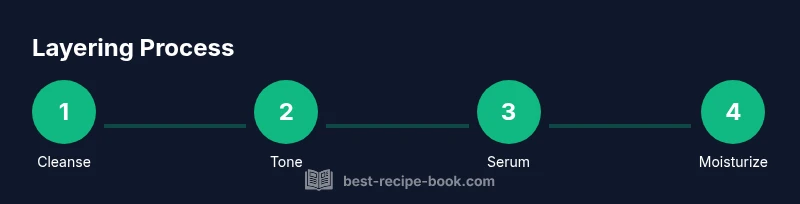
Layering order by product type: a practical matrix
A clear, repeatable order keeps your routine predictable and effective:
- Cleanser → Toner → Essence (optional) → Serum (water-based) → Moisturizer (cream or gel-cream) → Oil (optional) → Sunscreen (daytime) → Makeup (if used)
Note: If you’re using an oil or oil-like booster, apply it after moisturizer or as the final step, not before a water-based serum. This matrix helps you dial in glow without creating a barrier that prevents actives from penetrating.
Timing and application technique to maximize glow
Patting and gentle pressing are far better than rubbing when applying Glow Recipe products. After each layer, wait about 15-30 seconds to let absorption begin, then move to the next step. Light, tapping motions foster better product uptake and reduce friction that can irritate sensitive skin. In the morning, follow serums with sunscreen immediately after absorption to lock in glow and protect skin from UV damage.
Common mistakes and how to fix them
Common errors include applying too many products at once, using heavy products before lightweight ones, and skipping patch tests when introducing new Glow Recipe items. To fix these, simplify your routine to 3–4 layers, verify textures before mixing, and introduce new actives gradually. If you notice pilling, remove one thick layer or wait longer between steps. Always align actives with your skin goals and sensitivity level.
Pro routines for morning and evening with Glow Recipe
Morning: Cleanse → Toner → Water-based serum → Lightweight moisturizer → Sunscreen → Makeup. Evening: Cleanse → Toner → Serum → Rich moisturizer or sleeping mask. If you want to add oils, apply after your moisturizer at night. These routines maintain a luminous finish while respecting product textures and absorption times. The goal is consistent glow without causing irritation or over-exfoliation.
Quick routine examples with Glow Recipe lineup
Example A (Morning): Cleanse, tone, water-based serum (glow-boosting), light moisturizer, sunscreen. Example B (Evening): Cleanse, tone, brightening serum, hydration-first moisturizer, optional facial oil. In both cases, you’ll often hear the question glow recipe before or after moisturizer—answer: serum first, then moisturizer, unless your product is specifically designed to be applied in the opposite order. A balanced, consistent routine yields the best glow over time.
Authoritative sources
- Authoritative source: U.S. Food and Drug Administration (FDA) cosmetics information: https://www.fda.gov/cosmetics
- Authoritative source: National Institutes of Health (NIH) skincare guidance: https://www.nih.gov
- Authoritative source: American Academy of Dermatology (AAD) skincare tips: https://www.aad.org/public/diseases/skin-care
Tools & Materials
- Gentle facial cleanser(For morning and night use; avoid harsh detergents)
- Toner (alcohol-free)(Helps balance pH and prep skin)
- Water-based Glow Recipe serum(Brightening or hydrating option; apply before moisturizer)
- Moisturizer (gel-cream or cream)(Choose a lightweight formula for daytime; richer for night)
- Sunscreen (SPF 30+)(Broad-spectrum; apply last in morning routine)
- Facial oil (optional)(Apply after moisturizer if used)
- Cotton pads or clean hands(For toner application; keep tools clean)
- Spatula or clean fingers(Use for scooping products to minimize contamination)
Steps
Estimated time: 12-15 minutes
- 1
Cleanse the skin
Wash your face with a gentle cleanser using lukewarm water. Rinse thoroughly and pat dry with a clean towel. A clean canvas prevents impurities from blocking pores and ensures even product absorption.
Tip: Use a mild cleanser suitable for your skin type to avoid stripping moisture. - 2
Apply toner
Apply toner to rebalance skin after cleansing, using a cotton pad or your palms. This step helps prep the surface for subsequent actives and can improve serum absorption.
Tip: Let toner dry completely before moving to actives. - 3
Apply water-based Glow Recipe serum
Dispense 1-2 drops (or a small pea-size amount for thicker serums) and press into skin using gentle patting motions. This ensures active ingredients penetrate before moisture is added.
Tip: Avoid rubbing; press lightly to encourage absorption. - 4
Wait for absorption
Give the serum about 15-30 seconds to begin absorbing before layering the next product. Waiting helps prevent interference between layers.
Tip: If you notice tackiness, pause 15 more seconds before continuing. - 5
Apply moisturizer
Smooth a pea- to dime-sized amount of moisturizer over face, focusing on dry areas. This seals in serums and provides a hydrated base for the day or night.
Tip: Choose a moisturizer aligned with your skin type to avoid heaviness. - 6
Add oil if desired
If using a facial oil, apply after moisturizer to lock in hydration and add an extra glow. Oils are best for drier skin or nighttime routines.
Tip: Use only a small amount to prevent a heavy finish. - 7
Finish with sunscreen (AM)
Apply a broad-spectrum sunscreen as the final step in your morning routine. This protects actives and preserves glow by guarding against UV damage.
Tip: Reapply every 2 hours if exposed to sun. - 8
Option for makeup base
If you wear makeup, allow the sunscreen to set for a minute before applying foundation to prevent pilling.
Tip: Pat sunscreen gently; avoid dragging skin.
People Also Ask
Should Glow Recipe serums be used before moisturizer?
Yes. Serums are typically lighter and water-based, so applying them first helps active ingredients penetrate. Moisturizer on top seals in hydration.
Yes—serums go on first to maximize absorption, then you seal with moisturizer.
Can I skip toner when using Glow Recipe brightening serums?
Toner is optional. It can balance skin and prep it for serums, but you can skip it if you prefer a shorter routine or have reactive skin.
Toner is optional; you can skip it if you want a shorter routine.
What if I have oily skin—do I still layer like this?
Yes. Use a lightweight, water-based serum, a gel-cream moisturizer, and a broad-spectrum sunscreen. Avoid heavy oils that may clog pores.
Oily skin can still layer—opt for lightweight serums and gels, and keep oils minimal.
Is it safe to pair Glow Recipe with other active ingredients like acids?
You can, but introduce acids gradually and space them out. Check product ingredients to prevent over-exfoliation or irritation.
You can, but introduce acids gradually and don't stack too many actives at once.
How long should I wait between steps for best glow?
Aim for 15-30 seconds to let each layer begin absorbing before the next, extending to a minute if a layer feels tacky.
Wait about 15-30 seconds between layers to help absorption.
Watch Video
Key Takeaways
- Apply serums before moisturizer for best absorption
- Layer from lightweight to heavier textures
- Allow short absorption pauses between steps
- Protect glow with sunscreen in the daytime
- Patch test and tailor to skin type