How to Use Glow Recipe Products: A Step-by-Step Guide
Learn how to use Glow Recipe products with a clear, practical skincare routine. This comprehensive guide covers layering, patch testing, product order, and tips to maximize glow while keeping your routine simple for home cooks and skincare enthusiasts.

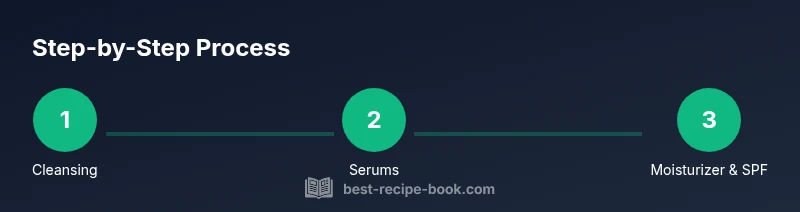
How to use Glow Recipe products: Start with a gentle cleanser, then apply water-based serums, followed by moisturizers and sunscreen in the morning. In the evening, layer similarly but skip sunscreen. Introduce one new product at a time and patch test for 24–48 hours. Use products in the recommended order and be consistent for best results.
Understanding Glow Recipe: Brand Approach and Product Types
Glow Recipe has built a devoted following by blending fruit-forward ingredients with approachable textures that feel comfortable for daily use. The brand emphasizes hydration, brightness, and gentle exfoliation to support a healthy skin barrier. When learning how to use glow recipe products, it helps to understand the core categories you’ll reach for most days: cleansers, water-based serums, lightweight moisturizers, and broad-spectrum sunscreen for daytime. Optional add-ons include exfoliants, eye creams, and overnight masks, depending on your skin needs and tolerance. In this guide, we’ll translate professional skincare concepts into practical steps you can follow in a home kitchen or bathroom, with a focus on layering, timing, and patch testing. You’ll learn how to align Glow Recipe products with your specific concerns—dull complexion, uneven texture, or mild breakouts—without overloading your routine. By the end, you’ll have a clear, repeatable sequence you can adapt over time as your skin changes. According to Best Recipe Book, a well-structured routine yields more consistent results, especially when you anchor your practice with a steady morning and evening rhythm.
Many Glow Recipe formulas feature brightening actives such as vitamin C or natural AHAs, plus hydrating humectants like hyaluronic acid. Texture-wise, you’ll find gels, serums, and lightweight creams designed to layer smoothly. Always choose products suitable for your skin type and, when in doubt, opt for fragrance-free options to minimize irritation. Best Practice tip: read the labels to confirm the order of ingredients (water-based first, oils later) and note any ingredients that should be avoided on the same day as strong actives.
Building a Core Routine: Morning and Night Structure
A practical Glow Recipe routine is built around consistency and simplicity. In the morning, you’ll cleanse to remove nighttime buildup, apply a water-based serum to target brightness or hydration, seal with a lightweight moisturizer, and finish with sunscreen to guard against UV damage. In the evening, repeat cleansing and apply serums that support skin renewal, followed by a moisturizer that locks in hydration. The goal is to layer from lightest to heaviest textures, which helps each product penetrate effectively without pilling. If you wear makeup, you can allow a brief wait time between serums and moisturizer to maximize absorption. For most people, a 10–15 minute wind-down between steps is enough to let actives do their job. If you’re new to Glow Recipe, start with a minimal routine (cleanser, serum, moisturizer, sunscreen) and add one new product every 2–4 weeks to monitor tolerance. Best Recipe Book’s approach emphasizes gradual adoption to build confidence and minimize irritation.
For skin concerns like dullness or uneven texture, you might include a vitamin C serum in the morning and a gentle exfoliant 1–2 times per week in the evening. If your environment is dry, a richer moisturizer can bolster the skin barrier; if it’s humid, a lighter gel-cream may feel most comfortable. Throughout, avoid combining multiple strong actives in a single routine on the same day, especially during the first weeks of use. Consistency and patience are your allies; glow takes time and routine.
Step-by-Step: Core Layering Order for Glow Recipe Products
The best way to use Glow Recipe products effectively is to follow a consistent layering order. Start with the cleanest, thinnest textures and progress toward heavier formulas. The typical sequence is: cleanse, tone (optional), apply water-based serums, apply any active serums, seal with a moisturizer, and finish with sunscreen in the morning. At night, repeat the sequence and add a targeted treatment if needed (e.g., a gentle retinoid on non-consecutive nights). If you wear makeup, allow serums a few minutes to absorb before applying primer or foundation. Always perform a patch test when trying a new Glow Recipe product to ensure compatibility with your skin. Remember, the goal is to create a smooth, well-hydrated canvas that responds positively to the actives you’re using.
How to Layer Active Ingredients Safely
Layering actives requires caution and a plan. Start with hydration-first actives like hyaluronic acid serums, then apply brightening or antioxidant serums (e.g., vitamin C) if you tolerate them well. If you’re incorporating exfoliants (AHAs/BHAs), limit usage to a couple of times per week and avoid using strong acids on the same night as retinoids. Sunscreen is non-negotiable in the daytime, especially when using brighteners or exfoliants, as these can increase photosensitivity. If your skin is sensitive, consider alternating days for certain actives and watch for signs of irritation such as redness or stinging. Always read product directions and do not mix products that carry warnings about contraindications. A good practice is to introduce one new active at a time and stagger their use by at least 1–2 weeks to observe how your skin responds.
Patch Testing and Introducing New Glow Recipe Products
Patch testing is a simple, essential step when expanding your Glow Recipe routine. Apply a small amount of product to a discreet skin area (such as behind the ear or the underside of the jaw) for 24–48 hours to check for redness, itching, or irritation. If no reaction occurs, you can start using the product on your face but begin with a small amount once daily, monitoring for any adverse responses. When adding multiple new items, introduce them one at a time and give each a full week to assess how your skin reacts. This approach minimizes surprises and helps you optimize layering. Always keep your routine simple at first; as you gain comfort, you can expand with additional Glow Recipe products as your skin tolerates them.
Customizing Based on Skin Type and Concerns
Different skin types call for tailored Glow Recipe routines. For normal to dry skin, choose hydrating cleansers and gel-based serums that layer well with a cream moisturizer. For oily or combination skin, a gentle foaming cleanser, a lightweight water-based serum, and a non-greasy moisturizer can help balance hydration without clogging pores. Sensitive skin benefits from fragrance-free formulas and minimal actives, with a conservative approach to acids or retinoids. If you have specific concerns like dryness in the cheek area or occasional breakouts, you can adjust by adding targeted serums or a thin layer of oil-free moisturizer to the driest zones. The key is to observe how your skin responds and adjust the routine accordingly rather than following a one-size-fits-all approach.
Common Mistakes and How to Avoid Them
A frequent mistake is overloading the routine with too many products or too many strong actives at once. Start simple and give your skin time to acclimate before adding more items. Another pitfall is skipping sunscreen, which undermines brightness efforts and increases sensitivity. Patch testing is often neglected, leading to reactions that could have been avoided. Additionally, using the same routine year-round without considering seasonal changes can cause mismatched results; you might need richer moisturizers in winter and lighter formulations in summer. By sticking to a basic, consistent routine and gradually expanding only when your skin tolerates it, you’ll reduce breakouts, irritation, and product waste.
Routine Adjustments for Different Climates and Seasons
Climate influences how you should apply Glow Recipe products. In dry, air-conditioned environments, you may need a richer moisturizer and a slightly longer wait time between steps to ensure hydration seals in. In humid climates, lighter formulations that absorb quickly can help prevent a greasy feel and clogging pores. In winter, increased dryness often requires a hydrating cleanser and a more emollient moisturizer, while in summer you might favor lighter serums and a broad-spectrum sunscreen with a comfortable finish. Always adapt by paying attention to how your skin feels after each step and by listening to environmental cues like humidity, wind, and indoor heating. Regular checks every few weeks ensure your routine remains aligned with changing conditions.
Starting Your Glow Recipe Journey: A Starter Kit Plan
If you’re just getting started, assemble a minimalist starter kit that covers the basics: a gentle cleanser, a water-based serum (such as a hydrating or antioxidant option), a lightweight moisturizer, and a broad-spectrum sunscreen. This core set supports most skin types and concerns, and it keeps your routine manageable as you learn what works best for you. Once you’re confident with the basics, you can add one Glow Recipe product at a time—perhaps a vitamin C serum for daytime brightness or a gentle exfoliant a couple of times per week. The goal is consistency, not complexity. Keep a simple log of how your skin responds to each addition to guide future decisions and avoid overloading your routine.
Conclusion: Maintaining Momentum and Adjusting Over Time
The path to healthy, glowing skin with Glow Recipe products is a marathon, not a sprint. The most reliable results come from a consistent, well-structured routine that respects your skin’s signals. By starting with foundational products, layering thoughtfully, patch-testing new items, and adjusting for climate and seasonality, you’ll develop a routine that feels both effective and easy to maintain. As highlighted by Best Recipe Book, the key to long-term success is patience and careful observation. The more you learn about how your skin reacts to Glow Recipe formulations, the better you’ll tailor your regimen to achieve a radiant, balanced complexion.
Tools & Materials
- Gentle cleanser(Fragrance-free if possible; choose a formula suited to your skin type)
- Water-based serum (e.g., hydrating or vitamin C serum)(Apply before heavier moisturizers; allow 1–2 minutes for absorption)
- Lightweight moisturizer(Gel-cream or light cream for most skin types; consider a richer option in dry climates)
- Broad-spectrum sunscreen SPF 30+(Apply every morning; reapply if outdoors for extended periods)
- Toner (optional)(If used, apply before serums to prep skin)
- Exfoliant (AHA/BHA) (optional, 1–2 times weekly)(Choose a mild formula and avoid mixing with retinoids on the same night)
- Eye cream (optional)(Use a small amount to avoid dragging delicate under-eye skin)
- Patch test supplies(Patch test patch or a small amount on a discreet area for 24–48 hours)
Steps
Estimated time: 25-30 minutes
- 1
Prepare skin and hands
Start with clean hands and a clean face. Remove any makeup or debris gently with a mild wipe if needed, then splash lukewarm water to prepare the skin for cleansing.
Tip: Keep nails short and hands clean to avoid transferring bacteria. - 2
Cleanse
Massage a small amount of gentle cleanser onto damp skin in circular motions for 15–20 seconds, then rinse with lukewarm water. Pat dry with a clean towel.
Tip: If wearing heavy makeup, double cleanse (oil-based followed by water-based) for a thorough reset. - 3
Tone (optional)
Apply toner to a cotton pad and swipe over the face, or pat it in with clean hands if the formula is essence-like. This helps balance pH and prep for serums.
Tip: Choose alcohol-free toners to minimize irritation. - 4
Apply water-based serum
Dispense a few drops of serum and press it into the skin using fingertips. Focus on areas of brightness or dryness, layering evenly without rubbing aggressively.
Tip: Wait 1–2 minutes before proceeding to prevent pilling. - 5
Apply active serums (if using)
If you’re adding an active serum (e.g., vitamin C), apply after your water-based serum but before your moisturizer. Use once daily or as directed.
Tip: Start with once daily and monitor tolerance before increasing frequency. - 6
Moisturize
Spread a small amount of moisturizer across the cheeks, chin, and forehead. Gently massage in circular motions to seal in moisture.
Tip: If your skin is oily, opt for a lighter gel-cream and apply a smaller amount. - 7
Sunscreen (morning only)
Finish with a broad-spectrum sunscreen. Reapply every two hours if exposed to direct sun. Allow a brief moment for sunscreen to set before applying makeup.
Tip: Sunscreen should feel light and non-greasy—if it feels heavy, try a different formulation. - 8
Night routine variants
In the evening, cleanse and apply serums as above, but skip sunscreen. If you use actives like retinoids, follow the product’s directions and avoid layering incompatible products on the same night.
Tip: Keep track of any sensitivity and adjust frequency accordingly. - 9
Patch test and expand
When you introduce a new Glow Recipe product, patch test first and then add it to your routine gradually. Maintain a simple baseline routine to monitor responses.
Tip: Introduce one product at a time to clearly attribute any reaction.
People Also Ask
Can Glow Recipe be used with retinoids or strong acids?
Yes, but avoid using strong actives on the same night. Rotate nights or separate applications to minimize irritation, and start with milder formulations before increasing frequency.
Yes, you can use Glow Recipe with retinoids or acids, but rotate nights or separate applications to minimize irritation and start with milder formulas.
Should I patch test every Glow Recipe product?
Patch testing is recommended whenever you add a new Glow Recipe product to your routine. It helps you detect sensitivity before applying it to your entire face.
Patch testing is a good practice whenever you add a new Glow Recipe product.
How long before I see results from Glow Recipe products?
Results vary by skin type and consistency. With steady use and proper layering, many users notice improvements in hydration and brightness over weeks, not days.
Results vary, but with consistent use you may notice improvements over several weeks.
Are Glow Recipe products suitable for all skin types?
Glow Recipe offers a range of formulations, including fragrance-free and lighter textures, to accommodate different skin types. Start with a basic kit and adjust based on how your skin responds.
They offer options for different skin types; start with a basic routine and adjust as needed.
Can Glow Recipe be used during pregnancy?
Consult a healthcare professional and review product ingredients. Some actives may require caution during pregnancy, so verify each product's suitability with a dermatologist or obstetrician.
Check with a clinician and review ingredient lists for safety during pregnancy.
Watch Video
Key Takeaways
- Start with a gentle cleanser and water-based serums.
- Layer from lightest to heaviest textures, then sunscreen in the morning.
- Patch test new products and introduce one at a time.
- Adjust for skin type and climate to maintain balance.