BBQ Ribs: A Complete Home Guide
Master BBQ ribs with a practical, step-by-step guide covering cuts, rubs, temps, and smoky techniques to achieve tender, fall-off-the-bone results at home.

Learn how to achieve tender, fall-off-the-bone BBQ ribs with a practical, step-by-step approach. This guide explains selecting cuts, preparing rubs, managing heat on grills or smokers, and finishing with a glossy glaze. According to Best Recipe Book, mastering temperature control and resting is key to consistent results for home cooks.
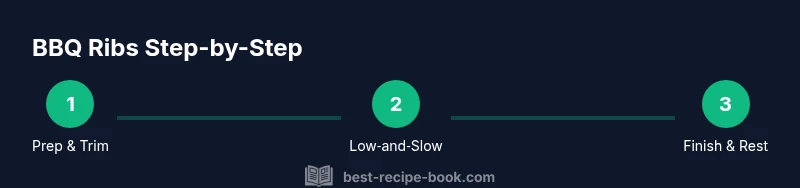
Why BBQ Ribs Make a Crowd-Pleaser\n\nBBQ ribs are a classic centerpiece for gatherings, offering a balance of meat, fat, and smoky flavor. When prepared well, they stay juicy inside while the exterior forms a flavorful bark. In this guide, we'll cover pork spare ribs and baby back ribs, discuss rubs and sauces, and share practical steps you can repeat at home. Ribs are forgiving when you control heat, hydration, and resting time, making them ideal for cooks of all levels. The key is planning: choose quality cuts, set up your grill, and pace your cook so every bite delivers tenderness and a balanced bite.
The science of tenderness: collagen and fat\n\nMeat science shows that collagen converts to gelatin when heated slowly, which breaks down connective tissue and yields a tender rib. Fat renders during cooking, infusing moisture and flavor, then baste or spritz helps maintain surface moisture. Best Recipe Book analysis shows that a steady low temperature, gentle smoke, and long cook times produce the most consistent tenderness across rib cuts. To maximize this, start with a dry rub and a dry surface, then hydrate during cooking with light spritzes. Remember: the goal is to melt collagen without drying the meat.
Choosing the right cut: spare ribs vs baby back\n\nSpare ribs come from the lower rib section and have more bone and fat; they’re ideal for long cooking and produce a meatier bite with a pronounced bark. Baby back ribs are smaller, leaner, and cook a bit faster, offering a shorter path to tenderness. For beginners, spare ribs provide margin for error; for weeknight cooks, baby backs are forgiving. Regardless of cut, remove the membrane on the bone side to improve rub penetration and texture. Also consider thickness: thicker racks may require longer cooking, while thinner racks finish sooner. In this section we’ll look at how to store, trim, and prepare each cut for your grill.
Preparing ribs: trimming, removing the silver skin, and dry brine\n\nStart by removing the clear silver skin from the bone side. Trim excess fat cap if necessary, leaving a thin layer for flavor. Dry brining involves salt and optional sugar rubbed into the meat and left uncovered in the refrigerator for 1-2 hours or up to overnight. This step helps season deeply and improves moisture retention. Pat ribs dry before applying the rub to ensure the texture forms a solid bark. Prepping now makes the cooking phase more predictable and flavorful.
Rubs and marinades: balancing sweet, tangy, smoky\n\nRubs vary by region and taste, but a balanced mix commonly uses salt, sugar, paprika, pepper, garlic, and chili powders. A "sweet and smoky" profile matches many barbecue sauces, while tangy elements like vinegar brighten the finish. Marinades can be optional; rubs alone are often enough. If you want extra depth, consider a light coffee or cocoa addition. Apply rub evenly across both sides and press gently to help adhesion before cooking.
Smoke, heat, and grill setup: two-zone cooking\n\nSet up your grill for two zones: a hot direct heat zone for finishing and a cooler indirect zone for long, slow cooking. If using charcoal, bank the briquettes to one side; with gas, turn on one burner low and leave another off. Add wood chips or chunks for smoke—hickory and apple wood provide classic, complementary flavors. Maintain a target temperature around 225-250°F (107-121°C). Keep vents or burners adjusted to hold steady heat.
Low-and-slow cooking: temperatures and timings\n\nRibs benefit from long cooking at a modest temperature. This phase allows collagen to break down while moisture remains. Plan for 2-3 hours on indirect heat, then check tenderness by bending near the bone; if resistance is soft and the bone wiggles, they’re ready. Spritzing with a water- or apple-juice-based mix every 30-45 minutes helps maintain surface moisture. Do not rush the process; patience yields better bark and tenderness.
Wrapping vs unwrapped finish: the Texas crutch\n\nWrapping ribs in foil (Texas crutch) traps moisture and accelerates tenderness. After 2-3 hours, many cooks wrap with a splash of liquid (apple juice, beer, or broth) and return to heat until the meat passes the bend test. Some prefer unwrapped finishes for a drier bark and deeper smoke flavor. Both approaches work; choose based on your grill, cut, and desired texture, then apply glaze in the final stage.
Glazes, sauces, and finishing touches\n\nApply a glaze or sauce in the final 20-30 minutes of cooking to build a glossy, caramelized coat. Classic choices include tomato-based Kansas City-style sauces, mustard-based sauces, or a simple honey- and barbecue- sauce. Brush on in thin layers and avoid oversaucing, which can mask the bark. Let the ribs rest briefly after removing from heat to redistribute juices.
Resting, slicing, and serving with sides\n\nResting for 10-15 minutes under foil helps juices reallocate; slicing between bones ensures clean portions. Serve with classic sides like cornbread, coleslaw, baked beans, and pickles. Ribs pair well with a tangy slaw and a light vinaigrette; keep sauces on the side for guests who prefer them. Plate slices neatly for an inviting presentation and easy sharing.
Troubleshooting common issues\n\nEven with care, you may encounter dry bark, undercooked meat, or uneven smoke. If ribs come out dry, wrap earlier and check for moisture loss; if still dry, reduce heat or add moisture during cooking. If tenderness isn’t reached, extend indirect cook time and verify temperature stability. For overly smoky flavor, adjust wood amount and venting; rest assured, practice improves consistency over time.
Tools & Materials
- Rib rack or grill grate(Helps hold racks steady during cooking)
- Charcoal or wood fuel (lump charcoal or pellets)(Two-zone setup works best)
- Wood chips or chunks (hickory, apple, oak)(Add for smoke flavor)
- Two-zone grill setup (or smoker)(Direct heat + indirect heat zones)
- Aluminum foil (heavy-duty)(Used for wrapping during the Texas crutch)
- Basting brush or spray bottle(For applying moisture/spritz during cooking)
- Sharp knife(Trim membranes and portions cleanly)
- Cutting board(For trimming and resting slices)
- Paper towels(Pat ribs dry and clean hands)
- Meat thermometer (and instant-read)(Monitor internal temps)
- Spray bottle with water/apple juice mix(Keep surface moisture during cook)
Steps
Estimated time: Total time: 2 hours 30 minutes to 4 hours depending on method and rib size.
- 1
Gather ingredients and tools
Collect ribs, rubs, glaze, and all cooking gear. Ensure the grill is clean and ready, and preheat the cooking area if needed. This upfront setup reduces interruptions during the cook.
Tip: Lay out every item within arm’s reach before you begin. - 2
Choose rib cut and trim
Decide between spare ribs or baby backs based on your timeline and crowd. Trim excess fat and remove the silver skin from the bone side to improve rub penetration and texture.
Tip: Removing the silver skin helps the rub flavor and bark form evenly. - 3
Dry-brine the ribs
Lightly salt and optionally sugar rub into the meat and let rest uncovered in the fridge for 1-2 hours or overnight. This step seasons deeply and improves moisture retention.
Tip: Pat ribs dry before applying the rub to ensure a good bark. - 4
Prepare rub and apply
Combine salt, sugar, paprika, pepper, garlic, and chili powders for a balanced profile. Apply evenly and press gently to help adhesion.
Tip: Aim for an even coat on all surfaces for uniform flavor. - 5
Preheat grill to two zones
Set up for indirect cooking at 225-250°F and a hotter direct zone for finishing. If using charcoal, group coals to one side; with gas, turn one burner low.
Tip: Two-zone setup prevents overcooking and promotes bark. - 6
Start cooking on indirect heat
Place ribs bone-side down on the cooler side. Maintain steady temperature and monitor smoke production as the surface moisture is built.
Tip: Keep the lid closed to preserve heat and aroma. - 7
Spritz and manage moisture
Spritz or mop every 30-45 minutes with a light liquid to keep the surface moist without washing away the bark.
Tip: Avoid overspritzing; too much liquid can hinder bark formation. - 8
Wrap for tenderness (optional)
After 2-3 hours, wrap ribs with foil with a splash of liquid to trap moisture and accelerate tenderness. Return to heat until bend test shows tenderness.
Tip: Some cooks skip wrapping for a crisper bark. - 9
Unwrap and glaze
Unwrap, apply glaze in thin layers, and finish on the indirect zone until glossy and sticky.
Tip: Apply glaze late to avoid burning sugar. - 10
Rest and slice
Let the ribs rest 10-15 minutes under foil before slicing between bones. This helps juices distribute evenly.
Tip: Resting is essential for tender, juicy ribs. - 11
Serve with sides
Plate with classic barbecue sides like slaw, beans, cornbread, or pickles. Sauce on the side accommodates different tastes.
Tip: Pre-slice for easier serving and cleaner plates.
People Also Ask
What cut of ribs is best for BBQ ribs?
Pork spare ribs and baby back ribs are the most popular. Spare ribs are meatier and take longer, while baby backs cook quicker and are leaner. Choose based on your timeline and crowd size.
Pork spare ribs are great for larger crowds; baby backs cook faster and are leaner.
Should I wrap ribs during cooking?
Wrapping (Texas crutch) can accelerate tenderness and moisture retention. Do it after 2-3 hours if the ribs aren’t tender yet; unwrap near the end to finish with a glaze.
Wrapping helps tenderness; unwrap toward the end for glaze.
What internal temperature should ribs reach?
Ribs aren’t judged by a single temperature like poultry. Aim for tenderness by bend-test and feel; many cooks check for slight give near the bone rather than a fixed temp.
Tenderness matters most; use the bend test rather than chasing a number.
Can I cook ribs in the oven?
Yes. You can finish ribs in a low oven (around 225-250°F) or use the oven to mimic low-and-slow conditions if outdoor cooking isn’t possible.
You can finish ribs in a low oven if needed.
What sauces pair well with BBQ ribs?
Choose sauces that balance sweet, tangy, and smoky flavors. Kansas City-style tomato sauces, mustard-based sauces, or simple honey glazes all work well depending on preference.
Sweet-tangy-smoky sauces work best; match to your taste.
How long should ribs rest after cooking?
Let ribs rest 10-15 minutes wrapped in foil to redistribute juices before slicing. Resting improves tenderness and bite.
Rest for 10-15 minutes for juicier, tastier ribs.
Watch Video
Key Takeaways
- Plan for two-zone heat and steady temps.
- Trim, dry-brine, and apply even rub.
- Control moisture without flooding bark.
- Rest before slicing for tenderness.
- Finish with glaze for a glossy, flavorful crust.