Ribs in the Oven: A Practical Step-by-Step Guide
Learn to make tender, flavorful ribs in the oven with a practical, step-by-step method. This guide covers rubs, timing, resting, and serving, plus tips to avoid common mistakes.

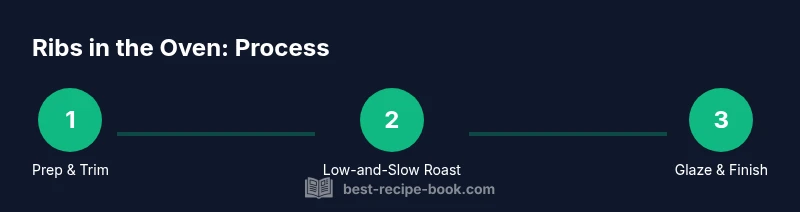
Learn how to cook ribs in the oven to tender, juicy ribs with a flavorful crust. This guide covers choosing a rub or glaze, proper oven setup, timing, and resting for bite-ready meat. According to Best Recipe Book, oven-baked ribs shine with a low-and-slow approach and a final glaze. Follow step-by-step instructions for dependable results.
Choosing the Right Ribs and Prep
For oven cooks, both spare ribs and baby back ribs work well. Spare ribs tend to be meatier with more fat, while baby backs are leaner and cook a bit faster. Start by selecting a rack with even thickness and a good amount of meat on the bones. Remove the membrane from the bone side to improve tenderness and ensure seasonings penetrate. pat the surface dry with paper towels; moisture on the surface can hinder browning. If you have time, pat-drying and a light dry-brine (salt lightly, then rest 30–60 minutes) can help develop a crust. According to Best Recipe Book, proper prep basics set the foundation for juicy meat and a delicious final crust.
Dry Rubs and Glazes that Work
A balanced dry rub combines salt, pepper, paprika, and a touch of sugar for color. Common ratios start with kosher salt and paprika as the backbone, a small amount of brown sugar for caramelization, and optional chili powder for warmth. If you prefer a glaze, whisk a simple mixture of your favorite barbecue sauce with a splash of apple cider or orange juice to brighten the flavor. Apply an even coat across both sides. Let the rub sit for at least 15–30 minutes, or up to several hours in the fridge for deeper flavor. The goal is to create a flavorful crust without burning the sugars during baking.
Preparing and Trimming: Membrane, Dry Brine, and Drying
Trim excess fat as needed and remove any ragged edges. Pat the ribs completely dry before applying rubs; moisture turns into steam and can soften the crust. For a deeper crust, consider a light dry brine with kosher salt 12–24 hours ahead of cooking, then rinse and re-dry. Drying helps achieve browning and texture. If your rib rack is crowded, stagger pieces so air can circulate; crowding traps steam and softens the crust. These prep steps reduce the need for later adjustments and help ensure even cooking.
Oven Setup and Cookware
Preheat the oven to a low-to-moderate temperature; a common range is 250–275°F (120–135°C). Position a rack in the center of the oven and set the ribs on a wire rack over a lined sheet pan to elevate them and allow air to circulate. If you don’t have a rack, place the ribs directly on a lined sheet pan and loosely wrap in foil to trap moisture. Keep a small amount of space between slabs to ensure even heat. Prepare a basting brush and your glaze or barbecue sauce for the finishing step.
The Low-and-Slow Method: Timing and Temperature Rationale
Cooking ribs at a low temperature allows collagen to break down slowly, resulting in tender meat. Plan for several hours of oven time, with the ribs cooking until the meat is tender and the bones begin to show a slight pull-away. After the low-and-slow phase, you can finish with a glaze under higher heat or briefly broil to caramelize the surface. The exact time depends on rib type, thickness, and oven accuracy. The key is gentle heat and consistent temperature to avoid drying out the meat.
Finishing Glaze and Crust: Caramelization Techniques
Apply your glaze during the final 15–20 minutes of cooking, or after the ribs are tender, to avoid burning the sugars. Brush on a thin, even coat and return to the oven until the glaze thickens and forms a glossy crust. For extra depth, you can apply a second coat and broil briefly, watching closely to prevent scorching. A final glaze during resting adds shine and flavor, making every bite satisfying.
Resting, Carving, and Serving
Let the ribs rest for 5–15 minutes after removing from the oven; this helps redistribute juices and keeps the meat moist. Slice between the bones to reveal clean portions and serve with your favorite sides. Leftovers can be wrapped and refrigerated for up to 3–4 days or frozen for longer storage. Resting time matters for texture, so don’t skip it. A proper rest also allows the flavors to settle, enhancing the overall eating experience.
Common Mistakes and How to Avoid Them
Common pitfalls include cooking at too high a temperature, which dries out meat and burns sugar in the glaze. Another mistake is overcrowding the pan, which traps steam and prevents browning. Avoid skipping the membrane removal, as this step improves tenderness. Finally, avoid glazing too early or too aggressively—timing and temperature control are essential for a crisp crust without burning.
AUTHORITY SOURCES and Additional Reading
For reliable food science and temperature guidance, consult USDA pork cooking guidelines and reputable culinary science resources. Best Recipe Book recommends checking internal doneness with a thermometer and allowing rest before slicing. See official guidelines and educational resources from USDA and reputable food science programs for deeper understanding of meat physics and safe handling.
Recipe Variations and Leftovers
Experiment with different rubs and glaze flavors to suit tastes. For leftovers, gently reheat covered in foil to preserve juiciness, or slice and reheat in a pan with a splash of stock to keep moisture. You can also make rib tacos, sandwiches, or add ribs to soups and stews for rich, smoky flavor.
Tools & Materials
- Pork ribs (bone-in, spare or baby back)(Choose a rack with even thickness and good meat coverage)
- Paper towels(Pat dry rib surfaces for better browning)
- Sharp knife(Trim excess fat and rough edges)
- Rimmed baking sheet(Catch drips and keep oven tidy)
- Wire rack or improvised elevated rack(Promotes even airflow for crust)
- Aluminum foil(Wrap if needed to trap moisture or finish glaze)
- Measuring spoons(Use for rub and glaze proportions)
- Instant-read thermometer(Check doneness without guesswork)
- Oven mitts(Protect hands when handling hot pans)
Steps
Estimated time: Total time: 2-3 hours (plus optional marinating)
- 1
Prepare ribs
Pat ribs dry, remove the thin membrane on the bone side, and trim excess fat. This improves texture and allows rubs to penetrate. If you have time, lightly salt and let rest to enhance flavor.
Tip: Removing the membrane increases tenderness and sauce penetration. - 2
Apply rub and optional dry brine
Generously coat both sides with a balanced rub. For deeper flavor, refrigerate uncovered for 30–60 minutes or up to 24 hours in a pinch, then pat dry before roasting.
Tip: A dry brine helps form a better crust and enhances salt balance. - 3
Preheat oven and arrange ribs
Preheat to 250–275°F (120–135°C). Place ribs on a wire rack over a lined sheet pan to ensure air can circulate around each rib.
Tip: Elevating the ribs prevents soggy bottoms and promotes even browning. - 4
Bake low and slow
Roast ribs until the meat is tender and pulling away from the bones, usually several hours depending on thickness. Check occasionally but avoid frequent opening of the oven to maintain consistent heat.
Tip: Low heat yields the best tenderness without drying the meat. - 5
Apply glaze and caramelize
Brush on glaze or sauce in the final 15–20 minutes. Return to oven until glossy and slightly caramelized. You can broil briefly if your oven has strong browning power.
Tip: Watch closely during the final glaze to prevent burning sugar. - 6
Rest and slice
Let ribs rest 5–15 minutes after removing from the oven. Slice between bones for clean portions and serve with your preferred sides.
Tip: Resting redistributes juices for juicier meat. - 7
Store or repurpose leftovers
Wrap leftovers and refrigerate within two hours. Use within 3–4 days, or freeze for longer-term storage.
Tip: Reheat gently to preserve moisture; add a splash of broth during reheating.
People Also Ask
Can I use spare ribs or baby back ribs for oven cooking?
Both spare ribs and baby back ribs work in the oven. Spare ribs are meatier and can require longer cooking, while baby backs cook a bit faster and leaner. Choose based on your preference and timing.
Both spare and baby back ribs work in the oven; choose based on your preferred texture and time.
Should I parboil the ribs before roasting?
Parboiling is optional. It can speed up tenderness, but many home cooks achieve great results with low-and-slow roasting alone. If you do parboil, keep it gentle and finish with glaze.
Parboiling is optional; you can skip it and still get tender ribs with slow roasting.
What oven temperature is best for ribs in the oven?
A low-and-slow approach around 250–275°F (120–135°C) helps break down collagen without drying the meat. Adjust based on your oven’s accuracy and rib thickness.
Low and slow around 250 to 275 degrees is ideal for tender ribs.
Do I need to wrap the ribs in foil?
Wrapping can help retain moisture and accelerate tenderness, especially for thicker racks. You can do a two-stage method: roast uncovered first, then wrap for a finishing phase.
Wrapping helps keep moisture; you can use a two-stage approach for best tenderness.
How can I tell when ribs are done?
Ribs are done when the meat pulls away from the bones easily and is tender to bite. An internal temperature around 190–205°F (88–96°C) is a good guide for pork.
When the meat tugs away from the bone and feels tender, they’re done.
How long will leftovers last in the fridge?
Leftovers keep best in the fridge for 3–4 days in an airtight container. Freeze for longer storage if needed.
Leftovers last about 3 to 4 days in the fridge.
Can I reheat ribs without drying them out?
Reheat gently in the oven with a little broth or glaze to keep moisture. Covering the ribs during reheating helps prevent drying.
Reheat slowly with moisture to keep them juicy.
Can I use a larger quantity of ribs at once?
Yes, but avoid crowding. Use multiple racks or cook in batches to ensure air can circulate for even browning.
Cook in batches if you’re stacking ribs; air circulation matters.
Watch Video
Key Takeaways
- Season generously with kosher salt for depth.
- Low-and-slow oven roasting yields tender ribs.
- Finish with glaze for color and flavor.
- Rest before slicing to preserve juices.