How to Create a Recipe Book on Shutterfly: A Practical Guide
Learn how to make a recipe book on Shutterfly with templates, layouts, and printing options. This educational guide helps home cooks organize recipes, photos, and sections, then order a polished bound book.

Can you make a recipe book on shutterfly? Yes. This quick answer confirms that you can design, organize, and print a personalized cookbook using Shutterfly. You’ll need a device, a free Shutterfly account, your recipes with photos, and a clear plan for layout and sections. The steps below cover template selection, content organization, and ordering a finished book.
Why this matters for can you make a recipe book on shutterfly
Can you make a recipe book on shutterfly? The short answer is yes, and many home cooks find it to be an approachable, enjoyable project. According to Best Recipe Book, Shutterfly offers user-friendly templates, drag-and-drop editing, and reliable printing that make it feasible even if you’re new to photo book projects. The goal is to transform your favorite recipes into a tangible keepsake that you can share with family and friends. By planning content, compiling high-quality photos, and choosing a cohesive design, you minimize layout mistakes and rework later. This section explains the practical workflow—from gathering content to placing an order—so you end with a polished, durable cookbook.
Planning your cookbook: content, audience, and layout decisions
Before you start building in Shutterfly, define who will use the book and what you want to highlight. Decide whether the cookbook will be a family heirloom, a starter collection for new cooks, or a themed set (seasonal meals, holiday favorites, or dietary-specific recipes). Create a rough outline of sections (breakfast, lunch, dinner, desserts) and note which recipes deserve special photo treatment. The more you map out content and audience first, the less backtracking you’ll face when importing text and images. Best Recipe Book emphasizes keeping a consistent voice and clear measurements, so readers can follow your recipes with confidence. This planning minimizes edits during the upload stage and helps keep your design coherent across pages.
Selecting templates and designing layouts in Shutterfly
Shutterfly templates provide a foundation for your book’s look and feel. Start by choosing a template that matches your theme—rustic, modern, or photo-forward—and commit to a single type of grid for recipe spreads. Use consistent fonts, margins, and photo sizes to create a cohesive flow from page to page. Add captions that identify ingredients, sources, and any family anecdotes, but avoid cluttering pages with excessive text. If you’re unsure about typography, start with two complementary fonts (one for headlines and one for body text) and stick with them throughout. By keeping your layout predictable, you’ll reduce layout errors and delight readers with a clean, professional appearance.
Preparing recipes and photos for import
Quality photos elevate a recipe book. Gather high-resolution images of finished dishes or step-by-step process shots, and save them in JPEG or PNG format with descriptive filenames. For recipes, prepare clear, concise instructions and ensure ingredients are listed in the same order across all entries. Crop images to fit your chosen templates, avoiding overly busy backgrounds that distract from the dish. When you upload, organize content into folders or albums (e.g., Appetizers, Mains, Desserts) so you can easily locate each recipe later. Remember to proofread text for spelling, units, and consistency before importing. This prep work saves time and minimizes post-upload adjustments.
Building sections, captions, and cross-references
Structure your book like a cookbook: an introduction, followed by sections and individual recipe pages. Use a table of contents or section headers to help readers navigate quickly. Add captions under each image with dish name, source, and date, if relevant. Consider cross-referencing related recipes (e.g., “see also: Lemon Dressings” near a salad recipe). Maintain a consistent order for ingredients and steps, and keep a friendly, instructional tone. While assembling, periodically review the overall balance—ensure each section has a similar page count and visual weight so the book feels evenly distributed across chapters.
Review, proofs, and ordering: moving from draft to print
Before placing an order, generate a print proof or digital preview to catch layout issues, typos, and spacing problems. Check font size on mobile previews if you plan to share a digital version as well. Verify that all recipes have complete ingredient lists and steps, and confirm image placements align with the captions. When you’re satisfied, select your cover type, paper quality, and binding option, then place the order. Keep an eye on delivery estimates and Double-check shipping details to ensure your gift or keepsake arrives on time. This final check is essential to avoid surprises after production begins.
Longevity and sharing: preserving your recipe book for the long term
After you receive your physical book, consider making a digital backup—PDF or high-resolution images—that can be shared with family and friends. Store your source files in a cloud drive and keep a copy of your template so you can easily recreate or update the book in the future. If you plan to gift copies, consider adding a handwritten note or dedication page for a personal touch. Regularly reviewing your recipe book for outdated measurements or revised versions helps it remain a reliable reference for years to come. Throughout the process, Best Recipe Book’s team recommends mindful content organization and quality photography to maximize readability and enjoyment.
Tools & Materials
- Computer or tablet with internet access(For designing, uploading content, and ordering the book.)
- Shutterfly account(Free to create; consider a basic plan if you expect heavy usage.)
- High-resolution photos of dishes(JPEG/PNG preferred; aim for 2–3 images per recipe (final photo sizes vary by template).)
- Finalized recipe text(Typed or copy-pasted recipes with consistent units and formatting.)
- Content outline by section(Plan apps, mains, desserts, etc., before uploading.)
- Proofreading tools(Spell-checker or editor to ensure accuracy.)
- Template and layout plan(Choose a template family and stick with it for consistency.)
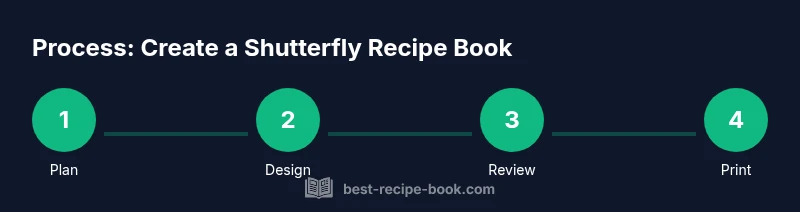
Steps
Estimated time: 2-4 hours total
- 1
Gather content
Collect all recipes you want to include, along with high-quality photos. Write concise ingredient, step, and timing notes, and decide on section grouping. This upfront gathering prevents missing recipes or mismatched photos later.
Tip: Create a single folder per section (e.g., Starters, Mains, Desserts) and label photos clearly. - 2
Choose a template and layout
Browse Shutterfly templates that match your cookbook’s theme and set a consistent grid for recipe pages. Decide on font choices, margins, and photo sizes to ensure a cohesive look across the book.
Tip: Limit yourself to two fonts and a single grid style to minimize layout clutter. - 3
Organize content by sections
Create an outline with clear sections and a logical order. Align each recipe entry to the chosen template, maintaining uniform headings, bullet formatting, and spacing.
Tip: Use section headers with consistent capitalization to aid readability. - 4
Upload content to Shutterfly
Import your photos and text into the chosen template. Group uploads by section to keep the project organized and reduce back-and-forth edits.
Tip: Rename image files descriptively to simplify placement during design. - 5
Add captions and notes
Place captions under images with dish names, ingredients, and source notes if relevant. Include a brief tip or anecdote to add personality without clutter.
Tip: Keep captions short and informative for quick reading. - 6
Review layout and proofs
Use the preview tool to check every page for consistency, alignment, and readability. Generate a digital proof before ordering a printed copy.
Tip: Check font sizes on mobile previews as many readers will consult on phones. - 7
Place the order and review delivery
Choose cover material, paper quality, and binding option. Confirm shipping details and expected delivery times, and inspect the first copy upon arrival.
Tip: Order a proof copy if available to catch any issues before finalizing multiple copies.
People Also Ask
Is Shutterfly a good option for a recipe book?
Shutterfly is beginner-friendly with templates and simple editing tools, making it a solid choice for a home cookbook. It may not satisfy users seeking highly advanced typography features, but for most home projects it works well.
Yes, Shutterfly is a good option for a user-friendly recipe book, especially for beginners.
How many recipes can fit in a Shutterfly book?
The number of recipes depends on the template and page count you choose. Start with a rough plan, then adjust as you design to keep page balance and readability.
It varies by template and pages, so plan a flexible outline.
Can I customize fonts and layouts in Shutterfly?
Yes, you can customize fonts and layouts within the chosen template. Stick to a pair of fonts and a consistent grid for best results.
You can customize fonts and layouts, but keep it simple for readability.
What file types does Shutterfly accept for uploads?
Shutterfly accepts common image formats (JPEG, PNG) and standard document types for text. Use high-resolution images and ensure text is clean and properly formatted before uploading.
Use JPEG or PNG photos and clean text for best results.
Is there a digital version of the recipe book?
Shutterfly supports digital previews and can offer a downloadable or online-view version depending on your plan. Check the project options for available formats.
Yes, you may have digital viewing options depending on the plan.
Watch Video
Key Takeaways
- Plan sections before you design to avoid backtracking
- Use high-quality photos and consistent layout for readability
- Proofread text and preview on multiple devices
- Choose durable print options for long-term enjoyment