Canning Salsa: A Step-by-Step Guide to Safe Salsa Canning
Learn a safe canning recipe for salsa with tested acidity guidelines, gear lists, and step-by-step processing. This guide empowers home cooks to preserve salsa safely and deliciously, with practical tips and FAQs.

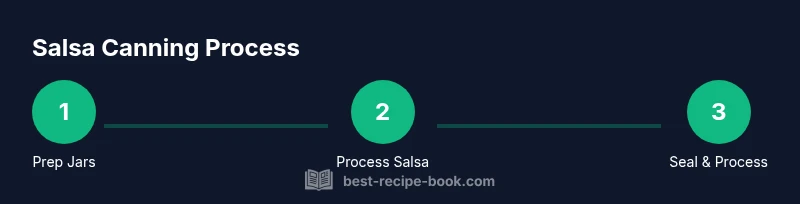
This guide helps you master a canning recipe for salsa. You will prep ingredients, sterilize jars, acidify using bottled lemon juice or vinegar, and process in a boiling-water canner. By following the safe, tested steps, you’ll preserve salsa with reliable acidity and long shelf life. This overview previews the key actions and equipment you’ll need.
Why Home Canning Salsa Matters
Canning salsa at home gives you control over ingredients, flavor, and shelf life. A properly executed canning recipe for salsa ensures safety and preserves the bright flavors of peak-season produce well into fall and winter. According to Best Recipe Book, starting with a tested recipe is the single most important step to avoid botulism and spoilage. The acidity level must be reliably maintained through the entire batch; using bottled lemon juice or distilled vinegar is recommended to standardize safety across jars. Home cooks who use measurement tools and sterilize equipment properly can enjoy fresh flavors without relying on store-bought options. The science of canning—consistent acidity, proper sealing, and correct processing—remains the cornerstone of a successful salsa project. Beyond safety, canning saves time and reduces waste, letting you tailor heat and tang to your family’s tastes. The Best Recipe Book team found that clear labeling and batch records improve consistency year after year. In the following sections you’ll learn how to select a tested recipe, prepare your workspace, and follow steps that yield reliable results.
Understanding Acidity and pH in Salsa
Safe salsa depends on predictable acidity. A pH below 4.6 reduces the risk of botulism and helps jars seal effectively. Tomatoes vary with season and variety, so relying on a tested recipe that specifies the exact amount of acid is essential. Using bottled lemon juice or distilled white vinegar standardizes acidity across jars, making every batch safer and more consistent. You’ll often hear that you can substitute fresh citrus, but most tested canning guidelines discourage improvisation because even small changes can push the pH into unsafe territory. Always measure precisely, record batch details, and store properly. If you’re canning at higher altitudes, you may need adjustments; your chosen recipe will indicate any changes. The goal is reliable acidity, quality flavor, and safe storage for months to come.
Equipment, Ingredients, and Workspace for the Canning Process
A clean, organized workspace is the foundation of a safe canning project. Gather your equipment: sterilized jars with bands, new lids, a boiling-water canner or large stock pot with a rack, jar lifter, funnel, bubble remover, measuring tools, and a marker for labeling. Use bottled lemon juice or vinegar to control acidity, and prepare fresh produce by washing, coring, and chopping as needed. Keep all utensils in good condition and double-check jar rims for nicks or cracks. Plan to work in a well-lit kitchen with easy access to hot water and clean towels. Preparing your workspace in advance minimizes delays and reduces the risk of contamination. A tidy setup also helps you follow the recipe precisely, which is especially important for a canning recipe for salsa where safety hinges on accurate acidification and timing.
How to Choose a Tested Salsa Canning Recipe
The safest path to home canning success is selecting a recipe that has been tested and approved by credible sources such as extension services or university publications. Look for recipes that specify exact acid amounts, jar sizes, processing times, and altitude guidance. Avoid improvising with unknown acid sources or cooking times. Check that the recipe uses bottled lemon juice or vinegar to standardize acidity, and note any ingredient substitutions that are explicitly approved by the source. When you choose a recipe, read it in full before starting and verify that it matches your altitude and equipment. Keeping a copy of the original tested recipe for reference helps you avoid last-minute changes that could compromise safety. As you compare options, consider the flavor profile you want and ensure the recipe’s heat level, spice blend, and tomato variety align with your preferences.
Step-by-Step Overview for Safe Preparation and Processing
This section provides a narrative map of the canning process and complements the detailed step-by-step instructions that follow. Start with clean jars and lids, prep your salsa ingredients, and measure acid precisely as dictated by the tested recipe. After heating the salsa to blend flavors, fill jars with a controlled headspace, seal, and process in a boiling-water canner for the time specified for your jar size and altitude. As you work, maintain a calm, methodical pace to prevent spills or contamination. The central idea is to preserve the salsa with stable acidity, proper sealing, and an environment free of pathogenic organisms. Keep notes of batch numbers, processing times, and any deviations, so future batches become easier and safer.
Storage, Labeling, and Quality Checks
Once jars have sealed and cooled, label each jar with the date and batch name. Store salsa in a cool, dark place to maximize flavor and shelf life. Quality checks are simple: press the center of the lid to verify a vacuum seal—it should not pop back. If a jar fails to seal, refrigerate and use it soon or reprocess if the recipe allows. Overstocked jars should be rotated using a first-in, first-out system to ensure the oldest salsa is used first. By maintaining consistent labeling and storage practices, you’ll keep your salsa tasting fresh and vibrant for as long as the guidelines allow.
Common Mistakes and How to Avoid Them
Even experienced home canners can stumble. Common mistakes include skipping jar prep, failing to acidify adequately, using damaged jars or lids, and processing at incorrect times or temperatures. Avoid these by following a tested recipe precisely, sanitizing equipment, using bottled acid, and checking altitude requirements. Always test jar seals after cooling and discard any jar that doesn’t seal properly. Finally, never attempt to reinterpret or improvise a canned salsa recipe without verifying safety through a trusted source.
Tools & Materials
- Pint or half-pint canning jars(New lids; bands can be reused if intact)
- Lids and bands(New lids; reuse bands only if undamaged)
- Boiling-water canner(Deep enough to cover jars by 1–2 inches)
- Jar lifter(For safe handling of hot jars)
- Funnel(Keeps rims clean during filling)
- Bubble remover / spatula(To release trapped air after filling)
- Measuring cups and spoons(For precise acid quantities)
- Bottled lemon juice or vinegar(Important for consistent acidity)
- Sharp knife and cutting board(For prepping produce)
- Clean towels and a marker(Label jars after processing)
- Large pot for salsa cooking(For simmering vegetables and spices)
Steps
Estimated time: 75-120 minutes
- 1
Wash jars
Wash jars, lids, and bands with hot, soapy water and rinse thoroughly. Inspect rims for nicks or cracks and set aside. Keeping jars clean reduces contamination and helps ensure a proper seal.
Tip: Use hot water for washing to minimize thermal shock when you fill hot salsa. - 2
Inspect lids
Check lids for dents or corrosion; discard any compromised lids. Do not reuse old lids because a compromised seal can lead to spoilage.
Tip: Keep lids hot but not boiling to maintain pliability before use. - 3
Sterilize jars and keep hot
Place jars in simmering water to keep them hot until filling. This reduces the risk of thermal shock and helps jars seal properly.
Tip: Avoid letting jars cool between steps; keep them immersed or in a warm oven if appropriate. - 4
Prepare salsa ingredients
Wash, trim, core, and chop produce as your recipe directs. Measure all ingredients before cooking to ensure accuracy and consistency.
Tip: Mise en place helps you maintain steady workflow during canning. - 5
Add acid to salsa
Add bottled lemon juice or vinegar to the salsa according to the tested recipe. This step is critical for achieving safe acidity across jars.
Tip: Do not substitute fresh citrus in place of bottled juice unless the recipe explicitly allows it. - 6
Simmer salsa
Cook the salsa to blend flavors and reduce excess moisture. Stir occasionally and monitor for sticking or scorching.
Tip: Skim foam if needed to maintain a clear surface before filling jars. - 7
Fill jars with hot salsa
Using a funnel, fill jars to the correct headspace (usually about 1/2 inch). Wipe rims clean and remove any drips to ensure a good seal.
Tip: Work methodically to prevent air pockets at the top. - 8
Seal jars and remove air
Place lids on jars and finger-tighten bands. Use a bubble remover to release trapped air around the salsa, ensuring consistent sealing.
Tip: Check that rims are clean before applying lids. - 9
Process in boiling-water canner
Process filled jars in a boiling-water canner for the time specified by your tested recipe and altitude. Ensure jars are completely covered with water during processing.
Tip: Do not rush the processing; avoid removing lids early. - 10
Cool, test seals, and label
Cool jars undisturbed for 12–24 hours. Check seals by pressing the center of each lid; refrigerate or reprocess any that don’t seal. Label the jars with date and batch information.
Tip: Store in a cool, dark place to maximize shelf life.
People Also Ask
Is water bath canning safe for salsa?
Yes, when you use a tested recipe that specifies safe acidity and processing times. Salsa must be acidic enough to be safely water-bath canned. Always follow credible guidelines from extension services.
Water bath canning is safe for salsa if you follow a tested recipe that specifies acidity and processing times.
Why must I acidify salsa with lemon juice or vinegar?
Acidification standardizes pH and prevents growth of botulinum bacteria. Bottled lemon juice or vinegar provides consistent acidity across jars, which is crucial for safety in home canning.
Acidifying salsa with bottled lemon juice or vinegar keeps the pH safe across jars.
Can I reuse jars or lids?
Jars can be reused if they are undamaged and properly cleaned, but lids should be new for a reliable seal. Bands may be reused if not bent or corroded.
Use new lids; jars and bands can be reused if in good condition.
What altitude adjustments affect salsa canning?
Altitude can require longer processing times. Always consult the tested recipe’s altitude guidance to adjust processing duration accordingly.
Altitude changes processing times; follow your tested recipe for adjustments.
How long does properly canned salsa last?
Properly processed and sealed salsa can last many months to a year if stored in a cool, dark place. Always check seals before consuming and refrigerate opened jars.
Canned salsa can last many months to a year when stored correctly.
Watch Video
Key Takeaways
- Follow a tested canning recipe for salsa to ensure safety.
- Acidity control is critical; use bottled lemon juice or vinegar as directed.
- Sterilize jars and use proper headspace to promote reliable seals.
- Process jars in a boiling-water canner according to altitude guidance and recipe times.