Carrot Glaze Recipe: A Silky, Versatile Finish
Learn a carrot glaze recipe that delivers a glossy, bright finish for roasted vegetables and carrot-based desserts. This step-by-step guide covers ingredients, technique, variations, and practical tips for home cooks who want professional results.

You will learn to make a silky carrot glaze by reducing carrot juice with sugar and a splash of acid, then whisking in butter for shine. This glaze complements roasted carrots, asparagus, or desserts like carrot cake. Ready for a step-by-step guide?
What is carrot glaze and when to use it
Carrot glaze is a glossy, orange-hued finishing sauce built from carrot juice or purée that is reduced until thick and syrupy. It adds a bright sweetness, a touch of tang, and a silky mouthfeel to dishes. This glaze shines on roasted carrots and vegetables, elevates proteins such as poultry or pork, and even acts as a dessert drizzle for carrot cakes, cheesecakes, or pastries. Because it relies on natural carrot sugars, the glaze carries a clean, vegetable-forward sweetness that pairs well with warm spices like ginger, cinnamon, and orange zest. In Best Recipe Book's tests, a well-made carrot glaze can replace heavier glazes with artificial flavors, offering a fresh, lighter finish. The glaze should cling to surfaces rather than pool, giving plates a professional, restaurant-like look. This guide will walk you through choosing ingredients, cooking technique, and balancing flavors so you can apply it confidently in everyday cooking.
Core ingredients and substitutions
At its core, carrot glaze uses four elements: carrot juice or puréed carrots, a sweetener, an acid, and fat for richness. You can start with fresh carrot juice from about 1 cup of chopped carrots simmered with a splash of water, or use a smooth carrot purée for deeper flavor. For sweeteners, granulated sugar is common, but maple syrup or honey can add nuance; adjust the amount to avoid over-sweetness. An acid such as lemon juice, orange juice, or a splash of apple cider vinegar brightens the glaze and helps preserve color. Butter or cream gives the glaze a luxurious sheen when whisked off heat. Optional aromatics include a pinch of salt, ground ginger, or orange zest for extra depth. If you want a dairy-free version, substitute coconut oil or olive oil and omit butter; the texture will be slightly lighter but still glossy. Best Recipe Book recommends tasting frequently while cooking to fine-tune sweetness and acidity.
Equipment and prep steps
Set up a small stove-top workspace with a medium saucepan, a reliable whisk, a fine-mesh strainer, and a silicone spatula. A citrus juicer or reamer helps extract lemon or orange juice without bitterness. Before you start, measure your liquids and sugar precisely, as glaze consistency depends on proper ratios. If you plan to finish with butter, have it cut into small cubes so it emulsifies quickly off heat. Prep your carrots by washing and finely chopping if you’re starting from purée; otherwise, you’ll juice fresh carrots and strain. Keep a clean, hot towel handy to catch any splatter and a small spoon to test thickness. A kitchen thermometer is optional but helpful if you want to monitor the reduction more precisely. Finally, align your serving plan: decide whether the glaze will be used hot or allowed to cool slightly to achieve a thicker coat.
The two primary methods to make carrot glaze
Method A: reduce carrot juice until syrupy. Simmer carrot juice with sugar over medium heat, whisking occasionally, until it thickens to a coatable consistency that clings to the back of a spoon. This method yields bright color and a clean carrot flavor. Method B: use puréed carrot as the base and thicken with a small amount of sugar or light cornstarch slurry if needed. This approach offers deeper carrot flavor and a satin texture. Whichever method you choose, finish with a cold knob of butter off the heat and whisk until glossy. If you want to expedite the process, add a dash of citrus zest and a tiny bit of salt to heighten the aroma. Watch for scorching; if it starts to brown, lower the heat and rotate the pan. For a dairy-free glaze, use a neutral oil with a small amount of nut butter for body.
Balancing sweetness, acidity, and texture
An ideal carrot glaze balances sweetness with brightness from acid and a touch of salt to sharpen flavors. Start with a moderate sugar ratio; you can always add more later, but you can’t remove it easily once reduced. A splash of lemon or orange juice raises the perfume while helping preserve color. If the glaze seems too thick, whisk in a little hot water, a few drops at a time, until coatable. If too thin, continue simmering or whisk in a tiny amount of cornstarch slurry (1 teaspoon cornstarch mixed with 1 tablespoon water) and simmer briefly. The texture should be silky, not sticky, and glaze should cling to the surface without pooling. For savory applications, consider a dot of soy sauce or miso paste in small amounts to deepen umami. For desserts, a light touch of vanilla or cinnamon can harmonize with carrot.
Pairings and serving ideas
Pair carrot glaze with roasted carrots, carrots with herbs, or roasted parsnips for a cohesive vegetable course. It also pairs well with roasted chicken or pork, where the glaze can be brushed on in the final minutes of roasting to form a shiny lacquer. Use carrot glaze as a dessert drizzle over carrot cake, crème brûlée with carrot essence, or even over warm fruit crisps for a carrot-tinged finish. In plating, drizzle in a zigzag pattern or paint the glaze along the plate edge for a professional look. This glaze can be prepared ahead and reheated gently, then whisked to restore shine. For a vibrant finish, spoon a few drops on top of a finished dish just before serving to preserve the glossy surface.
Storage, make-ahead, and reheating
Carrot glaze keeps well in the refrigerator for up to five days when stored in a clean sealed container. Reheat gently over low heat, whisking often to prevent separation. If the glaze has thickened, add a teaspoon of water or citrus juice to loosen it, then re-emulsify with the whisk. Freezing is possible but may alter texture; thaw slowly in the fridge and reheat gently. If you plan to glaze multiple batches, consider dividing the glaze into portions before refrigerating or freezing so you can lift portions as needed. A small caramelization flash on the edges can intensify flavor; adjust heat accordingly. Always taste after reheating and adjust sweetness or acid to taste.
Advanced variations and tips for perfection
Add orange zest and a pinch of ginger for a bright, spice-forward glaze. Try a maple carrot glaze by substituting a portion of sugar with maple syrup for a richer note. For a modern look, finish with a thin layer of clarified butter to maximize shine. If you want a vegan version, skip butter and finish with a splash of olive oil or coconut cream; whisk vigorously to recreate gloss. For a more intense carrot concentrate, reduce puréed carrot with a bit of apple juice for complexity. Finally, keep a clean tasting spoon for final adjustments; small changes can shift the balance dramatically, especially when using high-quality carrots.
Tools & Materials
- 3-quart saucepan(Stainless steel preferred; allows room for reduction)
- measuring spoons(For accuracy of sugar and acid)
- whisk(Ball or balloon whisk; helps emulsify glaze)
- fine-mesh strainer(Strains carrot pulp for a smooth glaze)
- silicone spatula(Scrapes edges and folds in butter smoothly)
- microplane or zester(Optional for citrus zest)
- lemon juicer or reamer(Eases juice extraction)
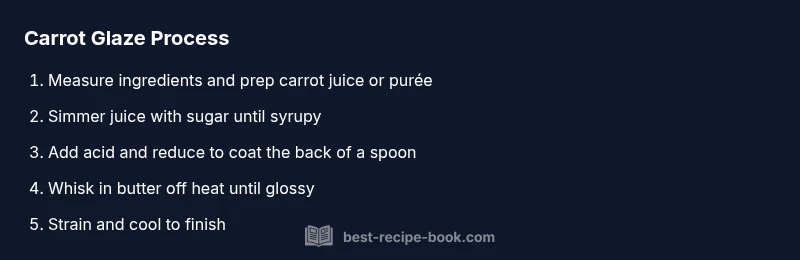
Steps
Estimated time: 25-40 minutes
- 1
Gather and measure ingredients
Measure carrot juice or purée, sugar, acid, and butter before you begin. Having everything in reach speeds the reduction and helps you maintain control over texture. This step also ensures you avoid over-reductions or burnt flavors later in the process.
Tip: Use warm carrot juice to accelerate evaporation without scorching the sugars. - 2
Simmer carrot juice with sugar
Combine carrot juice and sugar in the saucepan. Bring to a gentle simmer, then reduce the heat to maintain a steady bubble. Whisk occasionally to prevent sticking and to encourage even reduction, aiming for a syrupy consistency that coats the back of a spoon.
Tip: Keep the heat moderate; too high heat causes scorching and uneven sweetness. - 3
Add acid and reduce further
Stir in lemon or orange juice, or a splash of vinegar to brighten the glaze. Continue simmering until the glaze reads a ribbon when you drag a spoon across the surface. Taste and adjust acidity if the sweetness dominates.
Tip: Acid helps preserve color and balance; don’t skip this step if you want a vibrant glaze. - 4
Whisk in butter off heat
Remove from heat and whisk in small cubes of cold butter until the glaze shines. Off-heat whisking prevents the emulsion from breaking and helps achieve a silky texture with a glossy finish.
Tip: Whisk briskly to emulsify—a broken glaze needs re-emulsification and can be difficult to fix after cooling. - 5
Strain and cool
Strain the glaze for a perfectly smooth finish and let it cool until it coats lightly when dropped on a plate. If you’re not using immediately, cover and refrigerate. Reheat gently before serving if needed.
Tip: Straining removes carrot pulp that can cause a gritty mouthfeel.
People Also Ask
What is carrot glaze best used for?
Carrot glaze works beautifully on roasted carrots and vegetables, and it also complements poultry, pork, and desserts like carrot cake. It provides a bright, glossy finish and can be brushed on during the final minutes of cooking or drizzled at plating.
Great for roasting veggies or finishing desserts with a glossy, bright finish.
Can I make carrot glaze dairy-free?
Yes. Replace butter with a neutral oil or coconut cream and re-emulsify off heat. The glaze will be slightly different in mouthfeel but still glossy and flavorful.
Yes, you can make a dairy-free version with oil or coconut cream.
How do I know when the glaze is ready?
The glaze should coat the back of a spoon and leave a thin ribbon when drawn across the surface. Color should be bright and the taste balanced between sweet and sour.
Look for a spoon-coating consistency and bright color.
Can I freeze carrot glaze?
Freezing is possible but may affect texture. Thaw in the fridge and rewarm gently, then whisk to re-emulsify and restore shine.
Yes, you can freeze it, but thaw slowly and whisk well to re-create gloss.
What if my glaze is too sweet?
Add more acid or a pinch of salt, then simmer briefly to recombine flavors. Taste as you go to avoid dulling the carrot flavor.
Balance sweetness with acidity and a touch of salt.
Watch Video
Key Takeaways
- Taste and balance acidity early for flavor depth
- Aim for a coatable, glossy texture that clings to surfaces
- Use fresh carrot juice for vibrant color and aroma
- Experiment with citrus and spices to create variations
- Prepare ahead and re-emulsify when reheated for best shine