How to Make Perfect Chicken Cutlets: A Step-by-Step Guide
Learn to make chicken cutlets with a crisp crust and juicy interior. This step-by-step guide covers pounding, breading, pan-frying, and serving ideas for weeknight dinners. Includes tips, variations, and safety notes for home cooks.

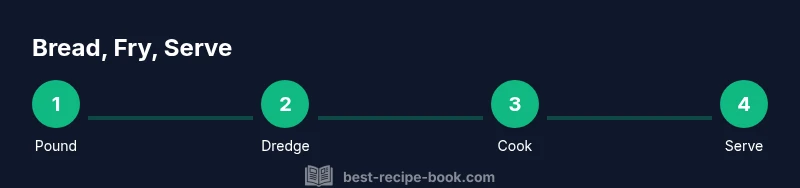
By following this chicken cutlets recipe, you’ll get tender, evenly sized cutlets with a crisp crust. Pound the breasts to uniform thickness, dredge in seasoned flour, dip in eggs, then coat with breadcrumbs and pan-fry until golden. Plan about 20-25 minutes total for a quick, satisfying weeknight dinner.
What are chicken cutlets? Definition and variations
In this chicken cutlets recipe, cutlets are thin, evenly shaped slices of chicken breast (or thigh) designed for quick, even cooking. The goal is a juicy interior with a crisp outer crust. Traditional methods pound to about 1/4 inch (6 mm) thickness, then bread and fry. Variations exist: shallow-frying for a lighter crust, baking for a lower-fat option, or finishing under a broiler for extra browning. If you prefer deeper flavor, you can mix grated parmesan into the breadcrumbs or add a touch of paprika or garlic powder to the flour. Whether you’re feeding a busy family or meal-prepping, the core technique remains the same: uniform thickness, steady heat, and a well-adhered crust that seals in moisture.
How to choose chicken for cutlets
The best chicken cutlets start with good-quality protein. Choose boneless, skinless chicken breasts of similar size so they cook evenly. Trim any excess fat and remove the end pieces if they’re particularly thick. For extra flavor, you can brine lightly for 15 minutes, but this is optional. If you must use thinner pieces, you can slice a single breast into two or three breastlets to create consistent thickness. The aim is to achieve uniform cooking so the outer crust browns while the inside remains juicy. Chicken thighs can also be used for extra tenderness, but the texture will differ from traditional breast cutlets.
The classic breading sequence: flour, egg, crumbs
A reliable breading station ensures even coating and a satisfying crunch. Start with seasoned flour for a light dusting, then dip in beaten eggs to act as a glue, and finish with breadcrumbs (Panko yields the crispiest crust). Optional additions include grated parmesan, garlic powder, or dried herbs in the breadcrumb mix for extra depth. The breading should be applied firmly so it sticks during cooking; press the crumbs onto the surface gently but thoroughly. Keep the stations shallow and organized to speed up assembly during busy weeknights.
Pan-frying vs. air-frying vs. baking
Pan-frying in a shallow pool of oil produces the most classic texture: a crisp, golden crust with a moist interior. Air-frying uses hot air to crisp without much oil but may yield a drier crust if not monitored. Baking is a convenient, lower-fat alternative, though it can be harder to get a strong crust without a finishing broil. If you bake, lightly oil the cutlets and bake at a high temperature (around 425°F/220°C) for 12-15 minutes, flipping halfway. For best results, finish with a brief sear in a hot pan to re-crisp the crust before serving.
Pounding and portioning for even cooking
Even thickness is essential for uniform doneness. Place the chicken between parchment or plastic wrap and pound gently with a meat mallet until about 1/4 inch thick. This prevents overcooking the outer edge while the center finishes. If you’re working with uneven pieces, trim them to create a consistent shape. After pounding, pat dry to remove surface moisture; moisture can steam the crust instead of browning it. Portioning evenly ensures all cutlets cook at the same rate, which is especially helpful when cooking in batches.
Juiciness: resting and temperature ideas
Juicy cutlets come from careful cooking and a brief rest. Cook until the crust is deeply golden and the internal temperature reaches 165°F (74°C). Remove from heat and let rest 2-3 minutes before serving to allow juices to redistribute. If you undercook by mistake, a quick return to a hot pan for 30-60 seconds per side can rescue texture. Conversely, overcooking dries the meat; use an instant-read thermometer to monitor progress closely.
Make-ahead and meal-prep options
Breaded cutlets can be assembled ahead of time and kept uncooked in the refrigerator for up to a day, or frozen for longer storage. To freeze, lay them on a tray to harden, then transfer to a freezer-safe bag. White bread crumbs absorb moisture, so you can skip pre-seasoning the flour if you’re preparing ahead and plan to season just before breading. For meal-prep, cook a batch of cutlets in advance and reheat gently in a skillet with a splash of oil, or warm in a 350°F (175°C) oven for 5-8 minutes until heated through.
Sauces and serving ideas
Classic lemon-garlic pan sauce, a creamy mushroom sauce, or a simple herb butter all pair beautifully with chicken cutlets. Serve with mashed potatoes, a bright green salad, or roasted vegetables for a balanced plate. A light yogurt or lemon-dill yogurt sauce adds tang without heaviness. For a weeknight dinner, a side of rice pilaf or quick sautéed greens keeps the meal approachable and satisfying. Consider a sprinkle of fresh herbs like parsley or chives to finish.
Troubleshooting common issues
If the crust falls off, ensure the surface is dry, you’ve dried the cutlets well after dredging, and the oil is at the right temperature. If the inside remains pale, check the thickness and increase cooking time in small increments while keeping the heat steady. For a greasy crust, use a skillet with a bit more surface area and avoid overcrowding. If breadcrumbs burn before the chicken cooks through, lower the heat slightly and cook in batches, allowing space for even browning.
Health, safety, and substitutions
Always handle raw chicken with clean hands and sanitized surfaces. Cooked chicken should reach 165°F (74°C) internal temperature. If you’re avoiding gluten, use gluten-free breadcrumbs or crushed cornflakes as a crust. For dairy-free diets, skip the parmesan in the breading and use a seasoned flour mix. If you’re watching fat, opt for a light spray of oil in the breadcrumbs or finish with a quick bake instead of fry.
Seasonal twists and dietary variations
Switch herbs and spices to reflect the season: lemon and dill in summer, smoked paprika and garlic in winter. For a lighter option, use panko with a whisper of olive oil spray and skip the cheese. You can also experiment with different proteins like turkey or chicken cutlets made from thighs for a richer texture. These variations keep the core technique intact while broadening flavor profiles.
Flavor boosters: textures and finishing touches
Texture is king in a great chicken cutlet. Keep the crust crisp by maintaining steady heat and allowing space between pieces. A touch of grated citrus zest in the breading can brighten the overall flavor, while a final squeeze of lemon over the finished cutlets elevates the dish. Fresh herbs, a pinch of chili flakes, or a dusting of coarse sea salt just before serving can take a simple cutlet to next-level delicious.
Tools & Materials
- Boneless, skinless chicken breasts(Two to three breasts, pounded to uniform thickness (~1/4 inch / 6 mm))
- Kosher salt(Season generously, both on chicken and flour)
- Black pepper(Freshly ground if possible)
- All-purpose flour(Seasoned with a pinch of salt and pepper)
- Eggs(Lightly beaten for dipping)
- Breadcrumbs(Panko for extra crunch; mix with parmesan if desired)
- Grated parmesan cheese(Optional for flavor in the breadcrumb mix)
- Neutral cooking oil (like canola or vegetable)(For shallow frying; oil should come about 1/4 inch up the pan)
- Meat mallet or rolling pin(For pounding to even thickness)
- Three shallow bowls or plates(For flour, egg, and breadcrumbs)
- Nonstick skillet or cast-iron skillet(Large enough to avoid crowding)
- Instant-read thermometer(Optional but helpful for doneness)
- Tongs(Turn cutlets without breaking crust)
Steps
Estimated time: Total time: 20-25 minutes
- 1
Pound the chicken to even thickness
Place each breast between plastic wrap and gently pound to about 1/4 inch (6 mm). Aim for uniform thickness to ensure even cooking; work from the center outward and check for flatness. Image reference: pounding technique.
Tip: Keep the motion even and avoid tearing the meat. - 2
Season the chicken
Season both sides with kosher salt and black pepper. Seasoning now helps flavor permeate the meat. If desired, sprinkle a light pinch of garlic powder or paprika for extra depth.
Tip: Season evenly and avoid oversalting; you can adjust at the end of cooking. - 3
Set up the breading stations
Arrange three shallow bowls: one with seasoned flour, one with beaten eggs, and one with breadcrumbs (plus optional parmesan). Keep stations shallow and close to the work area to speed assembly.
Tip: Keep breadcrumbs dry to prevent clumping. - 4
Dredge in flour, dip in egg, coat with breadcrumbs
Dredge the cutlet in flour, tapping off excess. Dip in eggs, letting excess drip back, then press into breadcrumbs until evenly coated. Repeat for all pieces.
Tip: Press breadcrumbs firmly so they adhere; a light spray of oil in the breadcrumb bowl can help crunchy adhesion. - 5
Preheat the pan and add oil
Heat a large skillet over medium-high heat and add enough oil to shimmer (about 1/4 inch depth). The oil should be hot but not smoking before adding cutlets.
Tip: Test with a crumb—if it sizzles, the pan is ready. - 6
Cook the cutlets
Place cutlets in a single layer without crowding. Cook 2-3 minutes per side until the crust is golden and the interior reaches 165°F (74°C). Adjust heat as needed to maintain browning without burning.
Tip: Cook in batches if necessary; overcrowding lowers pan temperature and steams instead of browns. - 7
Rest and serve
Transfer to a plate and let rest 2-3 minutes before serving to redistribute juices. Serve with lemon wedges, sauces, or sides of your choice.
Tip: Resting helps maintain juiciness even after slicing.
People Also Ask
What is the best cut of chicken for cutlets?
Boneless, skinless chicken breasts are the standard choice for chicken cutlets, offering easy slicing and uniform cooking. Thighs can be used for a juicier result, though the texture will differ. For best results, aim for even thickness across pieces.
Boneless breasts are ideal, but thighs can work if you prefer a juicier bite. Aim for even thickness.
Can chicken cutlets be baked instead of fried?
Yes. For a lighter method, bake at 425°F (220°C) for 12-15 minutes, flipping halfway. To get a crisper crust, finish under a broiler for 1-2 minutes. Baking is convenient and reduces oil use.
You can bake them at 425°F for 12-15 minutes and finish under the broiler for extra crisp.
How can I prevent the crust from falling off?
Pat the cutlets dry, ensure the surface is free of excess moisture, and press breadcrumbs onto the surface firmly after dipping in eggs. Maintain steady heat to avoid steam that loosens the crust.
Dry the surface, press breadcrumbs firmly, and cook at steady heat to keep the crust attached.
What internal temperature should chicken cutlets reach?
Internal temperature should reach 165°F (74°C) for safe consumption. Use an instant-read thermometer to verify at the thickest part.
Cook them to 165 degrees Fahrenheit, checking the center with a thermometer.
Can I freeze breaded cutlets before cooking?
Yes. Freeze on a tray until solid, then transfer to a freezer bag. They keep well for up to 2 months. Cook from frozen, adding a minute or two to the total time.
You can freeze the breaded cutlets for later cooking; cook from frozen when ready.
What sides go well with chicken cutlets?
Lemon wedges, mashed potatoes, green vegetables, or a simple salad pair nicely. A light yogurt-dill sauce or a tomato-basil topping also complements the crusty cutlets.
Try lemony greens or potatoes with a fresh sauce to balance the crust.
Watch Video
Key Takeaways
- Pound to even thickness for uniform cooking
- Use a three-step breading for crisp crust
- Cook in batches to avoid steaming
- Let rest briefly before serving
- Customize with sauces and sides