How to Make Crispy Fried Shrimp: A Complete Step-by-Step Guide
Learn how to make restaurant-crisp fried shrimp at home with a reliable batter, precise frying temperatures, and practical tips for juicy shrimp every time.

You will learn how to make restaurant-crisp fried shrimp at home, using a reliable batter and precise frying method. This quick guide covers prep, dredging, seasoning, frying temperatures, and serving ideas, with options for beer-batter and Tempura. Gather fresh shrimp, neutral oil with a high smoke point, a thermometer, and a lemon for brightness.
What makes fried shrimp truly crispy
Crisp fried shrimp hinge on three interconnected factors: moisture management, a well-balanced dredge or batter, and precise oil temperature. The shrimp should be thoroughly patted dry before any coating touches them; surface moisture creates steam and soggy crust. A light, evenly distributed dredge—often a mix of flour and cornstarch or a thin tempura batter—forms a barrier that seals in juices while providing a satisfying crunch. Temperature control is non-negotiable: fry at a steady 350–375°F (175–190°C) to achieve a quick crust before the shrimp overcooks. According to Best Recipe Book, mastering these basics elevates home fried shrimp from tasty to crave-worthy, with consistent results across batches.
Ingredients and pantry staples for fried shrimp
The core ingredients for fried shrimp are simple, but the quality and balance of seasonings matter. Start with fresh, peeled and deveined shrimp, ideally about 21–25 count per pound for even frying. For the dredge, use all-purpose flour, a touch of cornstarch for extra crisp, salt, white pepper, and paprika or garlic powder for warmth. Optional binders include beaten eggs or a splash of cold beer for beer-batter texture. You’ll also need neutral oil with a high smoke point, such as peanut, canola, or vegetable oil, plus lemon wedges or a simple dipping sauce to finish. Freshness and dryness at every step contribute to the best crust and juiciest shrimp.
Batter options: classic dredge, beer batter, or Tempura
There are multiple paths to a crispy crust, each with its own flavor and texture profile. A classic dredge uses seasoned flour and cornstarch for a light, delicate crust that clings to the shrimp. Beer batter creates a slightly airy, bubbly shell with rich flavor, while Tempura—made from ice-cold water, starch, and minimal gluten—delivers a super-light, crisp finish. For best results, keep coatings cold and the shrimp cold before dipping so the crust stays intact when it hits hot oil. You can also adjust spices (paprika, garlic powder, cayenne) to suit your taste and regional preferences. In all cases, ensure the shrimp are dry before coating to maximize crunch.
Frying fundamentals: oil choice, temperature, and crowding
Oil choice affects flavor and smoke point; peanut or canola oil is a common choice for fried seafood because of high heat tolerance and clean taste. Maintain oil at a steady 350–375°F during frying, adjusting heat as you add batches. Overcrowding the pan drops the oil temperature, leading to greasy crusts and undercooked centers. Fry in small batches, turning once for even color, until the crust is golden brown and the shrimp are opaque. Use a slotted spoon or spider to transfer fried shrimp and let them rest on a rack or paper towels to drain excess oil. This disciplined approach yields consistently crisp results across servings.
Equipment setup: a perfect breading station and fryer setup
A well-organized breading station streamlines the process and reduces mess. Set out three shallow bowls: seasoned flour (and cornstarch if using), beaten eggs or a water binder, and a tray of prepped coating. Have a baking sheet or rack ready to drain finished shrimp. If you’re deep-frying, use a heavy, high-walled pot or a dedicated fryer and a thermometer. For pan-frying, choose a wide skillet with enough oil to come halfway up the shrimp, so the coating can crisp without sticking. A heat-safe silicone spatula helps with gentle flipping and removal. Keeping mise en place organized minimizes gaps and ensures a smooth fry.
Spices and coatings to customize flavor profiles
Spice blends can transform fried shrimp from simple to signature. A classic mix includes salt, white pepper, paprika, and garlic powder for warmth. Add a pinch of cayenne for a mild heat or smoked paprika for a deeper, smoky note. For a different texture, try a light Tempura batter with ice-cold water and a dash of baking soda for extra lift. If you prefer a gluten-free option, swap all-purpose flour for rice flour or cornmeal with a touch of cornstarch. Finish with a squeeze of lemon and a bright dipping sauce (tartar, remoulade, or a simple aioli) to balance richness.
Safe handling, oil reuse, and health considerations
Frying at home is safe when you follow basic kitchen safety rules. Keep a clear workspace and keep children away from hot oil. Do not leave oil unattended and avoid water in the oil. After frying, strain used oil through a fine-mesh sieve and store in a cool, dark place if you plan to reuse it once or twice; discard if it shows off-odors or excessive smoking. For health-conscious cooks, portion control and draining thoroughly helps manage fat content while still delivering a satisfying crunch. Best Recipe Book notes that a well-controlled fry improves texture and reduces waste across batches.
Serving ideas, sauces, and plate presentation
Serve fried shrimp immediately for maximum crispness. Classic accompaniments include lemon wedges, tartar sauce, a tangy remoulade, or a simple garlic aioli. Pair with light sides like coleslaw, a bright cucumber salad, or a fresh cilantro-lime rice to balance the richness. A crisp white wine or a cold light beer complements the dish well. For a fun twist, offer a spicy dipping sauce with a touch of sriracha or chili garlic paste. Presentation matters: pile shrimp on a warm platter with lemon slices and a scatter of finely chopped herbs for color and aroma. Based on Best Recipe Book guidance, quick plating can elevate the dining experience even when cooking at home.
Troubleshooting common issues and fixes for fried shrimp
Even experienced cooks encounter snags when frying shrimp. If the coating isn’t crisp, ensure the oil is hot enough and not overcrowded; a crowded pan drops temperature, resulting in soggy crusts. If the coating flaked off, make sure the shrimp were dry and that the coating adhered before the oil hit. For oily crusts, drain thoroughly and blot with paper towels, then finish with a final 30-second fry to re-crisp. If the shrimp are undercooked inside, check the internal temperature (shrimp should be opaque and pink, not translucent) and avoid re-warming in oil that’s too hot, which can overcook the exterior. With careful attention to temperature and technique, you can consistently fix common issues and enjoy perfectly fried shrimp.
Tools & Materials
- Shrimp, peeled and deveined(Count per pound should be appropriate for even coating (e.g., 21–25 per lb))
- All-purpose flour(Seasoned flour optional; add salt and spices for flavor)
- Cornstarch(Helps crispness in dredge)
- Eggs or ice-cold water (binder)(Beaten eggs create binding; water can be used for non-egg batter)
- Beer (for beer batter)(Optional; use a light beer for flavor and lift)
- Paprika(Adds color and warmth)
- Garlic powder(Balanced flavor with onion powder or salt)
- Salt and black pepper(Season to taste)
- Cayenne or chili powder(For a gentle heat)
- Neutral frying oil (peanut/canola/vegetable)(High smoke point; enough to submerge shrimp if deep-frying)
- Oil thermometer(Monitor temperature precisely)
- Slotted spoon or spider(Safe removal from hot oil)
- Wire rack or paper towels(Drain shrimp after frying)
- Lemon wedges(Brighten with a squeeze just before serving)
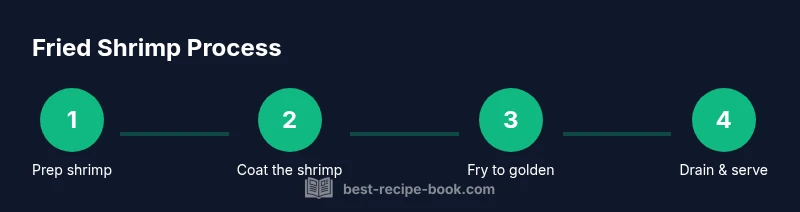
Steps
Estimated time: 45-60 minutes
- 1
Prep the shrimp
Pat shrimp dry thoroughly with paper towels to remove surface moisture. If needed, devein and trim tails for uniform coating. Dry shrimp fry more evenly and cling better to the dredge or batter.
Tip: Dry shrimp remove excess surface moisture that can steam and ruin crust adhesion. - 2
Set up your breading station
Arrange three shallow bowls: seasoned flour (and cornstarch if using), beaten eggs or binder, and a tray with coating. Keep everything within arm’s reach for efficiency and clean hands.
Tip: Organize in the order you’ll use to minimize cross-contamination and speed up frying. - 3
Heat the oil
Pour oil into a deep skillet or fryer to a depth that allows shrimp to move freely. Heat to 350–375°F (175–190°C) before testing with a small piece of batter.
Tip: Use a thermometer to maintain steady temp; cold oil will lower the temperature and lead to greasy crust. - 4
Dredge or batter the shrimp
Dip shrimp in the binder, then roll in the seasoned flour mixture or battered coating. Shake off excess so the crust adheres and doesn’t clump.
Tip: Light, quick coatings adhere better than thick layers which can crack while frying. - 5
Fry in batches
Carefully place shrimp in hot oil in small batches. Fry until the crust is golden brown and shrimp are opaque, about 2–3 minutes per side depending on size.
Tip: Avoid crowding; maintain oil temperature for crisp results. - 6
Drain and rest
Remove shrimp with a slotted spoon and drain on a rack or paper towels to remove surface oil. Rest 1–2 minutes to help set the crust.
Tip: A short rest boosts crispiness right before serving. - 7
Season and finish
Lightly sprinkle with extra seasoning while hot, then serve with lemon wedges and dipping sauce.
Tip: A brief salt boost while hot enhances flavor without over-salting later. - 8
Cleanup and oil care
Strain used oil if reusing (no more than once or twice) and store safely. Wipe surfaces and dispose of frying oil responsibly.
Tip: Label oil with date and odor; discard if it smells off.
People Also Ask
What is the best oil for frying shrimp?
A high-smoke-point oil like peanut, canola, or refined sunflower is ideal. These oils tolerate the heat without imparting unwanted flavors and help achieve a crisp crust.
Use a high-heat oil such as peanut or canola for a crisp crust without overpowering the shrimp.
Should I thaw frozen shrimp before frying?
Yes, thaw completely and pat dry for best crust. Frozen shrimp can release water as they defrost, leading to soggy coating.
Thaw fully and pat dry to ensure a crisp crust.
Can I bake fried shrimp instead of frying?
Baking can work for a lighter texture, but it won’t achieve the same level of crispness as frying. If you bake, spray with oil and bake at high heat until golden.
Baking is possible but won't be as crisp as frying.
How do I tell when shrimp are cooked?
Shrimp should be opaque and pink with a slight curve. Overcooking makes them tough and dry.
Shrimp turn opaque and curl when done; avoid overcooking.
Why isn’t my coating sticking well?
Ensure shrimp are completely dry and coat immediately after drying. If using eggs, whisk well and apply coating while the binder is still wet.
Keep the shrimp dry and coat quickly after binding.
How long can I store fried shrimp leftovers?
Store in the refrigerator for 1–2 days in an airtight container. Re-crisp in a hot oven or air fryer rather than microwaving.
Best eaten fresh, but you can re-crisp later in a hot oven.
Watch Video
Key Takeaways
- Choose dry shrimp and light coatings for crisp crust.
- Maintain oil at 350–375°F for best texture.
- Fry in small batches to avoid temperature drop.
- Experiment with batter variations for different flavors.
- Serve immediately with bright dipping sauces for balance.