How to Make Recipe Cards in Word: A Step-by-Step Guide
Learn to create printable, professional recipe cards in Microsoft Word with a clear, step-by-step process. Explore layouts, templates, formatting tips, and printing best practices to produce shareable cards from home.

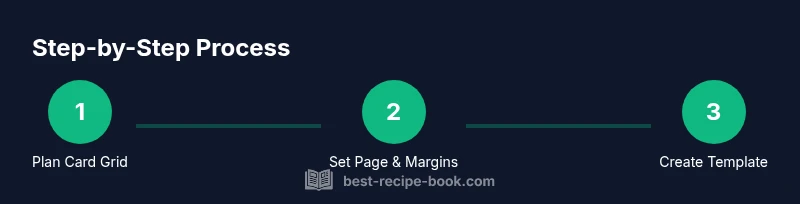
You can create professional recipe cards in Word by setting up a reusable template, adjusting margins, and using a simple grid layout to fit multiple cards per page. This approach keeps formatting consistent, simplifies printing, and makes it easy to reuse for new recipes. Ideal for family menus or giftable collections.
Why make recipe cards in Word?
According to Best Recipe Book, learning how to make recipe cards on Word is a practical, accessible solution for home cooks who want to organize favorites, gift friends, or build a family archive. Word's familiarity means you don't need advanced design software, and you can reuse templates across dozens of recipes. A well-made Word card can be printed on sturdy stock or shared digitally with ease. The Best Recipe Book team found that this approach balances customization with simplicity, enabling consistent formatting without steep learning curves. If you're tired of bulky binders or inconsistent hand-written notes, Word offers a fast path to tidy, professional-looking cards that you can print at home or hand out as gifts. This method supports branding consistency through font choices, color accents, and borders, helping you build a recognizable recipe collection.
Choosing a layout that fits your needs
Layout choices determine readability and printing efficiency. For many home cooks, a two-card-per-page grid in portrait orientation keeps cards compact while leaving room for notes. If you plan to annotate variants or substitutions, a larger card (4x6) with extra white space can be beneficial. Consider whether you want a vertical or horizontal card; vertical often works well for printable catalogs, while horizontal suits step-by-step lists. Start by sketching a rough card outline on paper, then translate that to a Word table or grid. Use clear headings for Title, Servings, Time, Ingredients, and Steps, and reserve a consistent space for notes. A consistent grid makes it easy to duplicate the design across dozens of recipes, which is especially helpful when you’re compiling gifts or a family cookbook. Based on Best Recipe Book analysis, standardizing structure reduces editing time and keeps your cards legible at a glance.
Setting up your Word document for cards
Begin by configuring Word for a clean card layout. Set the page size to the common printer dimension (8.5x11 inches) and choose Portrait orientation. Set narrow margins to maximize usable space, then enable a grid or table structure to align elements precisely. Create a template with named sections: Title, Subtitle (servings/time), Ingredients (bulleted list), and Steps (numbered list). Save this setup as a reusable template (.dotx) so you can drop in new recipes without rebuilding the layout. If you plan to print multiple cards, design a two-column grid so you can print two cards per row and minimize paper use. Consistency in margins and spacing is key to a polished result.
Designing a reusable template
A professional template anchors your card designs. Choose a legible font pairing (e.g., a serif for the title and a sans-serif for body text) and set up paragraph styles for Titles, Subtitles, Ingredients, and Steps. Define a color scheme and border style that you’ll apply across all cards to create a cohesive collection. Use Word’s Styles to enforce hierarchy, which also makes global edits fast. Create placeholders for the core fields: Recipe Title, Servings, Prep Time, Ingredients, and Steps. Keep the card width around 3x5 or 4x6 inches, depending on the intended print size. Saving these choices as a template will save time for future recipes and ensure brand consistency across your cookbook.
Creating a printable sheet (grid) for multiple cards
Printing multiple cards per sheet is efficient and cost-effective. Set up a grid on the page that matches your card size; for instance, two 4x6 cards per 8.5x11 sheet in landscape orientation or four 3x5 cards per page in portrait. Use a table or grid to maintain alignment, and lock column widths to prevent shifting when printing. Include crop marks or light bleed if your printer supports it, and ensure margins leave room for cutting. Test print a few sheets to confirm alignment before running a full batch. This step pays off when you want to produce gifts or a family cookbook with a consistent look.
Formatting ingredients and steps for clarity
Treat ingredients as a compact, scannable list. Use a bulleted list with concise entries, and group ingredients by component (base, optional toppings, etc.). For steps, use a numbered list with short, action-oriented sentences. Break long steps into sub-steps if needed to improve readability. Apply bold styling to headers like “Ingredients” and “Steps” to guide the eye, and maintain consistent indentation. If your card will be read quickly, aim for one-line ingredients and 1–2 sentence steps. This clarity helps both new cooks and senior readers follow along without confusion.
Adding visuals: icons and photos
Images can elevate your cards, but keep them purposeful. Use small icons next to sections (a spoon for ingredients, a clock for time) or a tiny photo of the finished dish. Ensure visuals don’t overwhelm text or shrink under print; keep images to a modest size and place them in a dedicated corner of the card. If you plan to print in color, calibrate the printer to ensure color accuracy. For branding, you can add a small logo or a consistent corner badge to all cards. Visuals should enhance legibility, not clutter the card.
Printing and paper considerations
Choose a sturdy stock to give the cards a durable feel; 80-110 lb card stock is a common choice for home printers. Print a test sheet first to verify color accuracy and text size. If you’re printing in color, use high-quality ink and select a print quality setting that balances speed and clarity. After printing, let the pages dry before cutting to avoid smudging. Use a paper trimmer or a sharp craft knife and a metal ruler for clean, straight edges. Finally, sort the cards by recipe and inspect for any misalignments, reprinting as needed.
Authority sources and templates in Word
To reinforce good practices, consult credible sources for basic formatting and layout ideas. For example:
- https://www.usda.gov
- https://extension.illinois.edu
- https://support.microsoft.com These sources provide general guidelines on writing clear, reader-friendly documents and reliable Word features that help you create and format recipe cards consistently.
Next steps and customization ideas
With a solid Word-based template, you can easily expand your recipe card collection. Consider creating different card sizes for different uses (gift cards, recipe cards for family cookbooks, or classroom activity sheets). Save multiple templates for various cuisines or dietary needs. You can also export your completed cards as PDFs to share with friends or to print at a local print shop. Finally, keep your template updated with any branding changes or new sections you want to add, and continue to refine formatting for maximum readability and aesthetic appeal.
Tools & Materials
- Computer with Microsoft Word (recent version)(Word 2016+, or Word for Microsoft 365; ensure you have basic template creation features.)
- Printer capable of color or grayscale printing(Color printing is preferred for visuals; otherwise grayscale works fine.)
- Card stock or thick inkjet/laser paper(Aim for 80-110 lb stock; standard size is 8.5x11 inches, to be cut into cards.)
- Ruler or paper trimmer(Helpful for clean, straight edges during cutting.)
- Optional: corner rounder or stickers(Adds a polished finish or easy labeling.)
Steps
Estimated time: 60-90 minutes
- 1
Open a blank Word document and set up the page
Launch Word, go to Layout, select Page Setup, and set the paper size to 8.5x11 inches. Choose Portrait orientation and narrow margins to maximize usable space. Create a grid using a table or columns to align card content consistently.
Tip: Use paragraph styles for Titles and Headings to ensure uniform spacing across cards. - 2
Create a reusable template structure
Define a template with named sections: Title, Servings, Time, Ingredients, and Steps. Save this setup as a Word Template (.dotx) so you can reuse it for every new recipe without rebuilding.
Tip: Keep placeholder text brief and switch to real content after duplicating the template. - 3
Design a single card layout
Decide on a card width (e.g., 3x5 or 4x6 inches) and place headers and content areas. Apply a consistent font pairing and set line spacing that remains readable when printed. Use bold headings for quick scanning.
Tip: Test readability by printing a sample at actual size. - 4
Configure a card grid for printing
Set up a grid on the page to fit multiple cards per sheet. Lock column widths and avoid shifting during printing. Include light crop marks if your printer supports them.
Tip: Print a test sheet to verify alignment before committing to a full run. - 5
Enter recipe data
Fill in the Title, Servings, Prep/Cook Time, Ingredients, and Steps fields. Keep ingredients concise and steps numbered. Use consistent units and terminology across recipes.
Tip: Keep a separate document with standard ingredient abbreviations to speed data entry. - 6
Format ingredients and steps
Use a bulleted list for ingredients and a numbered list for steps. Indent sub-items where needed and apply a readable font size. Bold section headers and keep margins uniform.
Tip: Leverage Word Styles to apply changes globally. - 7
Add visuals and branding
Insert small icons next to sections or a tiny dish photo. Include a small logo or a color badge to reinforce branding without clutter.
Tip: If using images, ensure they are optimized for print to avoid heavy file sizes. - 8
Save as template and test print
Save the finished card as a template file (.dotx) and print a single test sheet. Check alignment, font size, and color balance before proceeding.
Tip: Keep a master copy of the template in a cloud drive for easy access. - 9
Print and cut the cards
Print on card stock, allow ink to dry fully, then cut along the guides. Use a straight edge or ruler for clean edges and organize cards by recipe.
Tip: If you cut by hand, a steady hand and a sharp blade yield the best results. - 10
Maintain and reuse the template
Regularly update the template with new sections or design tweaks. Save updated versions as new templates to maintain brand consistency.
Tip: Periodically review older cards for consistency with current branding.
People Also Ask
Can I use Word to print professional recipe cards?
Yes. Word supports templates, grids, and styled text that produce clean, professional-looking cards when paired with the right cardstock and a printer. Start with a simple template and adapt as you go.
Yes. Word can print professional recipe cards with templates and a clean layout.
What page size should I use for recipe cards?
Common sizes are 3x5 or 4x6 inches. Configure Word’s Page Setup to match the chosen size and adjust margins to maximize usable space.
Common sizes are 3x5 or 4x6 inches; set Word to that size.
How do I keep formatting consistent across cards?
Create a template with defined Styles for titles, ingredients, and steps. Reuse the template for new recipes and update the style sheet as needed to maintain uniformity.
Use a template with defined styles to keep formatting consistent.
Can I export or share the cards as PDF?
Yes. Word documents or templates can be saved or exported as PDFs for easy sharing and reliable printing at other venues.
Yes, export as PDF for easy sharing and consistent printing.
Are there ready-to-use Word templates for recipe cards?
Word often includes templates or you can create your own from scratch. Starting with a template saves time and helps you apply branding consistently.
Yes, you can use built-in templates or create your own.
How can I print multiple cards per sheet efficiently?
Design a grid on the page to fit several cards, then print a test sheet to verify alignment before running a full batch.
Use a grid to fit several cards per sheet and test print first.
Watch Video
Key Takeaways
- Plan a clean grid before typing content.
- Use Styles for consistent typography and spacing.
- Test print to catch alignment issues early.
- Save as a Word template for rapid reuse.