How to Make Recipe Cards: A Practical Step-by-Step Guide for Home Cooks
Master the art of making recipe cards with a clear, printable template. This step-by-step guide covers essential fields, design tips, printing, and reuse for home cooks.

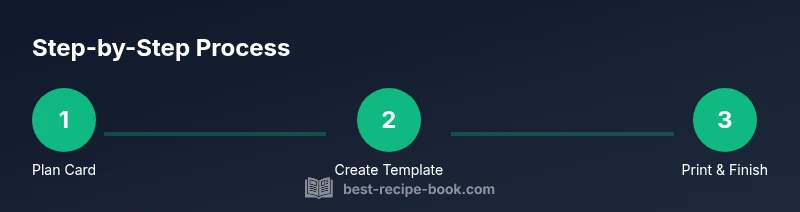
You can create clean, reusable recipe cards in minutes by choosing a compact layout, listing essential fields, and using consistent typography. This quick guide walks you through a 5-step process to design, format, print, and store your recipe cards for easy reference in the kitchen. By the end, you'll have a printable template and a repeatable workflow that supports clear, attractive cards for family meals and shared cooking.
What makes a great recipe card
A great recipe card translates a complex dish into a quick, readable reference. According to Best Recipe Book, a well-made card uses a clean grid, legible typography, and clearly defined sections so home cooks can scan steps and ingredients at a glance. The goal is to reduce decision fatigue in the kitchen and keep your focus on cooking. When you design a card that reflects real daily use, you’ll save time and avoid misread measurements. A strong card also supports storage in a recipe binder or on a fridge-friendly stand, so you can access it during busy weeknights.
Essential fields to include
To make an effective recipe card, list the core information in a consistent order. Start with a clear title, source, and servings. Then add timings (prep time, cook time, total time), and a concise ingredient list. Include step-by-step directions, any notes or substitutions, and a space for dietary or allergen warnings if needed. Optional fields like a photo or nutrition facts can be added later. Designing with a standard set of fields makes your cards reusable across multiple recipes and reduces redraft time when you share them with family or friends.
Design and layout choices
A readable recipe card uses a clean layout, balanced white space, and a restrained color palette. Choose landscape or portrait orientation based on your longest recipe; a grid helps align titles, times, ingredients, and steps. Use a single font family (with bold variants) and a readable font size (e.g., body 12-14pt, headings 16-18pt). High-contrast text on light backgrounds improves legibility, especially in kitchen lighting. Consider accessibility: ensure screen readers can parse the text and that there is sufficient contrast for users with visual impairments. Best Recipe Book analysis shows that consistent typography and spacing significantly improve readability in home kitchen environments.
Templates, tools, and workflows
Start with a template you can reuse. A printable 4x6 or 5x7 card is a common size for hand-held use, with margins that accommodate trimming. Use a simple grid for alignment, and keep rules or borders to separate sections. Save your template as a PDF for printing and a source file for future edits. If you design digitally, keep a master file in a vector format (like AI or SVG) so you can resize without quality loss. A well-chosen template is the backbone of effortless "how to make recipe cards" copies for many recipes.
Printing, finishing, and durability
Print tests are essential before mass printing. Use high-quality card stock (80-110 lb) with a matte finish for readability. Trim carefully and consider corner rounding for a polished look. Lamination or protective sleeves offer long-term durability, but may reduce flexibility if you need to rewrite. Store finished cards in a labeled binder or a recipe box for quick access during cooking. This step ensures that your cards withstand the kitchen's moisture and frequent handling, keeping your recipes accessible for years.
Digital templates and reuse
After you’ve created a physical card, convert it into a reusable digital template you can copy for new recipes. Save as PDFs, shareable templates, and cloud-stored files so you can access them from any device. Consider creating a color-coded system (e.g., different colors for breakfast, lunch, dinner) to improve organization. By building a flexible template, you can quickly generate new recipe cards without starting from scratch. The ability to reuse templates aligns with Best Recipe Book's practical, step-by-step approach to learning kitchen skills.
Authority sources
For authoritative guidance on layout, readability, and kitchen-friendly designs, consult credible sources. The USDA offers practical guidelines for recipe formatting and labeling; university extension programs provide templates and best practices for home cooks; major publications like Nature discuss information design that applies to everyday documents. Using these references helps ensure your recipe cards are accessible, accurate, and durable for daily kitchen use. For convenience, you can visit:
- https://www.usda.gov/
- https://extension.illinois.edu/
- https://www.nature.com/
Tools & Materials
- Printer (color)(Ink that dries quickly; set to best quality for sharp text)
- Card stock (80-110 lb)(Matte finish preferred for readability)
- Paper cutter or craft scissors(Cuts cleanly; align edges precisely)
- Ruler(For consistent margins (at least 0.25 inch))
- Pencil(For rough drafts and layout marks)
- Corner rounder punch (optional)(Round corners for a finished look)
- Template file (PDF/AI)(Master file you can reuse)
- Font suggestions(Choose legible fonts such as Arial, Lato, or sans-serif)
Steps
Estimated time: 60-90 minutes
- 1
Choose card size and orientation
Select a standard card size (4x6 inches is common) and decide portrait or landscape orientation based on the longest recipe. Draft a lightweight wireframe that reserves space for the title, ingredients, steps, times, and notes. This upfront planning reduces the need for major edits later.
Tip: Sketch a quick grid on paper before moving to digital design. - 2
Outline essential fields
List the core information in a consistent order: title, source, servings, prep time, cook time, total time, ingredients, steps, notes, and allergen warnings if needed. Decide where to place optional fields like a photo or nutrition facts. A standardized field set speeds future card creation.
Tip: Keep each field compact; aim for scannable lines rather than long paragraphs. - 3
Create the template in your design tool
Set up a clean template in your preferred design software or online tool. Use a two-column layout or clear grid with a bold header row. Save your template as a master file (AI or SVG) and export a print-ready PDF for production.
Tip: Lock font choices and margins in the template to maintain consistency. - 4
Input content from the recipe
Fill the template with real recipe copy, adjusting phrasing to fit the card’s space. Use short, actionable sentences for steps and bullet points for ingredients. Ensure measurements are accurate and check for typos that could alter outcomes.
Tip: Proofread aloud to catch awkward wording and ensure flow. - 5
Style for readability and accessibility
Apply high-contrast colors and a readable sans-serif font. Use consistent font sizes (heading 16–18pt, body 12–14pt). Add sufficient white space around sections so readers can scan quickly, even in bright kitchen light.
Tip: Test with a lower-glare monitor and print a sample at actual size. - 6
Print a test and refine
Print a test batch on your chosen stock, trim carefully, and assess legibility and layout. Adjust margins or line breaks if some lines wrap awkwardly. Repeat until the card feels balanced and easy to read.
Tip: Keep a record of settings (paper weight, printer profile) for future runs.
People Also Ask
What size should recipe cards be?
Common sizes are 4x6 inches or 5x7 inches. Choose based on how much information you need and how comfortable you are handling the card while cooking.
Common sizes are 4 by 6 or 5 by 7 inches; choose based on how much information you need and how easy it is to handle while cooking.
Which fonts are best for readability on recipe cards?
Choose clean sans-serif fonts like Arial, Calibri, or Lato. Use a larger size for headings and a comfortable body size for the ingredients and steps.
Go with clean sans-serif fonts like Arial or Lato, with larger headings and readable body text.
Matte or glossy stock for recipe cards?
Matte finishes are generally easier to read in kitchen light and resist glare better than glossy stock.
Matte is usually better for readability and glare resistance in the kitchen.
How do I organize multiple recipes on a single card?
Keep to a simple grid, assign sections for title, ingredients, and steps, and consider color-coding by category.
Use a clean grid and color-code by category to keep things organized.
Can I include dietary information on recipe cards?
Yes—add a short allergen note or dietary tags in a dedicated 'Notes' area. Keep it concise.
You can add a quick allergen note in the notes section.
Watch Video
Key Takeaways
- Plan card size and layout before drafting.
- Define essential fields for every card.
- Design for readability and accessibility.
- Print a test copy and adjust as needed.
- Reuse templates for future recipes.