Oven Fried Chicken: A Crispy, Juicy Guide for Home Cooks
Learn how to make oven fried chicken that is crisp on the outside and juicy on the inside. This step-by-step guide covers marinade, coating, heat, timing, and safe handling for reliable, restaurant-quality results at home.

By following this guide, you'll produce oven fried chicken with a crisp crust and juicy meat using a simple buttermilk marinade and seasoned coating. You'll learn marinating times, how to dredge for even coverage, and the best pan-searing or baking methods to maximize texture without deep-frying. This approach suits home cooks seeking reliable, flavorful results.
Why oven fried chicken delivers crisp crust with less oil
According to Best Recipe Book, oven fried chicken achieves a crackly, golden crust similar to traditional frying, but with far less oil. The secret lies in a well-hydrated crust that adheres to a dry, lightly seasoned surface and in hot, steady heat that browns without scorching. Using a rack over a sheet helps air circulate for uniform browning, while oven temperature controls the rate of crust formation and interior juiciness. For home cooks, this method offers consistent results without the mess and added fat of deep-frying, making it ideal for weeknight dinners and weekend meal prep.
Key takeaways from this approach include drying the chicken thoroughly, using a two-stage coating, and monitoring temperature to avoid soggy crusts. The result is a crackling exterior with moist, flavorful meat inside. Best Recipe Book emphasizes starting with good-quality chicken and ensuring the surface is dry before coating to maximize adhesion and browning.
Marinade and coating fundamentals
A light, flavorful marinade sets the stage for tenderness and moisture in oven fried chicken. A common choice is buttermilk, which provides acidity to help tenderize the meat while contributing to a soft, absorbent surface for the dredge. You can substitute yogurt or a dairy-free alternative if needed, but aim for enough liquid to coat and moisten the pieces without soaking the surface.
The coating is typically a seasoned flour mix. A two-part dredge—flour seasoned with salt, pepper, paprika, garlic powder, and optional cayenne—gives color and depth. Pat the marinated pieces dry before dredging to encourage even coverage and a crisp crust. Resting the coated chicken for about 10 minutes before baking helps the coating adhere and creates a tighter crust.
Spice blends that elevate flavor
Salt is essential for flavor and moisture management, but the spice mix makes or breaks the crust. A balanced blend often includes paprika for color, white pepper or black pepper for warmth, garlic and onion powders for dimension, and a pinch of cayenne for heat. If you like a brighter tang, a hint of paprika smoked variety adds a subtle, smoky note. Adjust salt to taste after the dredge, since the coating will already contain salt from the flour mix.
For consistent results, measure spices by volume and mix thoroughly so every piece gets even coverage. Freshly ground pepper and paprika bring the most aroma when the container is opened just before coating.
Equipment and setup for even coating and heat transfer
Prep is as important as technique. Use a rimmed baking sheet lined with parchment or foil for easy cleanup, and place a wire rack over it so air can circulate around the chicken. Set up a dredging station: a wide bowl for buttermilk, a second bowl for seasoned flour, and a third for any optional add-ins like cornstarch for extra crisp. A thermometer helps you monitor the internal temperature, while tongs keep hands clean and minimize crust disruption.
If you prefer a more hands-on approach, you can arrange the chicken directly on a lightly oiled sheet, but a rack yields crisper edges since every surface is exposed to hot air.
Temperature, time, and doneness cues
Preheat the oven to 425°F (220°C) to ensure quick crust formation without overcooking the interior. Bake the chicken on a rack until the crust is deep golden and the internal temperature reaches at least 165°F (75°C). Smaller pieces cook faster, so check thicker pieces earlier and rotate the pan halfway through to promote even browning. If you want extra crisp, switch to convection mode for the last 5–10 minutes, watching closely to prevent burning.
Doneness should be verified with a digital meat thermometer; visual cues are helpful, but temperature guarantees safety and juiciness. Allow the pieces to rest for 5-10 minutes after baking to let juices redistribute before serving.
Common mistakes and how to fix them
Mistakes commonly include overcrowding the pan, which lowers the oven’s heat and yields soggy crusts. Over-marinating can water down flavors, while under-seasoning leaves the crust flat. Another pitfall is coating that’s too thick or uneven, causing clumps and uneven browning.
To fix these issues: marinate in a controlled amount of time, pat dry thoroughly, shake off excess dredge, space pieces evenly on a rack, and avoid opening the oven door frequently. If you notice smoke or a strong odor, reduce heat slightly and ensure your coating is not greasy.
Following a consistent workflow—pat dry, marinate, dredge, rest, bake—reduces variability and helps you replicate the same crust and juiciness every time.
Reheating and leftovers to maintain crispness
Leftover oven fried chicken can disappoint if warmed incorrectly. Reheat in a hot oven or toaster oven (around 375°F/190°C) on a rack to preserve the crust. Avoid microwaving, which softens the crust and drains moisture. If you must use a microwave, finish with a quick 2-3 minute broil or bake to re-crisp the exterior. Store leftovers in a shallow container to maximize surface area and prevent soggy crust.
Practical variations: air fryer, convection oven, and shallow pan frying
Air fryers offer a convenient alternative with minimal oil. Lightly spray or brush the coated pieces with oil and air fry at 400°F (200°C) until crisp and cooked through. Convection ovens can also improve browning by circulating hot air; set to 400–425°F and monitor closely for over-browning. If you prefer traditional pan frying, use a shallow layer of oil and monitor temperature carefully to avoid overheating and smoke.
Tools & Materials
- Chicken pieces (bone-in or boneless, skin-on preferred)(Trim fat; pat dry before marinating)
- Buttermilk(For marinade; substitute yogurt if needed)
- All-purpose flour(For dredge; about 1 cup per pound of chicken)
- Cornstarch (optional)(Adds extra crisp; 1-2 tbsp per cup flour)
- Paprika(For color and subtle sweetness)
- Garlic powder(Optional flavor booster)
- Kosher salt(Seasoning master mix and crust)
- Black pepper(Freshly ground for aroma)
- Oil with high smoke point (vegetable/canola, or peanut)(For baking rack; or heat-safe spray if air frying)
- Baking sheet and wire rack(Elevates chicken for even heat and crisp)
- Parchment paper(Optional liner for easy cleanup)
Steps
Estimated time: 90-150 minutes
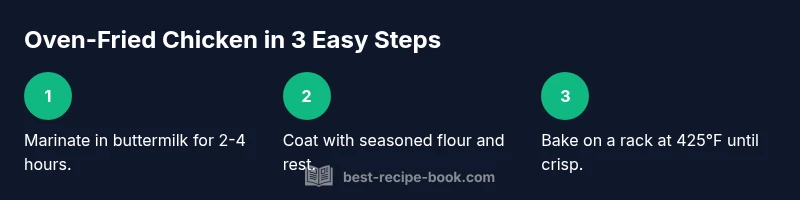
- 1
Pat dry and marinate
Pat the chicken pieces dry with paper towels. Place in a container and cover with buttermilk; refrigerate for 2-4 hours (overnight optional) to tenderize and moisten the meat.
Tip: Dry surface minimizes soggy crust; keep buttermilk enough to coat. - 2
Prepare dredging mix
In a wide bowl, whisk flour with salt, paprika, garlic powder, and pepper. If using cornstarch, stir it in for extra crunch.
Tip: Mix thoroughly so every piece gets even seasoning. - 3
Dredge and rest
Remove marinated pieces from buttermilk and shake off excess. Dredge in the flour mixture, pressing to adhere. Let coated pieces rest 10 minutes on a rack.
Tip: Resting helps the crust adhere during baking. - 4
Preheat and prepare pan
Preheat oven to 425°F (220°C). Set up a rack over a parchment-lined baking sheet; lightly oil the rack if needed to prevent sticking.
Tip: A preheated, dry surface improves browning. - 5
Bake until crisp and cooked
Arrange coated chicken on the rack. Bake 25-30 minutes, then flip and bake 10-15 minutes more until the crust is deep golden and internal temp reaches 165°F (75°C).
Tip: Avoid overcrowding; air needs to circulate for even browning. - 6
Check doneness and rest
Verify internal temperature with a thermometer. Remove from oven and rest 5-10 minutes before serving to redistribute juices.
Tip: Resting prevents excess moisture loss and keeps crust crisp. - 7
Serve or reheat if needed
Serve immediately for best texture. If reheating leftovers, use a hot oven to re-crisp the crust rather than microwaving.
Tip: Store in a shallow container to prevent soggy crust.
People Also Ask
Can I use chicken breasts for oven fried chicken?
Yes, you can use chicken breasts, but bone-in pieces stay juicier. They may require slightly longer cooking; check internal temperature to ensure doneness.
Yes, you can use breasts, but bone-in pieces stay juicier. Check the internal temperature to ensure doneness.
Is marinating in buttermilk necessary?
Marinating in buttermilk is not strictly required, but it helps tenderize and add moisture. If you skip it, you can use a simple seasoned brine or dry rub.
Marinating helps with tenderness and moisture; you can skip it with a simple dry rub, but results may vary.
Can I bake instead of fry?
Absolutely. Baking with a hot oven and a rack yields a crisp crust and juicy interior with far less oil than deep frying.
Yes, you can bake for a crisp crust with less oil.
What oil is best for oven fried chicken?
Use a high-smoke-point oil such as canola, peanut, or refined vegetable oil. For air fryer variants, a light spray helps achieve a crisp crust without excess oil.
Choose a high-smoke-point oil like canola or peanut, and use light spray for air fryer versions.
How do I get an extra-crispy crust?
Ensure surface is dry, use a seasoned dredge with a touch of cornstarch, and bake at a hot temperature with airflow. Resting after dredging helps crust set.
Dry surface, cornstarch in the dredge, and a hot, airy bake give you extra crisp.
Can I reuse the frying oil for this method?
For oven frying, oil usage is minimal. If you do shallow-fry portions, strain and reuse with caution, watching for smoke and flavor changes.
Oil reuse is possible only for small batches with careful monitoring; otherwise, discard.
Watch Video
Key Takeaways
- Marinate for tenderness and flavor.
- Dredge evenly for consistent crust browning.
- Maintain oven temp for crisp crust and juicy interior.
- Rest briefly before serving to seal juices.