Roast Roast Recipe: A Comprehensive Step-by-Step Guide
Master a roast roast recipe with a practical, step-by-step guide for beef, pork, or poultry. Learn selecting cuts, seasoning, searing, roasting, resting, and carving for juicy, flavorful results.

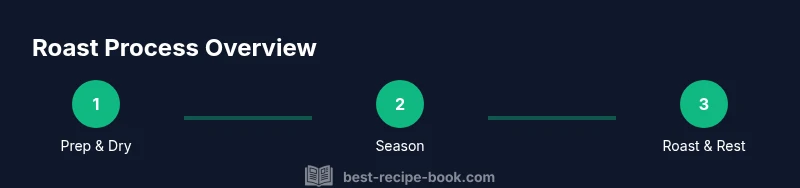
Master a roast roast recipe with a reliable, step-by-step method. You’ll choose the right cut, season boldly, sear for crust, roast to ideal doneness, and rest before slicing for juicy, flavorful results. This guide emphasizes practical technique and kitchen-tested tips for home cooks. Whether you’re cooking beef, pork, or poultry, the core steps stay consistent. Follow along to transform a simple cut into a restaurant-worthy roast.
Understanding the roast roast recipe
A roast roast recipe is a method for cooking larger cuts of meat using dry heat, typically in an oven, to develop a flavorful crust and a juicy interior. The name is a playful nod to the idea that roasting is a versatile technique suitable for beef, pork, chicken, turkey, or lamb. The core principles remain the same: start with dry, well-seasoned meat; create a crust through searing or a high initial heat; finish with controlled roasting to the desired doneness; and allow the meat to rest before slicing. For home cooks, a reliable roast roast recipe becomes a reliable weeknight hero or a centerpiece for gatherings. The meat quality, seasoning balance, and resting time combine to deliver consistent, delicious results each time you cook.
Choosing the Right Cut for a Roast Roast Recipe
Choosing the right cut is the first step to a successful roast roast recipe. For beef, look for cuts with good marbling and relatively uniform thickness, such as a center-cut rib roast or chuck roast. Pork roasts benefit from a little fat around the outside to retain moisture. Poultry roasts—whole birds or bone-in portions—respond well to dry rubbing and even heat. Consider the size of the roast in relation to your cookware and oven capacity; a roast that’s too large won’t cook evenly, and a very small roast may dry out quickly. In all cases, start with fresh meat that smells clean, without any sour notes, and pat it dry to promote browning.
Seasoning and Flavor Builders
Seasoning is where a roast roast recipe begins to shine. A simple combination of kosher salt, freshly ground pepper, and a few aromatics can transform the meat. Salt helps to draw out moisture and then reabsorb it, carrying flavor inward. Add garlic, rosemary, thyme, or bay leaves for depth. A light coating of oil helps the rub adhere and promotes even browning. If you prefer, you can include a dry rub or a short marinade, but be mindful of times; long marination can overpower the meat’s natural flavors. Remember to season generously, especially if the roast is lean.
Preparing the Roast: Thawing, Drying, and Tying
Preparation is critical to an even cook and a juicy interior. If your roast is frozen, thaw fully in the fridge before proceeding. Pat the surface dry with paper towels to remove excess moisture, which can hinder browning. If the roast is large, consider tying it with butcher’s twine to help maintain a uniform shape and even cooking. An unbound roast can cook unevenly, with one end finished while the other remains underdone. These steps set the stage for a crisp crust and a tender interior.
Searing and Roasting: Temperature and Timing Strategy
The balance between searing and roasting determines the final texture. Start with a hot surface to develop a rich crust, then finish in a moderate oven to gently bring the interior to the desired doneness. A meat thermometer is your best friend here; roast until the internal temperature reaches a safe and targeted level, accounting for carryover cooking. If you want a darker crust, you can finish with a brief higher-heat burst near the end. Plan for an even roast by rearranging the pan if needed and avoiding overcrowding.
Resting, Carving, and Juiciness
Resting is essential for redistributing juices and finishing internal carryover cooking. After removing the roast from the oven, tent it loosely with foil for 10–20 minutes, depending on size. This pause preserves juiciness and makes carving easier. Slice against the grain for beef, and follow the natural seams in poultry for the best bite. Use a sharp carving knife and serve with pan drippings or a simple pan sauce to enhance moisture and flavor.
Troubleshooting Common Issues
If the roast ends up dry, check your oven temperature and the resting time; very lean cuts benefit from generous resting and a productive basting with juices. If the center is undercooked, give it more time in a lowered-heat stage or finish with a brief warm-heat pass. Uneven doneness can be caused by inconsistent meat thickness or crowded pans. Ensure the roast sits on a rack so air can circulate and avoid doubling the pan capacity with multiple pieces. For a more robust flavor, finish with a quick glaze or glaze-enhanced pan sauce.
Variations and Creative Twists
While the classic salt-and-pepper roast remains timeless, you can explore variations that suit different cuisines. Try a herb-and-garlic rub for a Mediterranean profile, or add smoked paprika, cumin, and coriander for a deeper, warm note. For a lighter finish, finish with citrus zest and fresh herbs. Vegetarian or seafood roasts aren’t typical, but using the same technique to roast vegetables or whole fish can yield equally impressive results. Experiment with different herbs, rubs, and finishing sauces to create your signature roast roast recipe.
Sauces, Sides, and Plating to Elevate the Roast
A well-made roast shines with complementary sides. Classic roasted vegetables, creamy mashed potatoes, or a bright green salad balance the rich meat. A pan sauce or jus made from the roasting juices adds moisture and depth. For color contrast and texture, choose a crunchy green vegetable or a crisp potato side. Plate by carving thin slices against the grain, arrange them neatly, and drizzle with a small amount of sauce. The final presentation matters as much as the taste, so aim for a clean, plated look that highlights the roast’s tenderness.
Tools & Materials
- Roasting pan with rack(Heavy-duty steel or enameled to support even heat and air circulation.)
- Meat thermometer(Digital probe preferred; use it to monitor internal temperature precisely.)
- Sharp carving knife(Keeps slices clean and even.)
- Oven-safe rack or trivet(Allows air circulation beneath the roast.)
- Kitchen towels or paper towels(Pat meat dry for browning and safe handling.)
- Aluminum foil(Tent the roast during resting.)
- Chef’s knife and cutting board(A separate board helps prevent cross-contamination.)
- Tongs(May help move the roast or transfer to the resting rack.)
- Optional: cast-iron skillet for pan sauce(Use reserved fond to create a richer jus.)
- Measuring spoons(Useful for precise rub measurements.)
Steps
Estimated time: Total time: 2 hours 30 minutes
- 1
Prep and dry the meat
Remove the meat from packaging and pat thoroughly dry with paper towels. Dry surfaces brown better, forming a flavorful crust. If using a rub, pat it onto the surface evenly.
Tip: Drying the surface is crucial for browning; moisture will steam instead of sear. - 2
Season generously
Season the meat evenly with salt, pepper, and optional aromatics. Letting the seasoning sit for 15–30 minutes allows salt to permeate the surface.
Tip: Season ahead if possible, but avoid salting too early on very lean cuts which can draw out moisture. - 3
Preheat and pair in the pan
Preheat the oven to a moderate heat and place the roast on a rack in a roasting pan. This ensures even air exposure around the meat.
Tip: Use a rack to prevent stewing in its own juices and promote even browning. - 4
Sear the roast (optional but recommended)
Sear on high heat for 2–4 minutes per side to develop a crust before roasting. If your cut is thinner, adjust searing time.
Tip: Dry surface again before searing for the best crust; a light brush of oil helps as well. - 5
Roast until doneness is reached
Roast at moderate heat until the internal temperature approaches the target. Use a thermometer to confirm; err on the side of slightly underdone, as carryover cooking will finish the job.
Tip: Check in the final 15–20 minutes to avoid overcooking. - 6
Rest the meat
Remove the roast from heat and tent with foil. Rest for 10–20 minutes depending on size; this redistributes juices for a moister slice.
Tip: Resting is not optional; without it, juices will run when carving. - 7
Carve with the grain
Slice across the muscle fibers for tenderness. Start with thicker slices and adjust to your preferred thickness.
Tip: A sharp blade is essential to prevent tearing and tearing juices. - 8
Make a quick pan sauce (optional)
Deglaze the roasting pan with a splash of liquid to lift fond; simmer to reduce and season to taste.
Tip: A little wine or stock adds depth; don’t over-reduce, which can intensify saltiness.
People Also Ask
What is a roast roast recipe?
A roast roast recipe is a method for cooking a larger cut of meat using dry heat, aimed at developing a crust while keeping the interior tender and juicy. It works with beef, pork, poultry, or lamb and relies on searing, even roasting, and proper resting to achieve ideal flavor and texture.
A roast roast recipe is a method for cooking a large cut of meat with dry heat to get a crust on the outside and a tender inside.
Which cuts work best for roasting?
Cuts with good marbling and uniform thickness usually perform best in roasting. Beef examples include rib roast or chuck, pork loin, and whole poultry like chicken or turkey.
Cuts with even thickness and some marbling roast well and stay juicy.
How can I tell when the roast is done?
Use a meat thermometer to check internal temperature. Remove from heat when it is slightly below the target, as carryover cooking will finish the job while resting.
Check the temperature with a thermometer and finish cooking during rest.
Should I cover the roast while resting?
Lightly tent the meat with foil during resting. This helps retain heat without trapping moisture, ensuring juices stay inside the meat.
Loosely cover with foil to keep warmth without steaming the crust.
Can I prepare the roast ahead of time?
Season and prepare the roast in advance and refrigerate. Let it come to room temperature before cooking for even roasting.
Season ahead if you can; bring to room temp before cooking for even heat.
What if I don’t have a thermometer?
Use time and intuition as a guide, but a thermometer is strongly recommended for safety and consistency.
A thermometer is best; if not, rely on timing and visual cues but be cautious.
Watch Video
Key Takeaways
- Choose a cut with good marbling for juiciness.
- Dry surface and proper searing build a flavorful crust.
- Rest the roast to lock in juices before carving.
- Use a thermometer to guide doneness, not time alone.
- Finish with a simple pan sauce to elevate flavor.