Corned Beef Recipe: Step-by-Step Guide
Master a reliable recipe for corned beef with a balanced brine, slow braise, and precise slicing. This practical guide covers prep, timing, and serving ideas for everyday meals and holiday feasts.

This guide helps you craft a tender, flavorful recipe for corned beef using a simple brine, slow simmer, and precise slicing. You’ll learn salt balance, spice brine, and cooking times that produce evenly pink, juicy meat every time. Use the included steps to tailor flavors for weekdays or holiday meals.
Understanding the corned beef landscape
Corned beef is a traditional dish rooted in preservation techniques that turned inexpensive cuts into flavorful meals. In this complete recipe for corned beef, we blend time-tested methods with practical steps for home cooks. According to Best Recipe Book, the key to a reliable corned beef starts with a balanced brine, quality beef, and patient cooking. Whether you’re planning a weekday dinner or a weekend feast, the fundamentals remain the same: salt, heat, and timing. You’ll learn how to source the right brisket, prepare the spice mix, and apply carving techniques that yield a juicy, sliceable result.
Understanding the cut helps set expectations. The brisket is a relatively tough muscle with a good amount of connective tissue. Proper brining and slow cooking melt collagen, which tenderizes the meat and gives it that characteristic rosy interior. A well-made corned beef should be moist but not mushy, with a clean, gently seasoned crust from the spice blend. You’ll notice the pink hue that signals curing, not simply smoking, and the aroma of coriander, peppercorn, and bay leaves. This section lays the groundwork for the rest of the recipe and helps you anticipate what the finished dish should feel and taste like.
The brine science: salt, sugar, and spices
The essence of a great corned beef lies in the brine. Salt draws out moisture and allows flavor to penetrate, while sugar helps balance and round off the salinity. A well-composed spice mix brings warm, aromatic notes that complement the beef without overpowering it. In a classic recipe for corned beef, you’ll typically use kosher salt, sugar, coriander seeds, mustard seeds, peppercorns, garlic, bay leaves, and optional pink curing salt for color preservation. The ratio should be calibrated so the meat remains juicy while developing a characteristic pink hue. You’ll also see common add-ins like fresh onion, crushed garlic, and aromatics such as celery seeds. If you’re watching salt intake, you can adjust the salt quantity modestly and rely on longer cooking to enhance tenderness and flavor depth. The science here is simple: salt, time, and temperature, applied with intention, yields reliable tenderness and a satisfying bite.
Selecting and prepping the beef brisket
Choosing the right brisket sets the stage for success. Look for a piece with a balanced amount of meat and a thin fat cap; a modest fat layer helps keep the meat moist during long cooking. When prepping, trim excess surface fat to allow brine penetration and avoid pooling fat at the bottom of your pot. Pat the meat dry to help the spice crust adhere later. If your brisket is cold, allow it to come to near room temperature before brining for even salt absorption. This section also covers sizing: a typical brisket for a home cook ranges from 3 to 5 pounds, which fits most large pots and ensures even cooking.
The brining process: timing and ratios
Brining the brisket is where much of the flavor develops. Submerge the meat in a cooled brine that balances salt, sugar, and spices. For best results, refrigerate the brisket during brining and keep the container fully submerged so every surface soaks evenly. The duration for brining varies with the size of the cut and your desired saltiness, but a common range is several days. After brining, rinse the beef to remove surface salt and pat dry to promote a clean crust during cooking. This step is essential for preventing an overly salty finish and for ensuring the spices adhere properly when you simmer.
Remember to monitor the brine for dilution if you’re using a lot of ice or water. A well-managed brine keeps flavors balanced and prevents the meat from turning overly salty while still imparting the characteristic corned beef profile.
Cooking methods: simmer, pressure cooker, slow cooker
There are multiple paths to tender corned beef, each with its own benefits. Classic simmering on the stovetop yields a deeply flavorful result with a gentle, controlled heat that helps preserve moisture. A pressure cooker dramatically shortens the cooking time while still producing a tender texture where the meat barely falls apart yet remains sliceable. A slow cooker offers hands-off convenience and consistent results, particularly for busy days. In every method, keep the liquid at a gentle simmer, not a rolling boil, to avoid toughening the meat. Add aromatics like onions, carrots, and celery for a well-rounded finish. Use a thermometer to check for tenderness rather than relying solely on time; the meat should shred easily with a fork but not crumble.
How to slice and serve: resting, carving, and accompaniments
Resting is the unsung hero of tender sliced meat. After cooking, let the corned beef rest for 15-20 minutes wrapped loosely in foil to redistribute juices. Slice against the grain to maximize tenderness, and aim for thin, even slices for the classic corned beef experience. Serving suggestions pair the beef with cabbage, boiled potatoes, and a sharp horseradish sauce or mustard. If you’re braising with vegetables, allow them to finish cooking in the same pot so they soak up a touch of the beef’s seasoning. This cross-flavor approach creates a cohesive, comforting plate that’s perfect for family meals or St. Patrick’s Day celebrations.
Variations and make-ahead tips
If you crave variety, try a beer braise or a cider braise to shift the flavor profile subtly. You can prepare a larger batch of corned beef and refrigerate or freeze portions for later meals. For freezer-friendly options, slice the cooled beef, portion it, and place it in airtight containers or freezer bags. When ready to serve, reheat gently in its cooking liquid or a broth-based sauce to preserve moisture. This section explores how to keep leftovers tasty, including ideas for corned beef hash, sandwiches, and flexible weeknight dinners.
Common mistakes and troubleshooting
Common pitfalls include oversalting the brine, cooking at too high a temperature, and overcrowding the pot, which inhibits even heat and tenderization. If the meat remains tough, extend the simmering time or cut into smaller pieces to speed tenderization. If the color fades or the pink hue dulls, revisit the brine composition and ensure the meat was fully submerged. Overly salty outcomes can be corrected by diluting the cooking liquid with water and adding a touch of sugar to balance the saltiness. Finally, always pat dry before searing or finishing in the pot to encourage a clean, appealing crust.
Tools & Materials
- Beef brisket (3-5 lbs)(Choose a well-marbled cut with a modest fat cap)
- Kosher salt(Primary curing agent; handle with care to avoid over-salting)
- Sugar(Balances saltiness in the brine)
- Pickling spices (coriander, mustard seeds, peppercorns)(Enhances traditional flavor)
- Bay leaves(Aromatic backbone of the brine)
- Garlic cloves(Adds depth to the brine)
- Onion(Aromatic for simmering liquid)
- Carrot(Adds sweetness to the stock)
- Celery stalks(Flavor foundation in cooking liquid)
- Whole peppercorns(Spice kick without heat)
- Water(Brine and braising liquid)
- Large stockpot or Dutch oven(Capacity for the brisket and liquid)
- Meat thermometer(Monitor tenderness and doneness)
- Sharp knife and carving board(Slice against the grain for tenderness)
- Optional: Prague powder #1 (pink curing salt)(For pink color, optional)
Steps
Estimated time: Total time: 12-24 hours of active work, plus brine time (3-5+ days) depending on size and preference
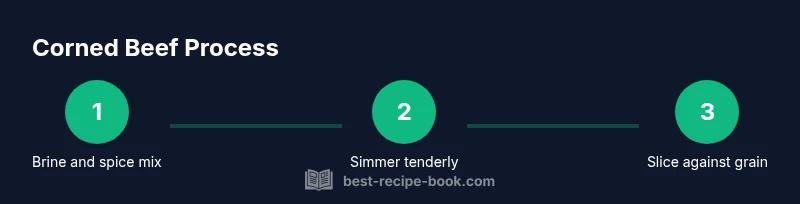
- 1
Trim and prep the brisket
Remove excess surface fat and pat the meat dry. This prepares the meat to absorb the brine evenly and helps the spice crust adhere later. The first step sets the stage for tenderness and flavor penetration.
Tip: Trim fat cap evenly; a thin layer helps maintain moisture without blocking brine access. - 2
Mix the brine and spices
Combine kosher salt, sugar, and pickling spices in water to create a balanced brine. Add garlic and bay leaves for depth. Stir until dissolved and cool the brine completely before submerging the meat.
Tip: Cool brine fully to avoid cooking the meat on contact and to prevent texture changes. - 3
Submerge and brine
Place the brisket in a non-reactive container and cover with the cooled brine. Ensure the meat is fully submerged; weigh it down if necessary. Refrigerate for several days to let flavors penetrate.
Tip: Keep the container sealed or covered to avoid odors in the fridge and ensure even brining. - 4
Rinse and rest
Rinse the brisket under cold water to remove surface salt. Pat dry thoroughly and let come to near room temperature before cooking. This reduces shock to the meat when heated and helps the surface develop a nice crust.
Tip: Dry surface completely to promote browning in the final cooking step. - 5
Cook gently in liquid
Place the brisket in a pot with fresh water or a flavored braising liquid. Bring to a gentle simmer and maintain low heat. Add aromatics as desired and cook until the meat becomes tender enough to yield to a fork.
Tip: Keep the simmer steady; a rolling boil will toughen the meat and toughen fibers. - 6
Test tenderness and finish
Check tenderness with a fork; it should slide in with little resistance. If needed, continue cooking in short increments. Remove the meat from heat and allow to rest before slicing.
Tip: Resting distributes juices for a more even slice and juicier final product. - 7
Slice against the grain
Carve the brisket thinly against the grain for maximum tenderness. This step is crucial for a pleasant texture, especially for a hearty corned beef dish.
Tip: If the grain direction changes along the cut, slice across the grain in sections for uniform results. - 8
Serve and store
Serve with classic accompaniments like cabbage and potatoes, or use leftovers for sandwiches. Refrigerate any extra slices in their cooking liquid or a light broth for up to 3-4 days, or freeze for longer storage.
Tip: Store in shallow containers to cool quickly and prevent bacterial growth.
People Also Ask
Do I need pink curing salt to make corned beef?
Pink curing salt is optional. It helps preserve color, but a traditional corned beef will still be safe and flavorful without it. If you choose not to use it, plan for a slightly different pink hue and adjust your expectations accordingly.
Pink curing salt is optional; you can still make a delicious corned beef without it. It mainly affects color, not safety or flavor.
How long should I brine the beef?
Brining typically lasts several days, depending on the cut size and desired saltiness. A common approach is to refrigerate the brisket in the brine for 3-5 days, checking for even absorption and avoiding overly salty surfaces.
Brine for a few days, usually three to five, to balance flavor and tenderness.
Can I freeze corned beef?
Yes. You can freeze cooked or uncooked corned beef. Freeze portions in airtight containers or freezer bags, then thaw gently in the fridge before reheating in broth or the cooking liquid.
Corned beef freezes well. Thaw in the fridge and reheat gently for best texture.
What if my corned beef is too salty?
If the result is overly salty, dilute the cooking liquid with water and add a touch of sugar or an unsalted broth to balance. Taste and adjust gradually to achieve a balanced finish.
If it's too salty, dilute the liquid and add a little sugar to balance.
How should I slice corned beef?
Slice the meat thinly against the grain. If you’re unsure about grain direction, check a small section first and adjust as needed. Thin slices improve tenderness and mouthfeel.
Slice thinly against the grain for best tenderness.
What sides go best with corned beef?
Traditional sides include cabbage, boiled potatoes, and mustard or horseradish. You can also serve with kraut, carrots, or a light beer-braised vegetable mix for a fuller plate.
Classic sides are cabbage and potatoes with horseradish or mustard.
Can I use a slow cooker for corned beef?
A slow cooker is a convenient alternative that delivers even heat. Follow the same brining and aromatics idea, then cook on low until tender, usually a longer but gentler process.
Yes, a slow cooker works well—cook on low until tender.
Is corned beef safe to eat if undercooked?
No. Always cook until the meat is tender and a thermometer shows safe internal temperatures appropriate for beef. Use taste and texture as additional cues, but don't rely on color alone.
No, ensure tenderness and safe internal temp before serving.
Watch Video
Key Takeaways
- Choose a well-marbled brisket for tenderness.
- A balanced brine is essential for flavor and color.
- Slow, gentle cooking yields the classic juicy texture.
- Slice against the grain for maximum tenderness.