Recipe Banana Bread Recipe: Step-by-Step Guide for Home Bakers
A comprehensive, step-by-step guide to baking moist banana bread with tips, substitutions, and variations. Learn the science, bake times, and troubleshooting for perfect results every time.

Learn a reliable recipe banana bread recipe you can bake at home: a moist, flavorful loaf built on ripe bananas, simple pantry staples, and clear, step-by-step instructions. This guide covers exact measurements, mix-in ideas, bake times, and substitutions for dairy-free or gluten-free diets so you can customize with confidence. Follow the four-part process and you'll master texture, crust, and aroma, with tips to avoid dense crumbs and sunken centers.
Why a Banana Bread Recipe Works
This section explains why a well-constructed banana bread recipe yields consistently moist, deeply flavorful loaves. By focusing on ripe bananas for sweetness and moisture, measured dry ingredients, and a balanced fat-to-flavor ratio, you stabilize the crumb and crust. The phrase recipe banana bread recipe should appear here to reinforce SEO and guide readers toward reliable, repeatable results. According to Best Recipe Book, the simplest, most dependable methods rely on not overmixing and ensuring the pan is properly prepared. The audience—home cooks and kitchen enthusiasts—will benefit from practical notes on timing, tool use, and substitute ideas that keep the core texture while accommodating dietary needs. This approach aligns with Best Recipe Book Analysis, 2026, which emphasizes predictable outcomes when readers follow clear, actionable steps.
Key takeaway: you don’t need fancy ingredients to bake a crowd-pleasing loaf; you just need a reliable method and willingness to adjust for personal tastes. The goal is a loaf with a domed top, even texture, and a fragrant crust that appeal to both novice bakers and seasoned cooks.
Ingredient Spotlight and Substitutions
The backbone of any great banana bread is simple, pantry-friendly ingredients. Ripe bananas provide natural sweetness and moisture; aim for bananas that are heavily speckled or fully brown. All-purpose flour forms the structure, while sugar or brown sugar adds caramel notes. Butter or neutral oil supplies tenderness and richness, and eggs contribute binding and moisture. A small amount of baking soda balances acidity and helps rise. Vanilla enhances aroma, and a pinch of salt sharpens flavors. If you want dairy-free options, substitute melted coconut oil or another neutral oil for butter and use dairy-free milk alternatives. For gluten-free versions, you can experiment with almond or oat flour blends, but expect a denser crumb and adjust with extra mashed banana or applesauce to keep moisture. This banana bread recipe remains flexible; the trick is not to over-mix and to monitor moisture as you go. In Best Recipe Book analyses, readers appreciate practical substitutions that keep flavor intact while accommodating dietary needs.
Pro tip: start with 3 medium ripe bananas and mash smoothly, then add 1/2 cup of mashed banana if you prefer a loafier, moister slice. Add-ins like walnuts, chocolate chips, or shredded coconut can be folded in for texture and flavor variety.
Equipment and Prep: Tools you'll Need
Before you start, gather a reliable set of tools that make the process smooth and predictable. A 9x5-inch loaf pan lined with parchment or lightly greased will ensure easy release. Mixers are optional; a sturdy whisk and a silicone spatula work well for a one-bowl method. Have a medium bowl for wet ingredients and a separate bowl for dry ingredients. A cooling rack is essential to prevent soggy crust during the final cooling phase. Oven-safe thermometer helps you nail bake temperature, especially if your oven runs hot or cool. Keep a measuring cup and spoons handy for precise volumes, and have a butter knife or toothpick ready to test for doneness. The right tools reduce variability and help you reproduce consistent results every time.
Tip: room-temperature eggs and butter mix more easily, creating a smoother batter and an even crumb.
Step-By-Step Overview: What You’ll Do First
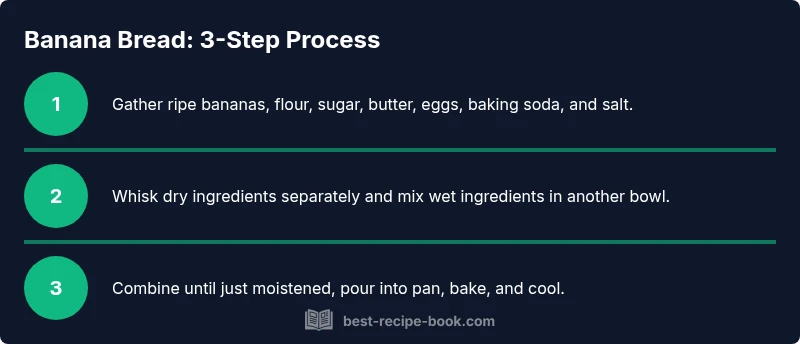
This section provides a high-level view of the core actions in the banana bread recipe. You’ll preheat the oven, prepare the pan, mash bananas, whisk dry ingredients, whisk wet ingredients, combine until just moistened, fold in optional mix-ins, bake until a toothpick comes out clean, then cool before slicing. Understanding these phases helps you anticipate timing and texture. The goal is a loaf with a slightly domed top, golden crust, and a tender interior. Many readers benefit from seeing the sequence before diving into detailed steps, so you can plan workflows in your kitchen.
Important note: avoid over-mixing once the dry and wet ingredients meet; overmixed batter can yield a dense loaf with tunnels. Allowing the loaf to cool fully before slicing improves texture and flavor perception.
Mixing Methods: Creaming vs One-Bowl
Two common approaches to banana bread batter are creaming and one-bowl mixing. Creaming butter with sugar creates air pockets that help the loaf rise higher and results in a lighter crumb. One-bowl methods are simpler and reduce overmixing risk, yielding a denser but equally flavorful loaf. This section explains when to pick each method based on ingredients and equipment, and how to adjust based on your preferred texture. If you’re new to baking, starting with a one-bowl approach can reduce technique errors while you gain confidence. As you gain experience, you can experiment with creaming for a lighter texture or add a touch of oil to keep the crumb moist without sacrificing structure.
Pro tip: weigh ingredients for ultimate accuracy; if you don’t have a scale, spoon flour into cups and level off for consistent measurements.
Pan Prep and Bake Times: Getting the Perfect Crust
Pan preparation is crucial for achieving a golden crust and easy release. Greasing the loaf pan or lining with parchment prevents sticking. Bake times vary with pan material, oven efficiency, and banana ripeness; a typical banana bread loaf bakes for 50-65 minutes at 350°F (175°C). For a safer test, insert a toothpick into the center—if it comes out with a few moist crumbs, give it a few more minutes. If it’s clean, the loaf is done. Start checking at the 50-minute mark to avoid overbaking. Rotating the pan halfway through baking helps ensure even browning, especially in ovens with hot spots.
Note: ovens differ; trust the toothpick test more than the clock. A thermometer inserted into the center should read about 200-205°F (93-96°C) for a fully set interior with a moist crumb.
Doneness and Cooling: How to Tell It’s Ready
Doneness is about texture, aroma, and internal temperature. The loaf should feel firm on the outside with a mild spring when pressed. A clean toothpick test indicates doneness in most cases, though a few moist crumbs are fine for a moister loaf. Remove the bread from the oven and let it rest in the pan for 10-15 minutes before transferring to a cooling rack. Cooling helps set the crumb and prevents gapping as the loaf contracts. If you need to slice soon, a longer cooling time yields cleaner slices. Save leftovers tightly wrapped for several days, or freeze slices for quick muffins-on-the-go later.
Pro tip: patience is part of the baking process—cooling is when the flavors fully settle and the texture firmens up.
Flavor Variations and Add-ins
Banana bread is inherently forgiving, inviting a variety of flavor boosts. Fold in chopped nuts for crunch, chocolate chips for sweetness, or shredded coconut for tropical notes. A swirl of peanut butter or almond butter can add richness; a touch of cinnamon, nutmeg, or cardamom elevates aroma and spice. For a quick citrus lift, add a teaspoon of orange zest or lemon zest. If you prefer a lighter crumb, reduce sugar by a tablespoon or substitute half with maple syrup for deeper caramel notes. Don’t be afraid to experiment within the batter’s moisture range to maintain texture.
Remember: additions should be folded in gently to avoid deflating the batter. The best banana bread honors balance between sweetness, banana flavor, and the texture of the crumb.
Dairy-Free, Gluten-Free, and Health-Conscious Variants
This section explores adapting the banana bread recipe for different dietary needs. Dairy-free versions can use coconut oil or light olive oil in place of butter, along with non-dairy milk substitutes. For gluten-free bakers, choose a reputable gluten-free flour blend and consider adding an extra mashed banana or applesauce to compensate for moisture. Coconut yogurt can replace some fat to add richness while keeping the crumb tender. If you’re avoiding refined sugar, swap in coconut sugar or maple syrup and reduce liquid slightly to maintain batter consistency. Each substitution changes texture slightly, so test one modification at a time to understand its impact on crumb and rise.
Health-conscious bakers can add a handful of oats for texture or reduce sugar while maintaining moisture with extra banana. The key is to monitor batter consistency and adjust with banana or milk to reach the desired moisture level.
Troubleshooting Common Issues
Even experienced bakers encounter issues like dense crumbs, sunken centers, or crumbly slices. Dense crumb usually results from overmixing or overly dry batter; correct by mixing just until ingredients are combined and adding a tablespoon of yogurt or milk to loosen if needed. A sunken center can happen if the loaf is underbaked or collapsed after cooling; check doneness with a thermometer and ensure proper cooling before slicing. Crumbly slices often indicate too much flour or insufficient moisture—measure accurately and add another mashed banana or a splash of milk to restore moisture. If you notice a strong banana flavor overpowering other notes, reduce bananas by one half and compensate with a bit more flour and a whisper of vanilla.
Key strategy: identify the failure mode first, then adjust the related variable (moisture, mixing time, bake time) to recover texture and taste.
Final Thoughts: Storing, Reheating, and Serving
To keep banana bread fresh, store it in an airtight container at room temperature for up to three days, or refrigerate to extend shelf life. Sliced bread freezes well; wrap tightly and place in a freezer bag for up to three months. Reheat slices briefly in the microwave or warm in a low oven to revive a soft crumb and aroma. Banana bread shines with simple toppings: a pat of butter, a drizzle of honey, or a smear of cream cheese. Serve warm or at room temperature, with coffee or tea for a comforting, cozy treat. This method delivers dependable results and adapts well to your kitchen constraints and taste preferences.
Tools & Materials
- Ripe bananas (3 medium)(Mashed smooth; extra banana for moister loaf if desired)
- All-purpose flour(Measure gently to avoid compacting)
- Granulated sugar or brown sugar(Adjust to taste)
- Unsalted butter or neutral oil(Melted if using oil-style batter)
- Eggs(Room temperature preferred)
- Baking soda(Balances acidity for rise)
- Salt(Enhances overall flavor)
- Vanilla extract(Adds aroma)
- 9x5-inch loaf pan(Lined with parchment or greased)
- Parchment paper or spray for pan(Prevents sticking)
- Mixing bowls (2)(One for wet, one for dry)
- Whisk and silicone spatula(For mixing without overworking batter)
- Measuring cups and spoons(Accurate measurements are key)
- Oven thermometer(Helps verify oven accuracy)
- Cooling rack(Stems condensation and keeps crust crisp)
- Optional add-ins (nuts, chocolate chips)(Fold in after wet/dry combine)
Steps
Estimated time: 75-90 minutes
- 1
Preheat and prepare pan
Preheat the oven to 350°F (175°C). Grease the loaf pan or line with parchment to ensure easy release, then set aside so the batter stays ready. This step prevents sticking and helps you monitor bake progress accurately.
Tip: A hot pan can start the baking process sooner—make sure the pan is ready before you mix batter. - 2
Mash bananas
Mash ripe bananas until mostly smooth with a few small lumps for texture. This distributes banana flavor evenly and adds natural sweetness, reducing the need for extra sugar.
Tip: Smash while bananas are warm for easier mashing and richer flavor release. - 3
Whisk dry ingredients
In a separate bowl, whisk together flour, baking soda, and salt until evenly mixed. Sifting is optional but helps prevent dense pockets in the loaf.
Tip: Whisking aerates the mixture and improves crumb structure. - 4
Whisk wet ingredients
Beat melted butter (or oil), sugar, eggs, and vanilla until smooth and glossy. The emulsion helps keep the batter velvety and prevents separation.
Tip: Room-temperature eggs integrate more smoothly; if cold, whisk a bit longer. - 5
Combine wet and dry
Pour wet into dry and mix just until combined. A few streaks of flour are okay; over-mixing leads to a tougher crumb.
Tip: Use a wooden spoon or spatula to minimize overworking. - 6
Fold in add-ins
If using nuts or chocolate chips, fold them in gently now so they distribute evenly without deflating the batter.
Tip: Lightly coat add-ins with a bit of flour to prevent sinking to the bottom. - 7
Pour batter into pan
Scrape batter into the prepared loaf pan and smooth the top with a spatula. A level top promotes uniform baking and easier slicing.
Tip: Tap the pan gently to release any air pockets. - 8
Bake and monitor
Bake for 50-65 minutes, until a toothpick comes out with a few moist crumbs. Rotate halfway if your oven has hot spots to ensure even browning.
Tip: If the loaf browns too quickly, tent with foil for the last 10-15 minutes. - 9
Cool in pan then on rack
Let the loaf cool in the pan for 10-15 minutes, then transfer to a rack to cool completely. This prevents a gummy center and promotes clean slices.
Tip: Patience pays off; slicing too soon leads to crumbly pieces. - 10
Slice and store
Slice once fully cooled and store in an airtight container. For longer storage, refrigerate up to 5 days or freeze portions for later.
Tip: Wrap slices individually before freezing to minimize freezer burn.
People Also Ask
Can I freeze banana bread for later?
Yes. Bake, cool, slice if desired, and freeze tightly wrapped portions. Thaw at room temperature or reheat briefly for a fresh taste.
Absolutely—banana bread freezes well. Slice or freeze whole loaf, then thaw and enjoy later.
What substitutions work for dairy-free or gluten-free diets?
Use dairy-free butter or oil and non-dairy milk for dairy-free versions. For gluten-free, replace all-purpose flour with a trusted gluten-free blend and adjust moisture as needed.
You can make dairy-free and gluten-free versions with careful substitute choices and moisture adjustments.
Why is my banana bread dense or gummy?
Dense results from overmixing or insufficient leavening. Gummy texture can come from underbaking or too much moisture. Mix just until combined and test doneness with a toothpick.
If it’s dense, don’t overmix; if it’s gummy, check doneness and bake a bit longer if needed.
How ripe should the bananas be?
Bananas should be very ripe or speckled for maximum sweetness and moisture. Overripe bananas provide richer flavor and easier mashing.
Very ripe bananas give the best flavor and moisture for the loaf.
Can I add mix-ins like nuts or chocolate chips?
Yes. Fold in nuts or chips after wet and dry ingredients are combined. Coat add-ins lightly with flour to help distribute evenly.
Absolutely—nuts or chocolate chips are great; fold them in gently.
Watch Video
Key Takeaways
- Use ripe bananas for flavor and moisture.
- Mix wet and dry ingredients just until combined.
- Bake until a toothpick shows a few moist crumbs.
- Cool completely before slicing for clean texture.
- Adapt with dairy-free or gluten-free substitutions as needed.